How to Choose Overhead Garage Storage Safely
Last updated:
Disclosure: This article contains affiliate links. If you buy through these links, we may earn a commission at no extra cost to you. We do not claim hands-on testing unless clearly stated.
Most overhead-rack failures aren’t the rack. The rack is a steel rectangle. What gets you is what it hangs from — the joist you didn’t quite hit, the drywall anchor that took weight for a week, the corner that ended up with all the totes on it. This guide walks the decision in order: ceiling, dropdown, capacity, model. Two starter picks at the end cover most residential cases — but the picks don’t save you if the ceiling situation is unusual. The framework does.
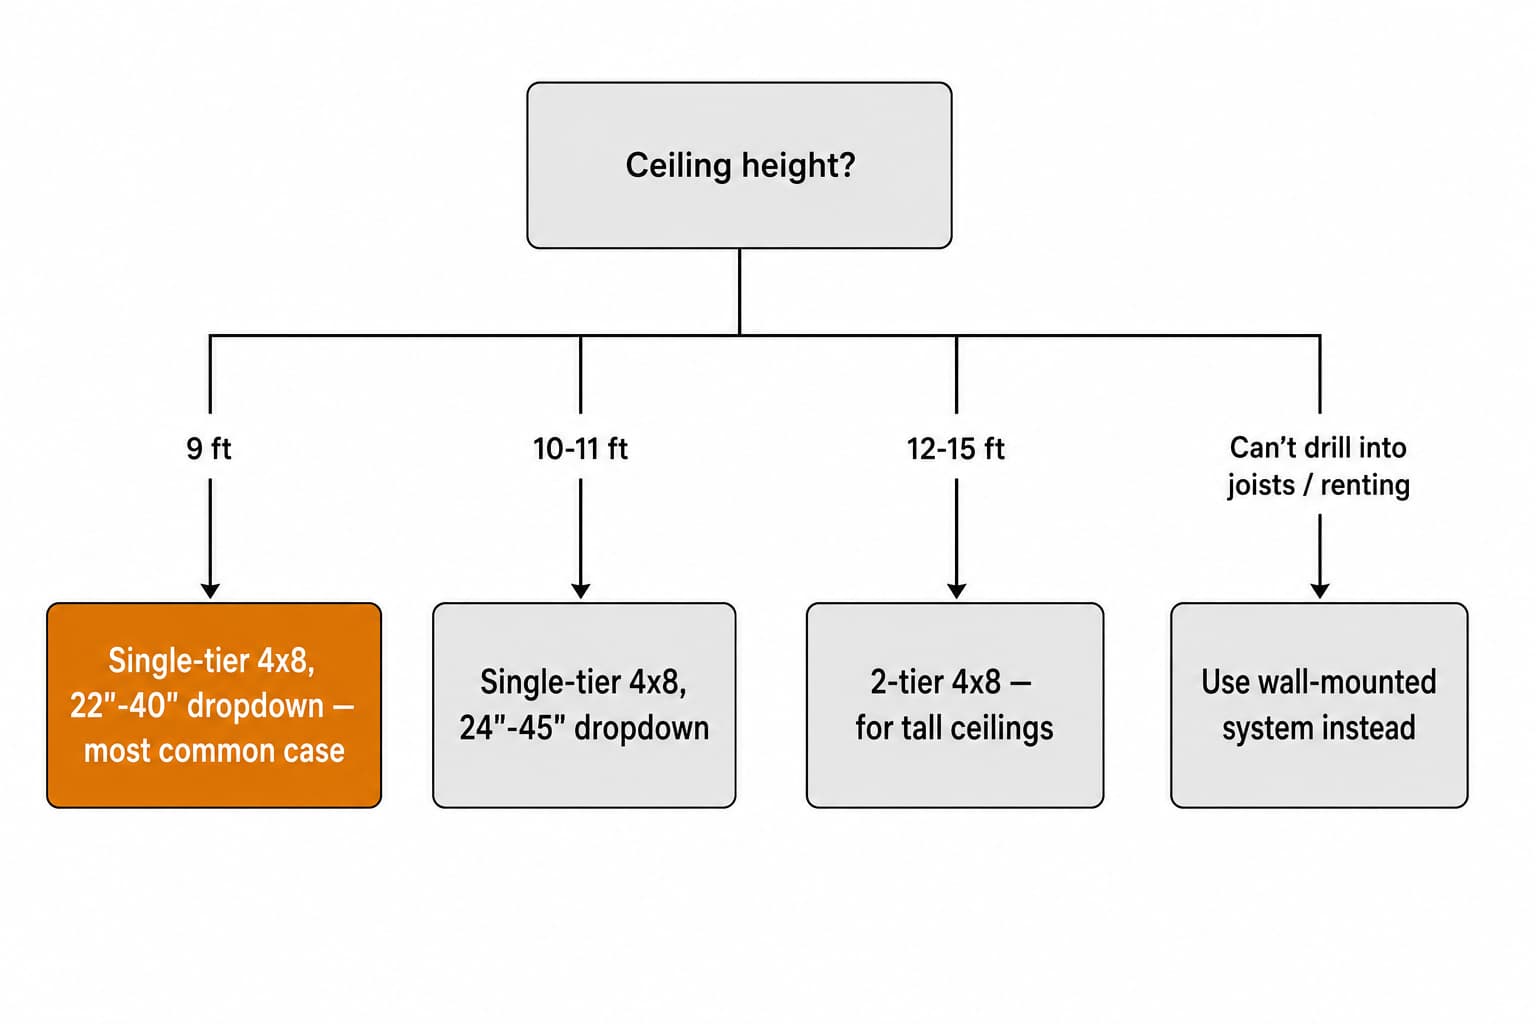
Quick Recommendation by Use Case
| Use case | Best product type | Why |
|---|---|---|
| Standard 9 ft ceiling, 1–2 car garage | Single-tier 4×8 with 22″–40″ dropdown | Fits typical residential joist patterns; leaves ~6 ft clearance under a loaded rack |
| 10–11 ft ceiling, want rack reachable from a step ladder | Single-tier 4×8 with 24″–45″ dropdown | Longer dropdown brings the rack down without losing too much head room |
| 12–15 ft tall ceiling | 2-tier 4×8 | Two stacked tiers double the storage volume — only worth it for tall garages |
| Narrow garage / car-door clearance issue | 3×6 or 4×4 single-tier | Smaller footprint preserves walk-around and door-swing space |
| Renting / unable to drill into joists | Wall system instead | See our roundup of wall-mounted garage storage systems |
This table is a starting point. Read the rest of the guide before you commit — the wrong rack on the right ceiling is a problem; the right rack on the wrong ceiling is a different problem.
Key Factors to Consider
Ceiling joists and what they carry
The rack hangs off your ceiling joists. Everything else is downstream of that. In typical residential construction, joists are dimensional lumber (2×6, 2×8, 2×10) spaced 16″ or 24″ on center, running perpendicular to the garage door. That is the case overhead racks are designed for, and where the included mounting hardware does what it should.
Two cases break that assumption. First, prefab roof trusses: most are engineered for the dead load of ceiling drywall plus modest insulation. Manufacturer-listed rack capacity assumes the structure above can carry the load — engineered trusses sometimes cannot, and the truss manufacturer or a structural engineer is the right source to confirm. Second, finished ceilings with no joist access. If your stud finder cannot find a regular 16″ or 24″ pattern, stop. Drywall with a thin nailer behind it is not a joist, and overhead loads don’t forgive that mistake.
Dropdown range and clearance
Dropdown is the distance from the ceiling to the top of the rack frame. It matters more than total rack height because it sets two things you will live with daily: head room under the loaded rack, and the reach you need to load it.
The math: ceiling height − dropdown − rack frame depth = clearance under the loaded rack. For a 9 ft (108″) ceiling, 24″ dropdown, and a 4″ frame, you end up with 80″ — enough to walk under, not enough for the roof rack on a tall SUV.
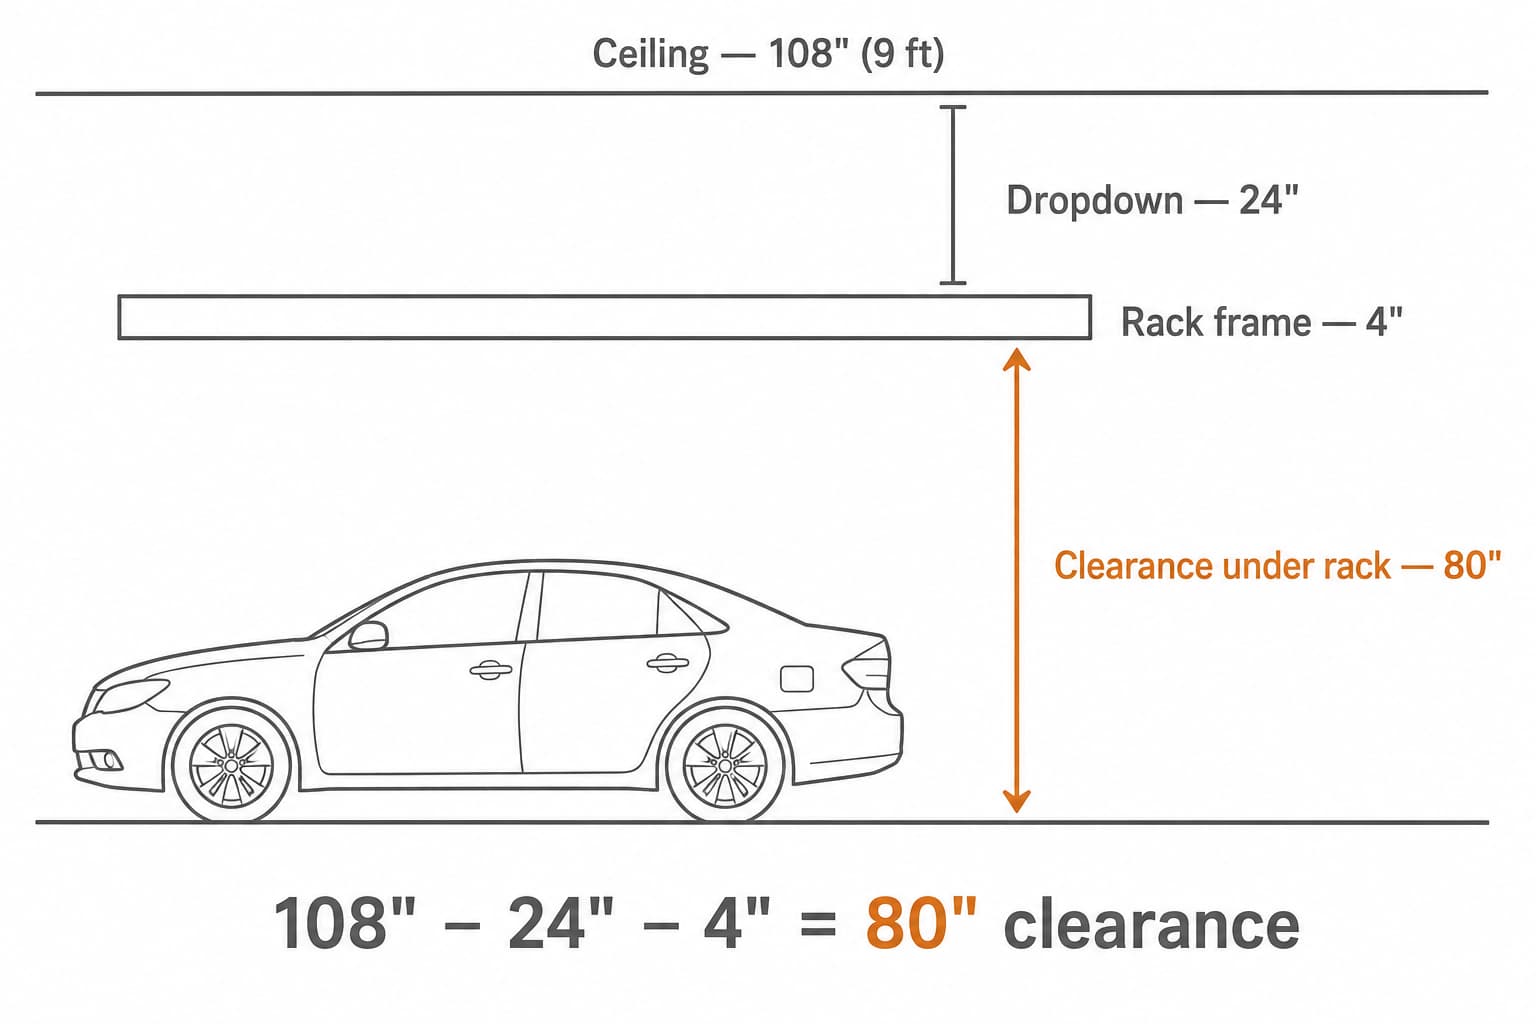
A longer dropdown brings the rack closer to head height — easier to load, less clearance. The right number depends on the tallest thing parked under it. Measure the tallest vehicle (with any roof rack), add a few inches of margin, work from there.
Manufacturer-listed capacity (and what it does NOT mean)
Capacity is the number you see in the product title — typically 600 lb for a single-tier 4×8 rack. That figure is the manufacturer’s listing, and it assumes a few specific things at once: even weight distribution across the rack, correct joist anchoring with the supplied lag bolts, level ceiling, and no point loads concentrated in one corner.
A useful rule of thumb is to plan around 60–70% of the listed capacity for total real-world load. The headroom absorbs off-center loads, drilling-pilot errors, seasonal moisture in the lumber, and the simple fact that you’ll probably stack a heavier tote up there three years from now without thinking about it.
Frame size and footprint
The 4×8 rack is the default for a reason: it fits most residential joist patterns and stores a typical seasonal load. But footprint matters too. A 4×8 above the front of a one-car bay can interfere with the garage-door arm, conflict with car-door swing on a wide vehicle, or eat the walk-around space behind a parked SUV. If your garage is on the narrow end of typical, a 3×6 or 4×4 may be the right answer — less storage, more walking room.
Material and finish
Two construction descriptions show up repeatedly: cold-rolled steel and 14-gauge industrial C-channel. Both are reasonable for residential use. Heavier-gauge C-channel deflects less over the years under the same load. Powder-coat finish protects against rust in humid garages — it doesn’t change capacity.
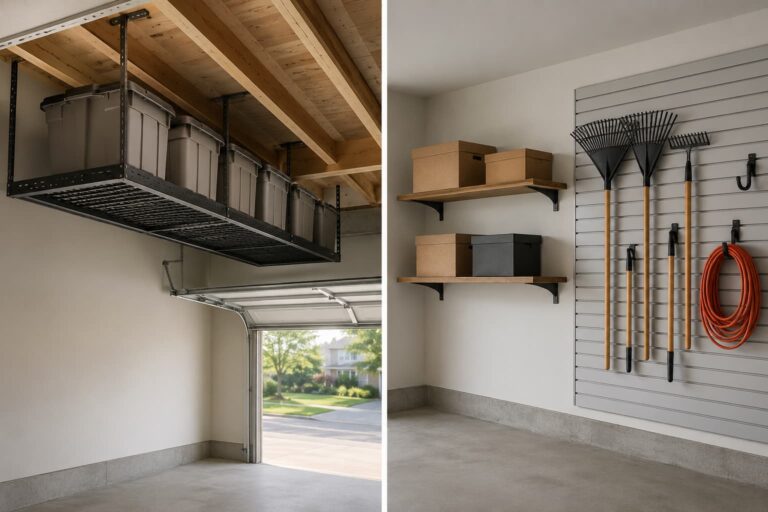
Hooks and accessories
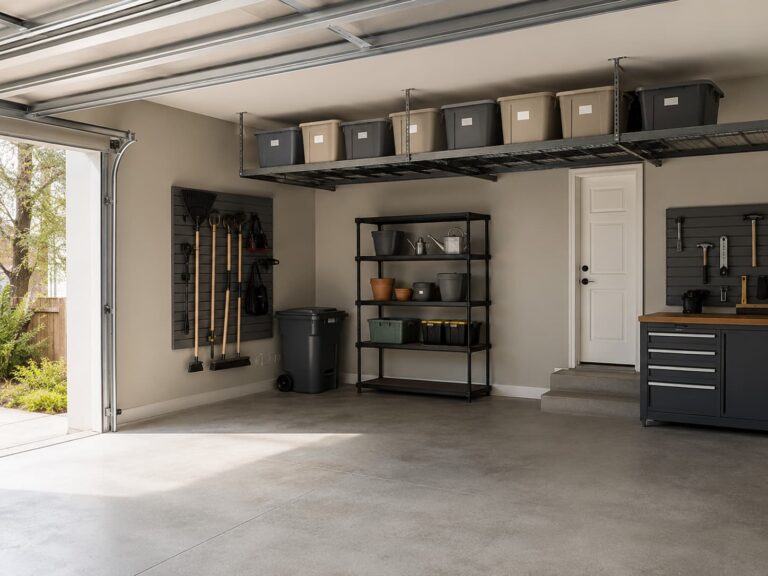
Most racks sell add-on hook kits — utility hooks, bike hooks, ladder hooks — that hang off the bottom of the frame. They share the same total capacity as the rack itself. Treat the listed capacity as a ceiling for everything dangling off it, not a target you keep adding to.
Product Types Explained
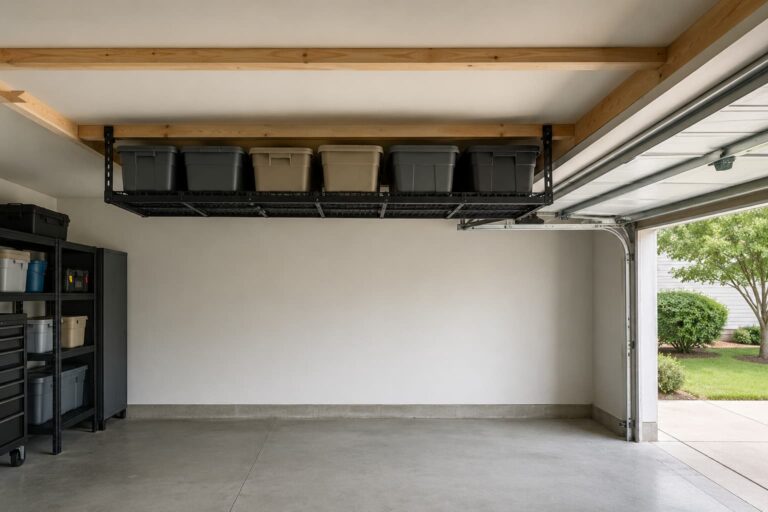
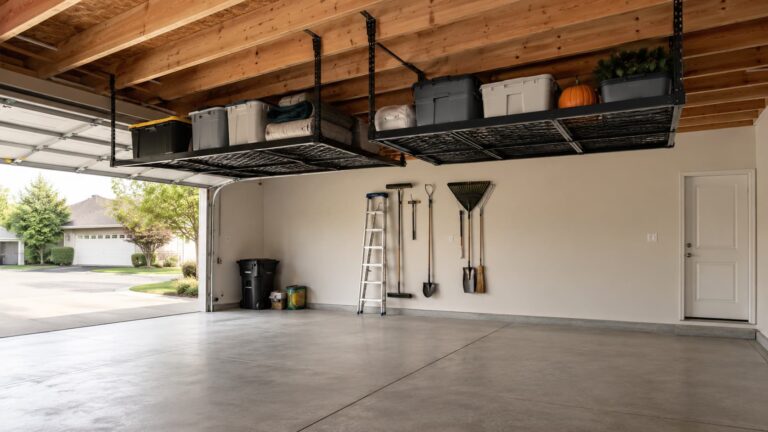
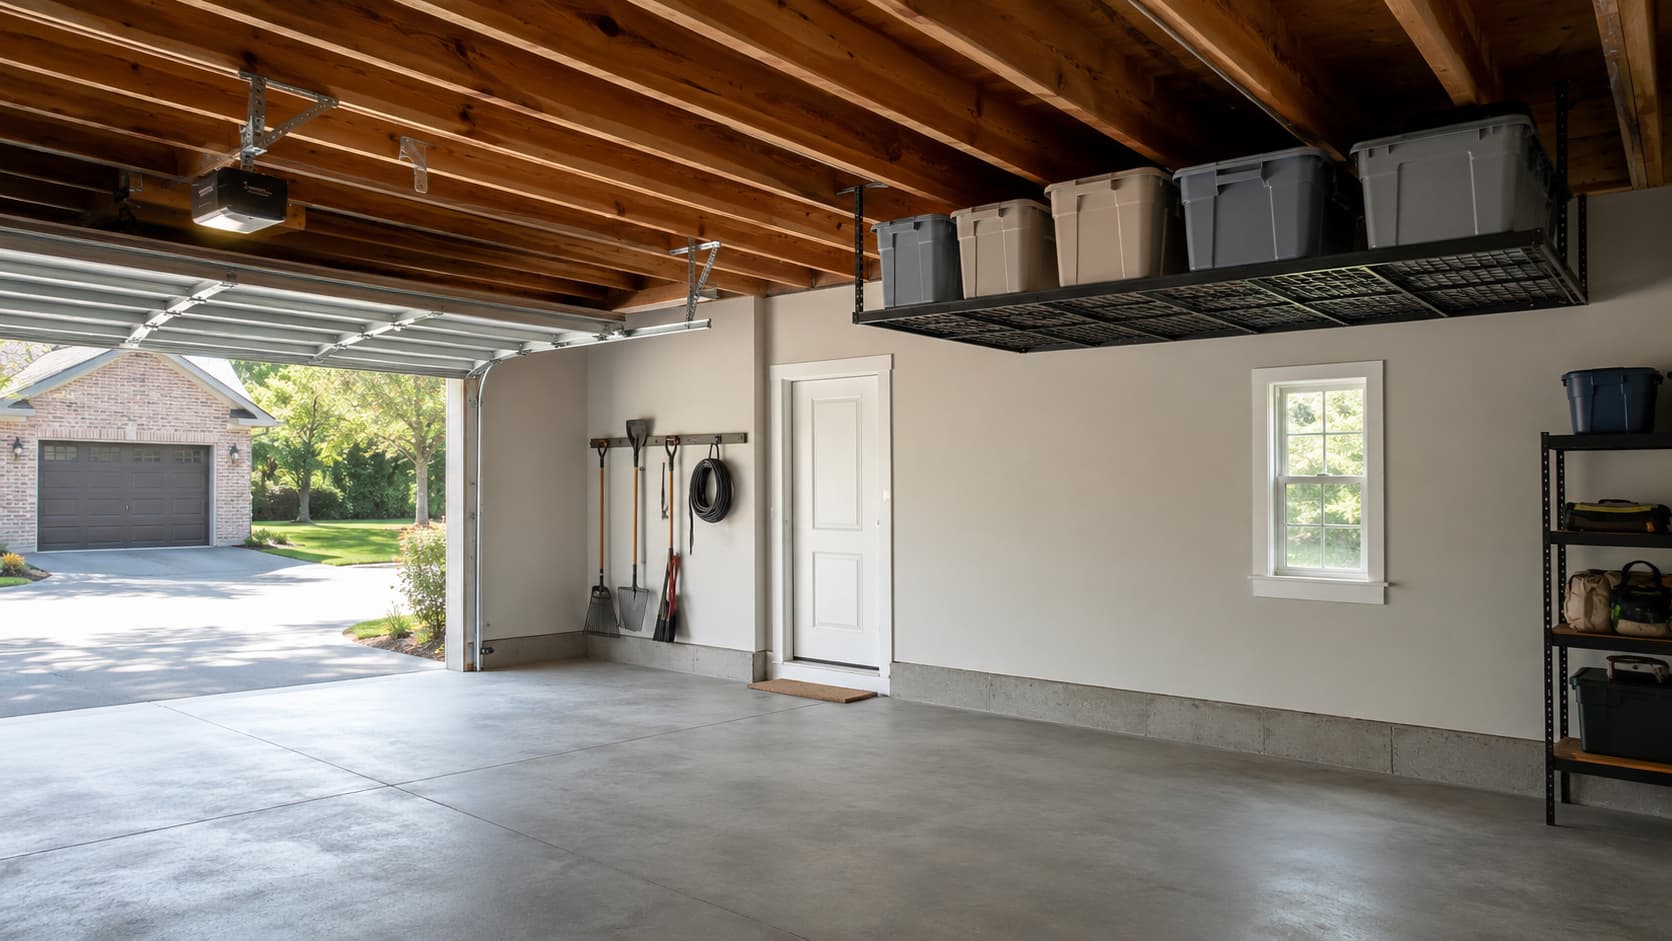
Single-tier 4×8 (the default)
The common case. Listed at 600 lb, dropdown range typically 22″–40″, fits 9 ft residential ceilings with ~6 ft of clearance underneath when fully extended. If you’re picking your first overhead rack and your ceiling is standard, this is almost always right. For specific picks, see our roundup of best overhead racks for low ceilings.
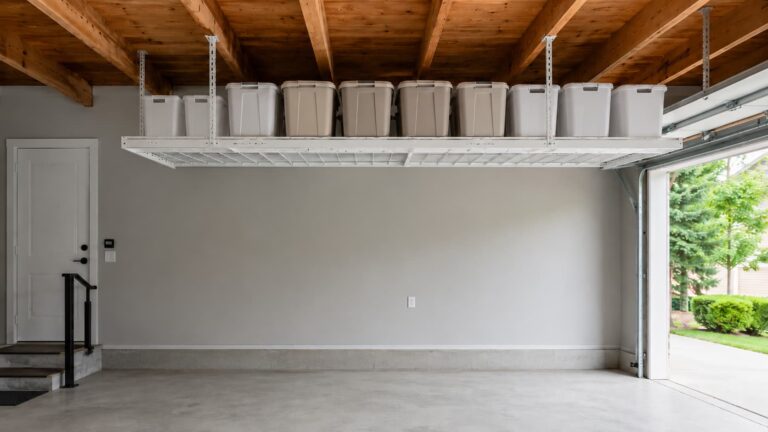
Two-tier 4×8 (for tall ceilings)
Two stacked tiers, listed up to 1000 lb total split across both. Useful when ceiling height is 12 ft and above. The trade-off: the upper tier is hard to reach without a 6 ft step ladder, so it ends up storing things you take down once a year. If you need daily access, the upper tier is wasted volume. See best overhead racks for tall garages.
Smaller 3×6 / 4×4 racks
For narrow garages or where the 4×8 footprint conflicts with car doors or the garage-door track. Listed capacity is lower in absolute terms but per square foot is similar. A footprint decision, not a value-engineering one.
Modular rail systems with overhead extensions
A different category — wall-mounted slat-rail systems with overhead-rack accessories sharing the same rail. Different mounting story (wall studs, not ceiling joists). See modular overhead storage systems.
When to Choose Each Type
Walk through the decision in order: ceiling height, joist type, frequency of use, footprint.
Edge cases worth flagging:
- Detached garage with cathedral ceiling and exposed rafters. Different mounting story. Rafters carry roof load; surface-mounting a rack to an angled rafter is not what either is designed for. Hire a contractor.
- Finished ceiling drywall with no clear joist access. Use a stud finder, mark the joists, drill pilot holes. If the pattern is irregular — studs at 13″ and 19″ instead of a clean 16″ — stop. That usually means non-standard framing (metal, retrofit, HVAC strapping), and it’s not safe to assume.
- Insulated ceiling with blown-in insulation. Lag bolts go into joists, not insulation. The rack works the same way.
Measurement Checklist
Before buying, measure (and write down):
- Ceiling height (floor to drywall surface)
- Joist direction (perpendicular to garage door is typical at the front of the bay)
- Joist spacing (16″ or 24″ on center — verify with a stud finder along multiple ceiling lines, not just one)
- Joist depth, if accessible (2×6, 2×8, or larger — knock test or check from an attic if you can)
- Garage-door opener arm path (the rack cannot sit in this path)
- Car-door swing clearance with both front doors fully open on every car you park there
- Walking-path clearance under the rack
- Garage-door track clearance — most tracks rise into the ceiling space at the rear of the bay; the rack cannot interfere
For the loads:
- Tote and box dimensions, with lids on
- The single heaviest item you plan to put up there
The lid measurement matters more than people expect. A 27-gallon tote with the lid clipped on is taller than the same tote with the lid off, and a rack that fits the bare totes leaves you wedging lids on at an angle.
Mistakes to Avoid
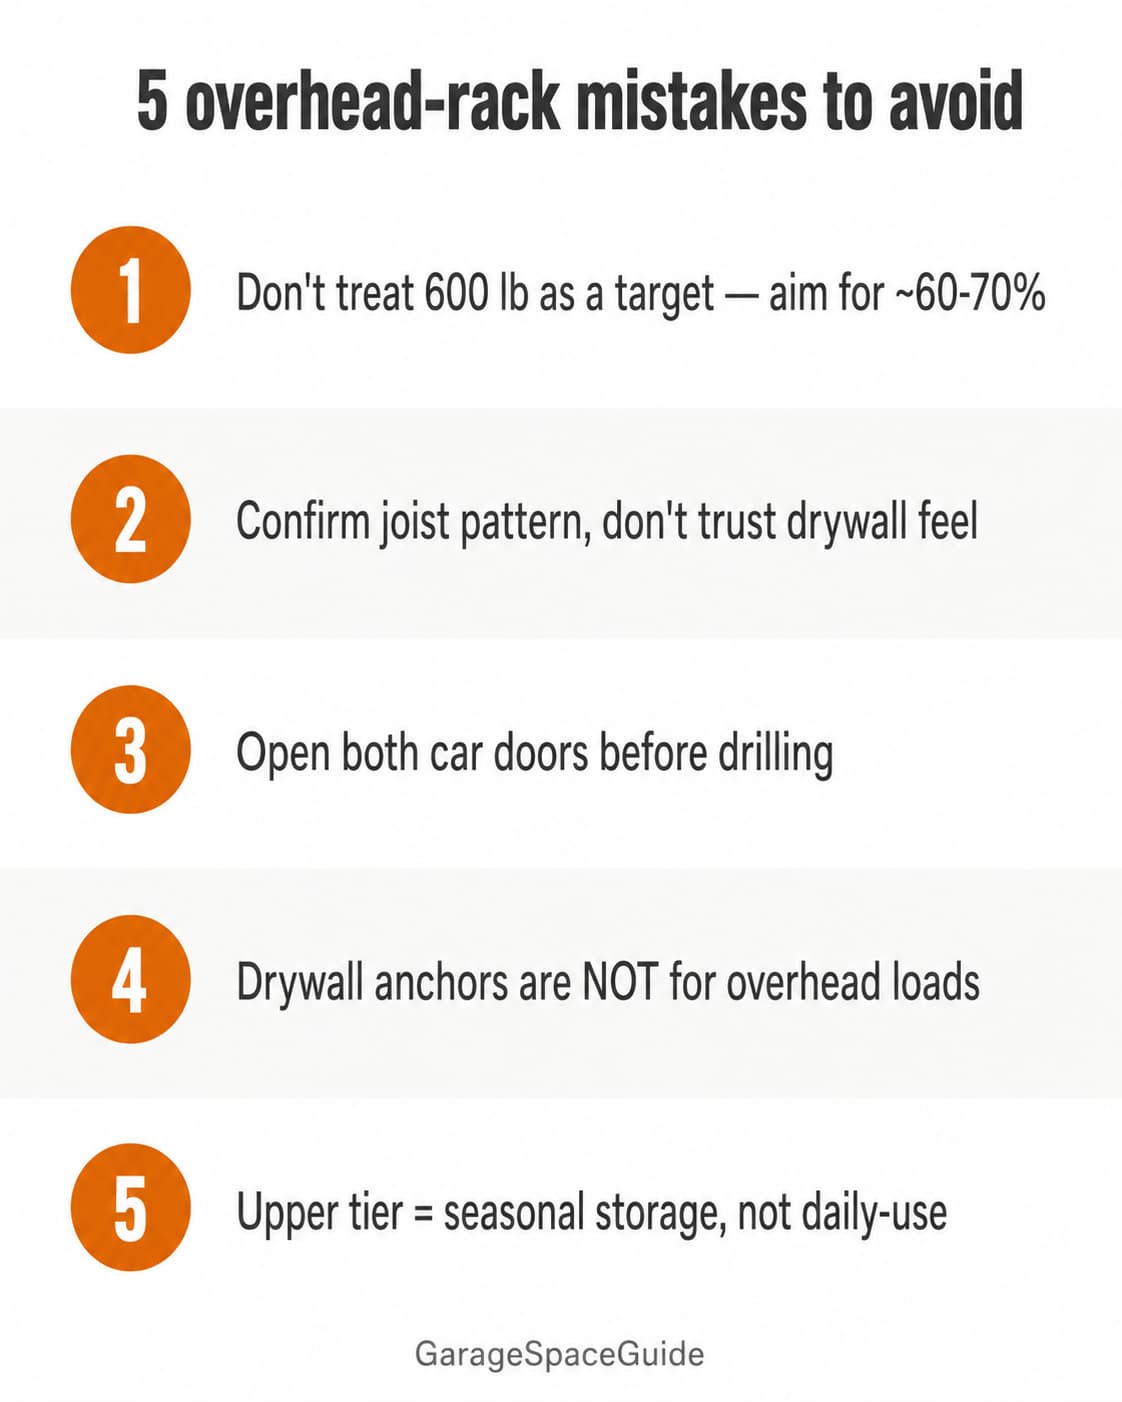
Treating manufacturer-listed capacity as a target
The 600 lb figure is the upper bound assuming everything goes right. Real-world target should be 60–70% of that. A 4×8 at 400 lb of evenly distributed totes works; the same rack at 600 lb with all the weight in one corner doesn’t.
Skipping the joist check
Drywall with a thin nailer behind it reads almost the same as a joist on a stud finder. Stud finders also pick up drywall screws and HVAC straps. Confirm the pattern is regular 16″ or 24″ on center along multiple lines before ordering lag bolts.
Ignoring car-door swing
A 4×8 at a 24″ dropdown is fine until you open the front passenger door of an SUV with the rack centered over the driving lane. Park each car under the proposed rack location and open both front doors fully before you commit.
Mounting a 4×8 to drywall anchors
This is the failure mode that ends up in the news. Drywall anchors are not for 600 lb of overhead load. They aren’t for 200 lb either. If you can’t find the joists, the answer is not “use anchors” — the answer is “find the joists” or “don’t install this rack.”
Loading the upper tier of a 2-tier rack with daily-use items
Two-tier racks earn their volume because most readers store seasonal stuff that comes down once or twice a year. If you need daily access, the upper tier is wasted. Plan the load before buying — what goes on top, what goes below, and how often each item comes down.
For the broader topic of organizing what goes up there once it is installed, see how to organize your garage ceiling.
Safety / Installation Notes
Most overhead racks are installable by a homeowner with a drill, a stud finder, a step ladder, and a second pair of hands. Where to stop and hire help: cathedral ceilings, finished spaces with no joist access, prefab truss bottom-chord installs, or any time you find ceiling structure you don’t recognize.
Lag bolt rule of thumb: pilot-drill into the center of the joist along its length. If the lag bolt does not bite into solid wood for the full thread length, stop and find the joist. A bolt that spins instead of biting is a bolt that will pull out under load — not immediately, but later.
Featured Picks
Two picks, not a roundup. For more options across capacities and brands, follow the link at the end.
For most readers, start here: FLEXIMOUNTS GR48 4×8 Overhead Garage Storage Rack
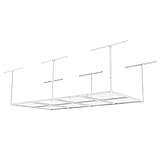
The standard 4×8 single-tier with a 22.5″–40″ dropdown range. The manufacturer lists a 600 lb capacity, cold-rolled steel construction, and a powder-coat white finish. This is the rack the typical 9 ft residential ceiling was made to receive.
For taller ceilings: MonsterRax 4×8 Overhead Garage Storage Rack (White, 24″–45″)
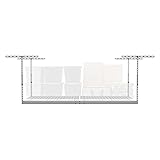
A single-tier 4×8 with a 24″–45″ dropdown — useful for 10–11 ft ceilings where you want the rack low enough to load from a step ladder. The manufacturer lists a 500 lb capacity (lower than the standard 600 lb baseline, in exchange for the longer dropdown). MonsterRax sells the 4×8 in multiple colors and dropdown ranges; confirm the white 24″–45″ SKU before checkout.
For the full list of overhead-rack picks across capacities and brands, see our roundup of best overhead racks for low ceilings.
FAQ
How much weight can an overhead garage rack actually hold?
Manufacturer-listed total capacity for a 4×8 single-tier rack is typically 500–600 lb; two-tier racks list up to 1000 lb total split across tiers. That figure assumes correct joist anchoring and even weight distribution. Real-world planning target should be 60–70% of listed. For engineered roof trusses, the truss manufacturer is the right source.
Will an overhead rack damage my ceiling joists?
Properly mounted into solid joists with the lag bolts that ship with the rack, no. The load is in shear at the joist — bolts pull straight down — and joists handle vertical loads of that order without issue. Mounted into drywall with anchors, yes, the rack will damage the drywall and likely come down with it.
Do I need a special stud finder for ceiling joists?
Any stud finder that detects studs detects joists. The challenge is confirming the pattern, not the device. Mark several joists across multiple ceiling lines and verify the spacing is consistent (16″ or 24″ on center). If the pattern is irregular, that’s information — investigate before drilling.
Can I install an overhead rack myself?
Most homeowners with a drill, stud finder, step ladder, and a second pair of hands can. The work is finding joists, drilling pilots, anchoring brackets, and lifting the frame. Two people make the lift much easier than one. If you’re not comfortable working overhead from a ladder, hiring help is reasonable.
What’s the difference between a 600 lb and a 1000 lb rack?
Usually the 1000 lb rack is a two-tier design with capacity split across both tiers. Single-tier 1000 lb racks exist but require correspondingly heavier joist anchoring — bolt pattern, bracket count, and joist depth all step up. Read the install manual before assuming.
Will an overhead rack interfere with my garage door?
If the rack hangs lower than the garage-door track or sits in the path of the opener arm, yes. Measure both before mounting. The track rises into the ceiling space toward the rear of the bay; the opener arm sweeps from the motor unit forward. Mount the rack in front of the track or behind the opener arm — never across either path.
Sources Reviewed
For this buying guide, we reviewed manufacturer documentation from FLEXIMOUNTS and MonsterRax, retailer product pages on Amazon, installation manuals where available, and recurring patterns in public buyer discussions about overhead rack installs in residential garages. We focused on details that change the safety of the install: ceiling structure assumptions, lag-bolt anchoring, joist spacing, dropdown clearance, and capacity framing.
Related Guides
- Best overhead garage storage racks for low ceilings
- Best overhead garage storage racks for tall garages
- Best modular overhead garage storage systems
- How to organize your garage ceiling