How to Organize a Garage in One Weekend (Hour-by-Hour Plan)
Last updated:
Disclosure: This article contains affiliate links. If you buy through these links, we may earn a commission at no extra cost to you. We do not claim hands-on testing unless clearly stated.
Two days is enough to clear the floor, sort everything into KEEP / DONATE / DISCARD, fill labeled bins, and stage the donate pile at the curb. It is not enough to install slatwall, build new shelving, or convert the garage into a workshop. Most weekend plans fail because they promise the second list inside the first.
This guide gives you an hour-by-hour Saturday + Sunday schedule, three pre-flight items to buy by Friday, and honest scope for what one weekend accomplishes.
What “Organize in One Weekend” Actually Means (Scope)
By Sunday at 6 PM, two focused days achieves: floor cleared and swept, everything triaged, KEEP items in category-labeled bins, donate pile staged for Monday, and a short buy-list for next time.
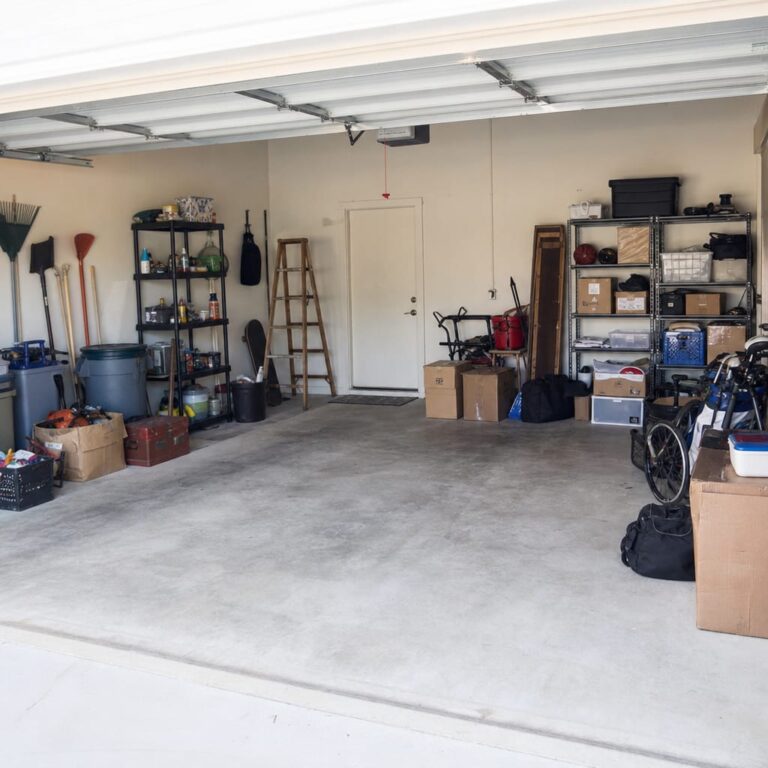
Two days does NOT achieve: installing a wall system, mounting overhead racks, or building shelving from scratch (plan an hour or more per unit, often longer for larger or flat-pack kits). If your garage needs new shelving first, plan that build for the prior weekend. If you need to plan zones before touching anything, work through garage zone planning first. For hoarder-level clutter, see the cluttered-starter guide for the multi-weekend method.
What You Need Before Saturday Morning
Three things on the workbench by Friday evening. Buying Saturday morning costs an hour.
- Heavy-duty contractor trash bags (42 gallon, 25+ count) — the one item where over-buying is fine. Kitchen bags split halfway out to the curb.
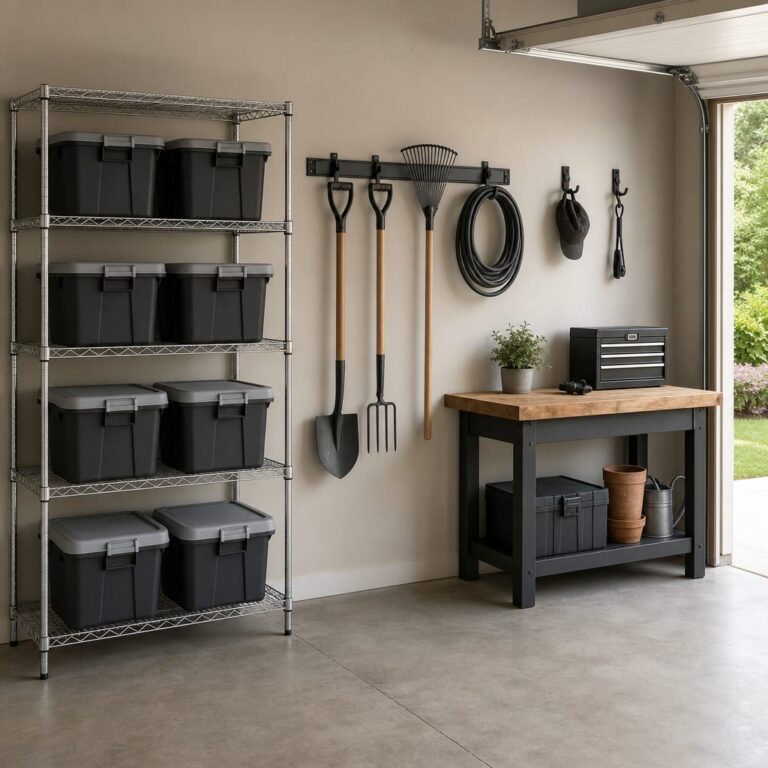
- One 6-pack of weathertight storage bins (19 quart or larger) — enough to start. You’ll likely want a second 6-pack by Sunday noon; don’t pre-buy more.
- A label maker, OR a permanent marker plus blank labels — depends on bin count. Below twelve bins, the marker is fine. Above twelve, a device pays off.
Plus gloves, a broom, dust mask, sturdy shoes — assumed.
The pre-flight list assumes you have existing shelving or open floor space to set bins on. If the garage has zero shelving, the weekend plan becomes “organize what you have onto a tarp, then plan a shelving build for next weekend.”
Saturday — Declutter Day (Hour-by-Hour)
Saturday is one job: triage. Every item gets a 5-second decision into one of three buckets.
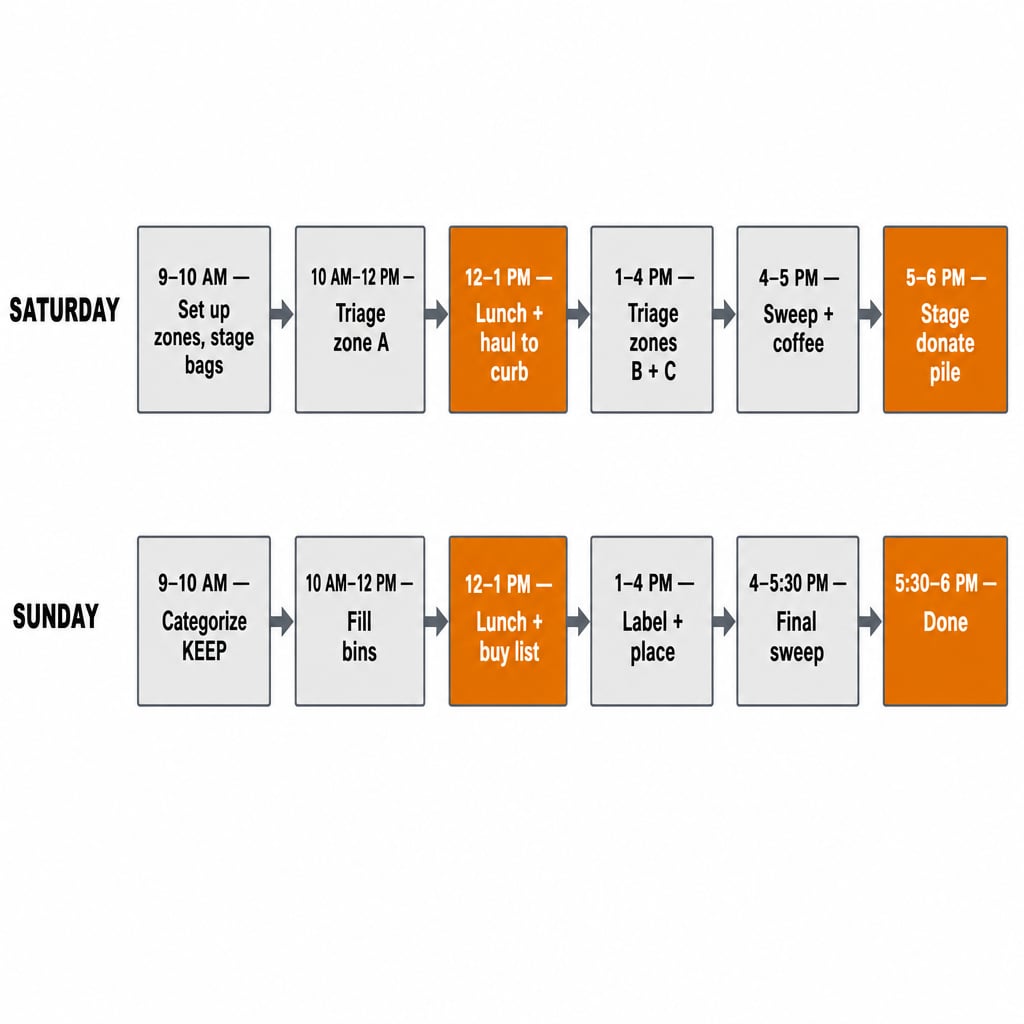
9:00–10:00 AM — Set up zones and stage your bags
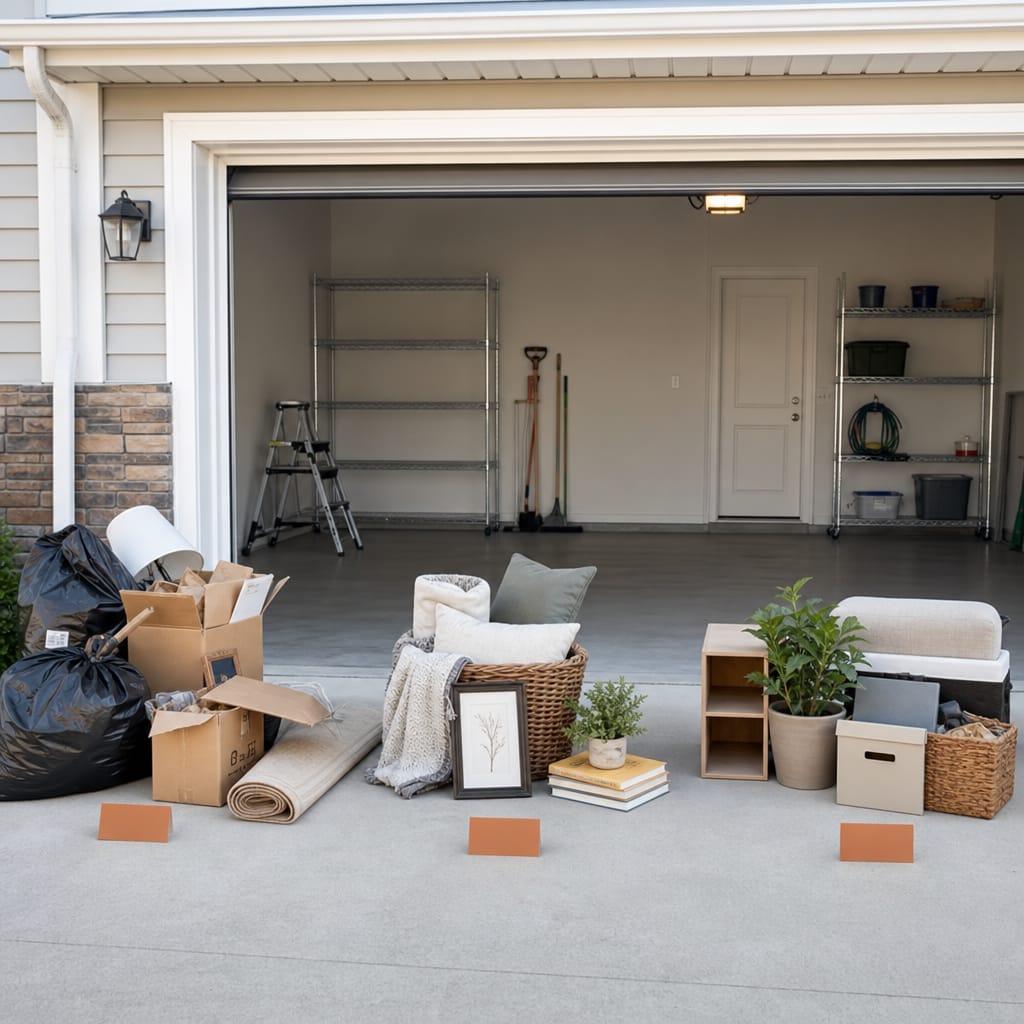
Empty the floor to the driveway. All of it. Stage three labeled stations: KEEP (a tarp), DONATE (one bag, marked), DISCARD (multiple bags). Deliverable: floor empty, three stations visible.
10:00 AM–12:00 PM — Triage zone A
Take items one at a time. Decide in 5 seconds: KEEP, DONATE, or DISCARD. Use the 12-month rule: if you haven’t touched it in twelve months and it isn’t seasonal, it goes. Don’t categorize KEEP items yet — that’s tomorrow.
12:00–1:00 PM — Lunch and a haul to the curb
Tie off discard bags. Haul them to the curb for Monday pickup or to your trunk for a dump run. Don’t skip the haul — visible progress at noon is what gets you back in at 1 PM.
1:00–4:00 PM — Triage zones B and C
Same process for the other two walls. If you find something dangerous (old paint, propane, leaking batteries), pull it out and handle it separately. Deliverable: all KEEP items in one staging area; donate and discard bags out.
4:00–5:00 PM — Sweep and a coffee
Floor is empty — sweep it. Easiest 30 minutes of the weekend, biggest payoff for the “did I accomplish anything?” feeling.
5:00–6:00 PM — Stage the donate pile
Move the donate bags to where they’ll be picked up or driven. Don’t store them back in the garage — that’s how a year-long donate pile happens.
Sunday — Sort and Label Day (Hour-by-Hour)
Sunday flips from triage to structure: every KEEP item finds a category, a bin, a label, and a home.
9:00–10:00 AM — Categorize the KEEP pile
Pull every KEEP item back into the open garage. Sort into 5–8 categories: power tools, hand tools, lawn and garden, sports and recreation, holiday decor, automotive, sentimental, miscellaneous. Count bins per category — this tells you whether your starter 6-pack is enough.
10:00 AM–12:00 PM — Fill the bins
Pack each bin by category. Don’t mix — mixing kills the system within two weeks because you stop knowing where things are. Heavy items in the bottoms of stacks; light on top. If you run out of bins, pile overflow on a tarp and add it to the buy-list.
12:00–1:00 PM — Lunch and write down what’s missing
The “buy next weekend” list. Common items: more bins, a wall system, hooks for bikes or ladders, a workbench. Don’t buy any of this today.
1:00–4:00 PM — Label and place
Label every bin with two labels: end label on the short side facing out when shelved, plus a top label visible when stacked. Same words on both. Place each bin on existing shelving or in its category zone.
A measurement caveat: if your shelves are 18 inches deep and you bought 24-inch totes, the overhang becomes a problem by Tuesday — the front edge sits past the shelf lip and stacking becomes unstable. IRIS USA lists the WeatherPro 19 Qt bin we recommend below (the product page for this exact line, not the Remington Weathertight line) at 17.5 × 11.75 inches, which fits standard wire shelving cleanly. For the full depth-vs-tote math, see our storage bins for shelves guide.
4:00–6:00 PM — Final sweep and done
Sweep again. Walk the garage. Take before-and-after photos — they’re what make you maintain this for twelve months. Donate pile leaves Monday; the buy-list is ready for next weekend if you want to keep going.
What to Buy by 9 AM Saturday
Three products, each tied to a specific moment in the schedule.
Heavy-duty contractor trash bags
For Saturday declutter and the curb haul, you want bags that won’t split under paint cans and broken tools. The Hefty Load & Carry 42-gallon contractor bag is the canonical pick — manufacturer-listed 3 mil thickness, with integrated carry flaps, sold in a 26-count pack. A single pack is a reasonable starting point — actual use varies with how much you’re discarding, and heavier cleanouts may need a second. Don’t go below 42 gallons — smaller bags fill before you finish a single zone.

Weathertight storage bins (starter 6-pack)
Sunday’s organization needs containers. The IRIS USA WeatherPro 19-quart 6-pack is a sensible starter — 19 quart is large enough to hold a labeled category without committing to oversize totes before you know your count. The gasket lid keeps garage dust and humidity off contents, and the clear walls let you verify contents at a glance.
Expect to need a dozen or more bins once everything is bagged out — the exact count depends on how much you keep and how finely you split it into categories. You’ll probably want a second 6-pack by Sunday noon — buy one Friday, buy a second only when you know you need it.

Label maker (or skip below 12 bins)
For the Sunday labeling block, the Brother P-Touch PT-H110 is the canonical entry-level handheld. Brother’s TZe laminated tape is manufacturer-listed as water- and fade-resistant, which matters in an unconditioned garage. Below twelve bins, the device is overkill — a permanent marker on blank masking-tape labels works fine. Above twelve, legibility matters and printed labels pay off when scanning a wall of bins.
For the device-versus-marker comparison, see our bin labeling guide.

Common Weekend-Plan Mistakes
Mistake 1: Installing shelving on Saturday
Shelving install easily runs a couple of hours or more per unit, depending on the kit and whether you’re anchoring to wall studs. Do it Saturday morning and half the declutter day is gone before you’ve touched a single item. If you need new shelving, that’s next weekend.
Mistake 2: Shopping for bins mid-weekend
The pre-flight 6-pack is enough to start. A second on Sunday morning is fine. Three or four hardware-store trips kills momentum — you spend more time driving than triaging.
Mistake 3: Going for “perfect” instead of “done”
Sunday at 5 PM, the garage is 80% organized. The last 20% is decisions you can’t make in one weekend: the mystery cables, the outgrown bike, the broken vacuum. A finished 80% Sunday night is a system you’ll maintain; a frustrated 95% at midnight is one you’ll abandon by Wednesday.
Mistake 4: Not labeling
By Tuesday next week, you won’t remember which bin holds the cables. Skip labeling and the system unwinds within two weeks. Permanent marker on masking tape works — just label every bin.
When This Plan Doesn’t Fit
The weekend plan works for a mid-cluttered two-car garage with some existing shelving. It does not fit:
- Hoarder-level clutter — multi-weekend project. See the cluttered-starter guide for the four-stage method.
- One-car garages where the car must stay inside Sunday night — see the small-garage guide.
- Budget-constrained projects — see the budget guide for free and near-free alternatives.
- Readers who want to plan zones first — see the zone planning guide.
- Readers wondering what to avoid generally — see the common garage organization mistakes guide.
How many totes actually fit on a garage shelf
Tote makers publish dimensions and shelving makers publish dimensions, but nobody puts the two together — so people buy shelving, then discover their totes overhang it. This table takes the published external size of totes from the brands people actually buy for garage storage — Sterilite, Rubbermaid Roughneck, and IRIS USA — and works out how many fit per shelf on the two garage shelving depths you can actually buy, 18 in and 24 in.
| Tote | Published dimensions (source order) | Footprint | Height | Fits an 18 in deep shelf? | Per 48 × 18 in shelf | Per 48 × 24 in shelf | Specification source | Source checked |
|---|---|---|---|---|---|---|---|---|
| IRIS USA Remington Weathertight Storage Tote, 19 Qt. | 17.50" L x 11.75" W x 7.88" H | 17.5 in × 11.75 in | 7.88 in | Yes | 4 | 4 | IRIS USA Remington Weathertight Heavy Duty Storage Tote, 19 Qt. (6-pack) | 2026-09-14 |
| IRIS USA WeatherPro Storage Container, 30 Qt. | 19.70" L x 15.75" W x 7.75" H | 19.7 in × 15.75 in | 7.75 in | Yes | 2 | 3 | IRIS USA WeatherPro Storage Container, 30 Qt. — Gasket Box | 2026-09-14 |
| IRIS USA WeatherPro Storage Container, 74 Qt. | 23.6" L x 17.8" W x 14.5" H | 23.6 in × 17.8 in | 14.5 in | Yes | 2 | 2 | IRIS USA WeatherPro Storage Container, 74 Qt. — Gasket Box (3-pack) | 2026-09-14 |
| IRIS USA WeatherPro Storage Box, 82 Qt. | 30.00" L x 16.00" W x 15.40" H | 30 in × 16 in | 15.4 in | Yes | 1 | 1 | IRIS USA Heavy-Duty Storage Box WeatherPro, 82 Qt. — Gasket Box | 2026-09-14 |
How these numbers were produced: External dimensions are quoted on the date shown per row. Sterilite rows are quoted from Sterilite’s own product pages (L x W x H order). Rubbermaid Roughneck rows are quoted from Ace Hardware’s retailer listing, which prints the manufacturer’s SKU-linked dimensions in H x W x D order on each product page. IRIS USA rows are quoted from IRIS USA’s own product pages (L x W x H order). All figures are the external/overall assembled dimensions with the lid on. The counts are computed, not estimated: totes are placed in a single layer, all in the same orientation, with no overhang and no gap; both orientations (the tote’s long side along the shelf’s 48 in run, or along its depth) are tried and the better one is kept. Shelf width is 48 in in both cases — the two depths are real Husky shelving footprints: 48 in. W x 18 in. D (Husky 86 in. H x 48 in. W x 18 in. D 6-Shelf Steel Shelving Unit, model MR481886W6B, https://www.homedepot.com/p/Husky-86-in-H-x-48-in-W-x-18-in-D-Black-Steel-6-Shelves-Shelving-Unit-MR481886W6B/306062319) and 48 in. W x 24 in. D (Husky 5-Tier Steel Shelving Unit, 48 in. W x 78 in. H x 24 in. D, model 426007, https://www.homedepot.com/p/Husky-5-Tier-Riveted-Steel-Garage-Storage-Shelving-Unit-in-Silver-48-in-W-x-78-in-H-x-24-in-D-426007/303241694); neither product page states a clear opening between posts. 48×18 and 48×24 are unobstructed reference surfaces, not guaranteed usable dimensions of every nominal 48×18 or 48×24 rack — posts and lips can reduce the clear opening (one retailer answer for a Husky 48×24 gives about 45.5 × 21.5 in between posts). Round the result down again if your shelving has corner posts that intrude, and leave room to get a hand in.
- A tote that fits the shelf footprint still needs vertical room: check the tote height against your shelf spacing, and leave clearance to lift it in and out rather than sliding it flush.
- Counts assume a flat, full-depth shelf. Wire shelving with a lip, or posts at the corners, will cost you the last tote in a row.
- Lids overhang the base on most totes; the figures here are the manufacturer’s overall assembled dimensions, which already include the lid.
- Capacity in quarts or gallons tells you nothing about whether it fits — and "27" doesn’t mean the same thing twice. The Sterilite 27 Qt. ClearView Latch Box (17 in x 11-1/8 in) fits an 18 in shelf; the Sterilite 108 Qt. Stacker Box (25-3/4 in x 18-3/8 in) — 27-gallon-equivalent by volume (108 qt = 27 gal), though Sterilite sells it as "108 Qt.," not "27 Gal." — does not.
- Manufacturers and retailers don’t all publish dimensions in the same order. Ace Hardware lists Rubbermaid Roughneck as Height x Width x Depth, where Sterilite and IRIS USA publish Length x Width x Height. This table normalises every row to footprint (the two horizontal dimensions) and height so they compare directly regardless of the order they were published in.
- Rubbermaid Roughneck’s 10 gal and 18 gal totes share the same footprint (23⅞ in x 15⅞ in) — only the height changes, so stepping up in capacity in that range costs no extra shelf space, only vertical clearance.
- A blank cell means the manufacturer does not publish that figure — we do not fill gaps with numbers we could not source.
These are the entries that matter for this guide. The full table, with every row and its source, is in our How many totes actually fit on a garage shelf.
FAQ
Can I really finish in one weekend?
For a mid-cluttered two-car garage with existing shelving, yes — if you accept the scope. Floor clear, bins labeled, donate staged. Not slatwall installed.
What if I run out of bins on Sunday?
Common. Pack the overflow on a tarp and add “more bins” to next weekend’s list. Don’t drive to the hardware store mid-Sunday — you’ll lose the labeling momentum.
Do I really need a label maker?
For fewer than about twelve bins, no — permanent marker on blank labels works fine. Above twelve, the device pays off. See the bin labeling guide for the threshold reasoning.
What about the cars during the weekend?
Driveway on Saturday — the floor needs to be fully clear. Sunday afternoon, once bins are in place, the cars come back in. For a one-car garage where the car must stay inside, see the small-garage guide.
Should I rent a dumpster?
For most weekend cleanouts, no — curbside trash plus a donation run handles it.
What’s the single biggest thing that derails this plan?
Trying to install something. Shelving, wall hooks, overhead racks, pegboard — anything requiring a drill. Drilling is next weekend. This weekend is sort-and-label only.
Sources Reviewed
Manufacturer product pages (Hefty Load & Carry contractor bags, IRIS USA WeatherPro storage bin line at irisusainc.com, Brother P-Touch PT-H110), public garage organization discussions, and GSG editorial. We do not claim hands-on testing unless clearly stated.
Related Guides
- How to Organize a Small Garage Step by Step — for one-car / small-garage geometry where parking changes the schedule
- How to Plan Garage Organization Zones — for readers who need to plan zones before starting
- How to Organize a Garage on a Budget — budget-constrained alternatives to the three pre-flight products
- Common Garage Organization Mistakes — mistakes catalog beyond the weekend-plan-specific ones
- How to Start Organizing a Cluttered Garage — for hoarder-level clutter; the multi-weekend method instead of the one-weekend method