How to Organize a Small Garage Step by Step
Disclosure: This article contains affiliate links. If you buy through these links, we may earn a commission at no extra cost to you. We do not claim hands-on testing unless clearly stated.
A small garage stops working the moment storage becomes improvised — bikes leaning on the car, a ladder across the floor, mismatched bins stacked four high in a corner. How to organize a small garage isn’t a Pinterest moodboard problem; it’s a sequencing problem. This guide walks the eight steps that turn a chaotic small garage into a working one and flags what to buy at each step — because most ‘go organize your garage’ articles send readers off to buy bins they haven’t measured for.
Quick Answer: What You Actually Need to Start
Organizing a small garage is an eight-step sequence: empty, sort, measure, contain, shelve, go vertical, use the ceiling, zone — followed by labeling. A long weekend if you’re decisive, two or three weekends if you’re not.
Before you buy anything, gather a 25-foot tape measure, a Sharpie and masking tape (temporary labels), trash bags, and one or two donation boxes. Notice what’s not on that list: bins, shelves, hooks, slatwall. Those come later — after you’ve measured.
The Eight Steps
Step 1 — Empty the garage (or one wall at a time)
Pull everything out so you can see the floor and walls. Full empty isn’t always realistic in a small garage; one wall at a time works. You need to be able to walk up to a wall with a tape measure without stubbing your toe on a kayak.
Step 2 — Sort into four piles: keep, donate, trash, decide later
Drag everything into four zones on the driveway. Keep the “decide later” pile small (one bin’s worth, max) — otherwise it eats the project. For more on what goes wrong here, see our guide to common garage organization mistakes.
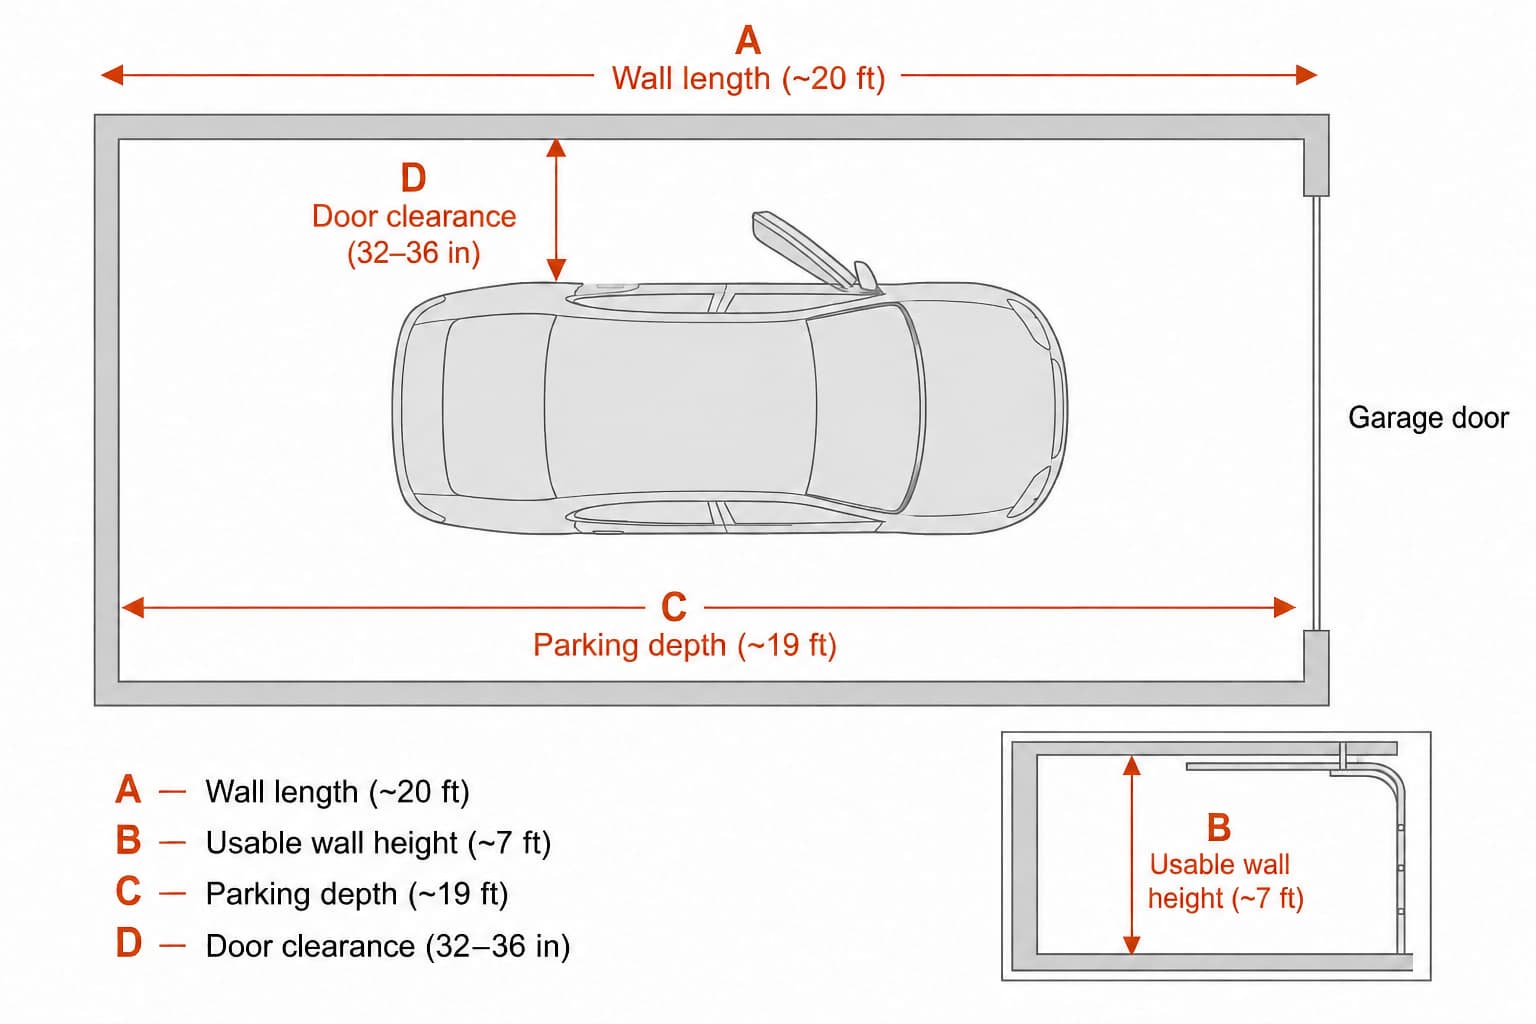
Step 3 — Measure before you buy anything
This is the step most articles skip, and the one that decides whether your next big purchase is a system or a return trip. Measure four things:
- Wall length along the longest free wall
- Usable wall height — floor to ceiling, door track, or where the ceiling slopes
- Parking depth — back wall to closed garage door, minus the longest car you ever park, plus 12 inches for opening the trunk
- Door clearance — side wall to the parked car’s fully-open driver’s door
Shelves get returned because they don’t fit behind the parked car. Bins get returned because they don’t fit between the shelves. Hooks get re-installed because the bike’s handlebar hits the car door. Each failure traces back to a measurement that wasn’t taken.
Write the four numbers on masking tape inside the garage door. You’ll reference them every time you click “add to cart.”
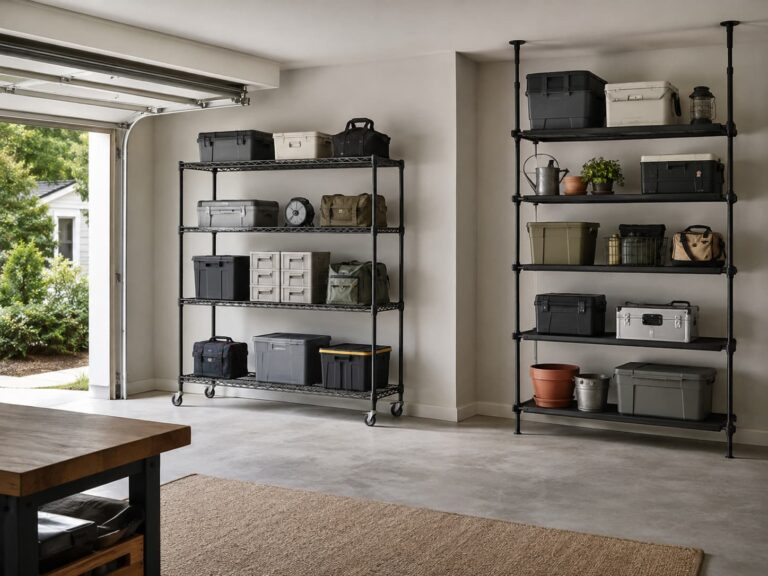
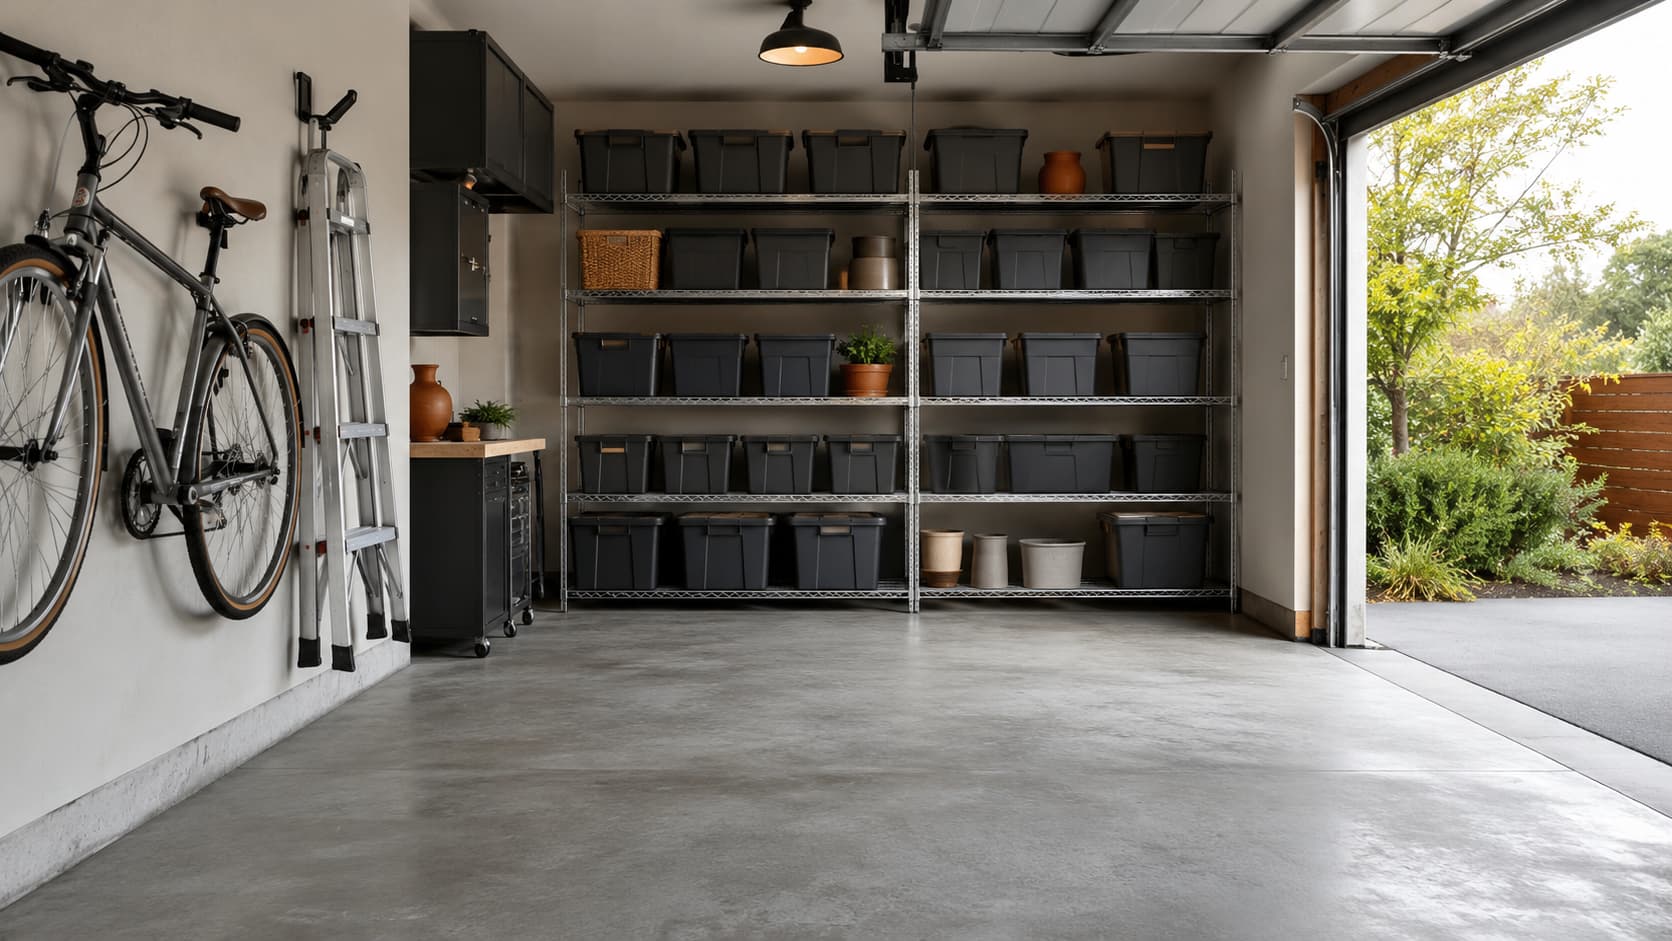
Step 4 — Sort and contain in stackable totes
Group the “keep” pile by category (holiday, sports, automotive, tools, camping) and contain each in stackable totes. Three things matter: predictable dimensions across the pack, a recessed lid (so the next tote doesn’t slide off), and a latching closure.
No products found.
A workhorse choice is the Sterilite 27-Gallon Industrial Tote, the size most garage shelving is designed around. The 24-pack fits a full sort-and-label-everything commitment; smaller packs (2 or 4) work for partial setups.
One trap: a 27-gallon tote does not sit flat on a standard 18-inch wire shelf — it overhangs about two inches at the front. If you’re putting bins on wire, you need a 24-inch-deep shelf (see best garage shelves for storage bins) or smaller bins. For labeling, see how to label garage storage bins.
Step 5 — Add a shelving unit (one, then maybe a second)
Buy one shelving unit before buying a second. Live with it for a week. Then decide whether the wall and ceiling can absorb the rest, or whether you genuinely need a second unit.
The shelf-and-tote pairing is the most common buying mistake. 18-inch wire shelving is the most common entry-level option, but it doesn’t seat a 27-gallon tote flat — the tote overhangs, looks fine empty, and sags once loaded. Go to a 24-inch-deep shelf or switch to smaller bins. The shelf-and-tote pairing decision is covered in the dedicated roundup, and best garage storage for small garages picks units for tighter footprints.
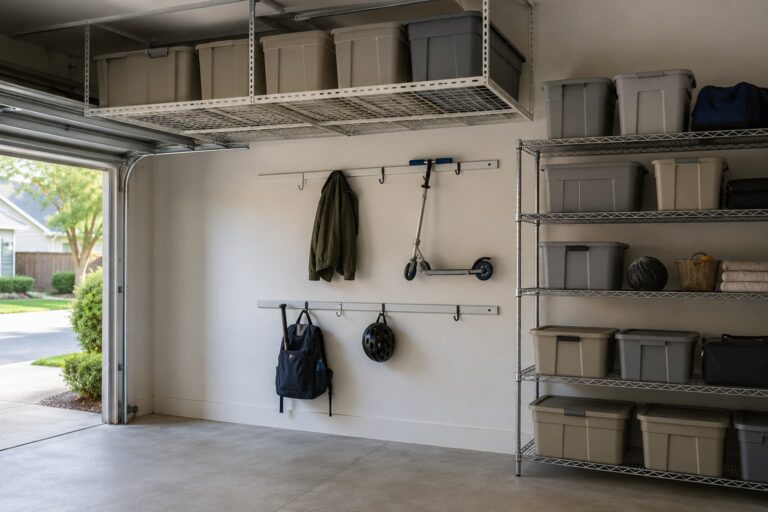
Step 6 — Go vertical with hooks
Once shelves are placed, get bikes, ladders, hoses, garden tools, and extension cords off the floor. A 16-pack heavy-duty hook starter kit covers most of these.
No products found.
A reasonable starter is the KOFANI Steel Garage Storage Hooks 16-Pack. The listing indicates an anti-slip coating, which matters when you’re storing tools you’d rather not chip.
Capacity figures on hook listings are substrate-dependent. Anchored into a wood stud, a hook can hold a bicycle. Anchored into drywall alone, realistic capacity drops to whatever the drywall anchor is rated for — fine for a trowel, not for a bike. Always anchor into studs for anything heavier than a hand tool.
When your wall fills up, the upgrade is a full rail-and-track system — see best wall-mounted garage storage systems.
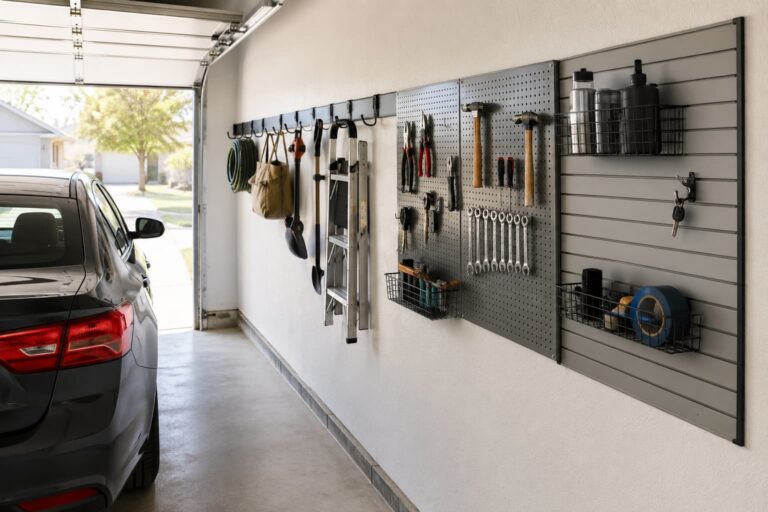
Step 7 — Build a wall system (when individual hooks aren’t enough)
Individual hooks are the right answer until the wall looks like a pincushion. The next step is a slatwall or pegboard panel — a single mounting surface that lets you reposition tools without re-drilling.
No products found.
A small-garage starting point is the PVC Slatwall Kit (4-by-4-foot total, four interlocking 1-by-4 panels) with 10 hooks. PVC matters: garages aren’t climate-controlled, and MDF-based pegboard swells in humid weather. PVC stays flat. The 4×4 footprint covers the wall strip between waist and shoulder height, where most hand tools live.
Mount only into wood studs — the panel is a mounting surface, not a load-bearing structure. Heavy items (cordless drill cases, full toolboxes) still need a stud-anchored hook, not the panel face. To skip slatwall and go straight to a full integrated rail system like FastTrack or Wall Control, see the wall-systems roundup.
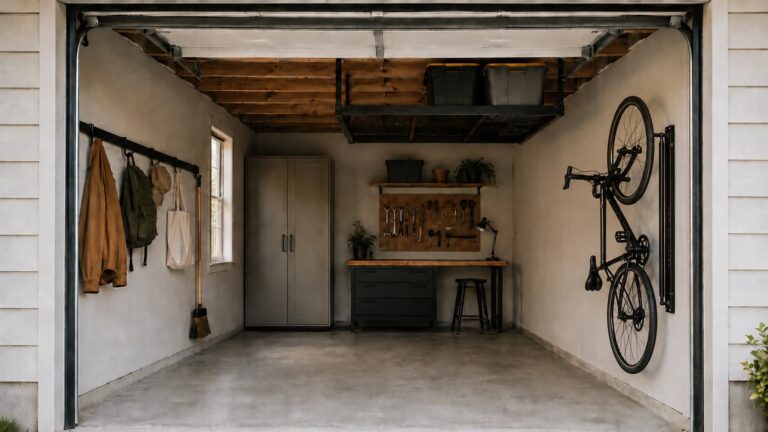
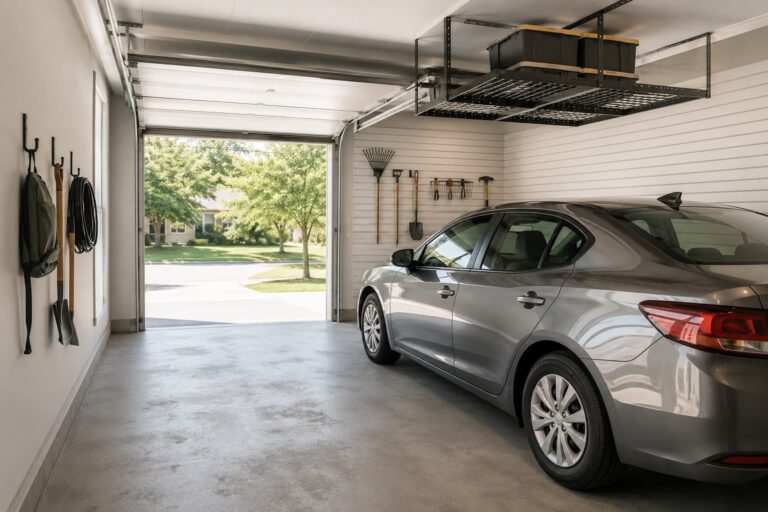
Step 8 — Use the ceiling
The space above the garage door track is usually the only unclaimed real estate in a small garage. Overhead racks live there for seasonal totes, suitcases, and camping gear.
Two non-negotiables: the rack must lag-bolt into ceiling joists (never drywall), and its drop height must clear the top of the garage door when fully open. A 24-inch drop sounds short until you realize the door track sits 12 inches below the ceiling — the rack drops below the track, not the ceiling. Manufacturer-listed capacity assumes proper joist installation and even weight distribution.
We cover sizing, drop height, and joist requirements in the best overhead garage storage racks roundup.
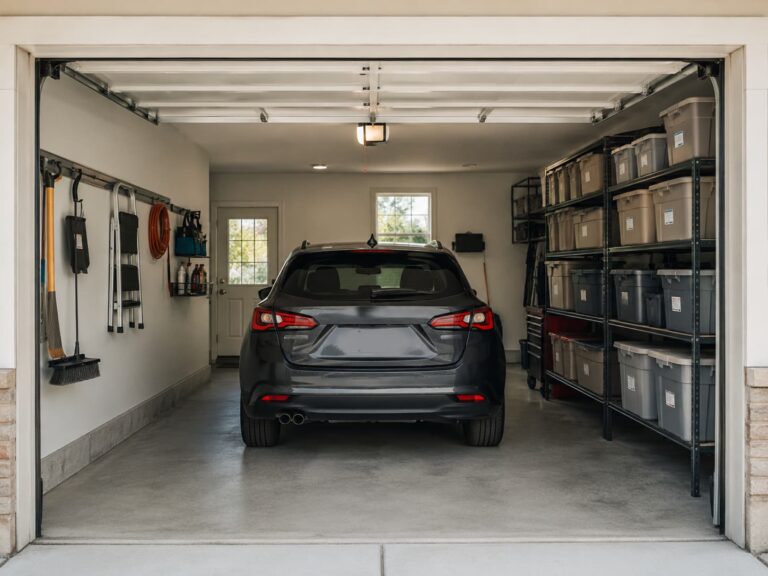
Park in Zones
Once everything has a home, the floor plan matters: wet zone near the door (yard tools, hose, cleaning supplies); tools zone along the longest free wall (slatwall or workbench); seasonal zone overhead; sports and bike zone wherever the wall has clear reach (see dedicated sports and bike storage); parking zone is whatever is left. The best garage storage products for small garages roundup pairs zones with specific picks.
Tools and Products That Help
The three categories most small-garage projects need: stackable totes (workhorse: Sterilite 27-Gallon Industrial), wall hooks (16-pack heavy-duty starter kit), and slatwall / pegboard (start with a 4×4 PVC kit; upgrade to a full rail later).
Bigger decisions have dedicated roundups: best garage shelves for storage bins, best overhead garage storage racks, best wall-mounted garage storage systems, and the complete walkthrough at how to choose a garage storage system.
Common Mistakes Specific to Small Garages
Mistake 1 — Buying bins before measuring shelves
The canonical small-garage mistake. Buy 27-gallon totes on sale, then discover the shelving is 18 inches deep. The tote overhangs, the shelf sags, returns ensue. Buy shelves first (after measuring), then bins that fit them.
Mistake 2 — Filling the floor before the walls and ceiling
The floor is the most expensive square footage in a small garage — it’s the only square footage that has to remain navigable. Use walls and ceiling first.
Mistake 3 — Mounting wall hooks into drywall only
Advertised capacity assumes anchoring into a wood stud. Use a stud finder, mark stud lines in pencil before you mount, and skip any spot where the only option is drywall.
For a fuller list, see the full list of common garage organization mistakes.
How to Decide What Goes Where
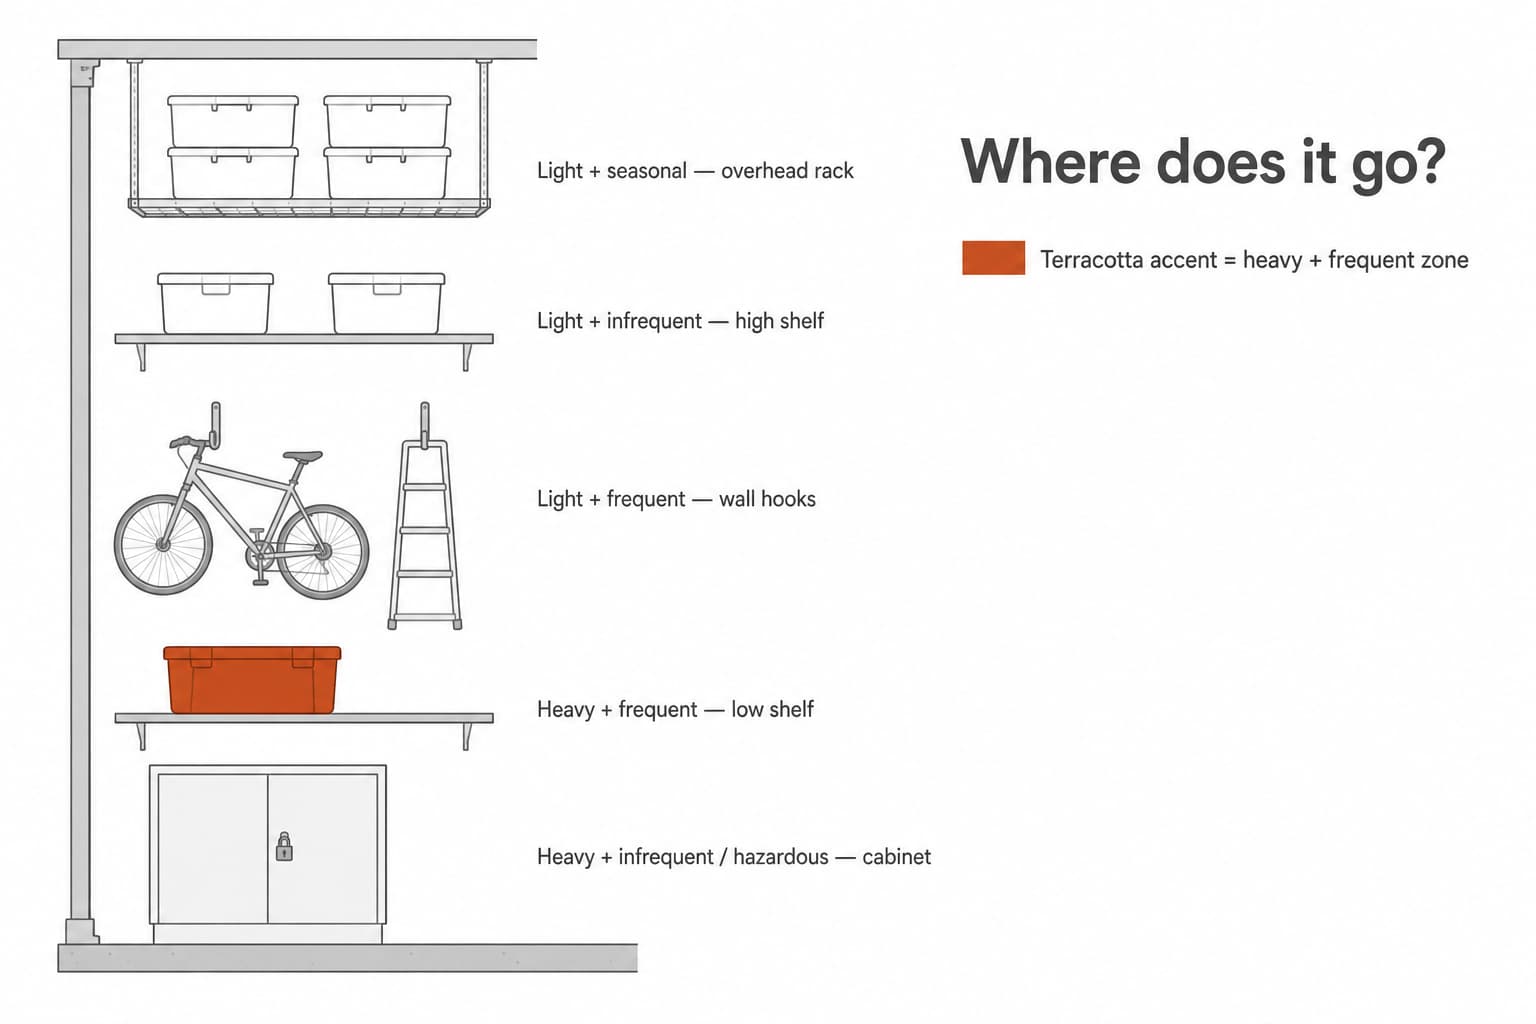
Floor-to-ceiling logic is the same in every small garage: heavy and frequent low, heavy and infrequent in cabinets, light and frequent on hooks at eye level, light and infrequent on high shelves, seasonal overhead.
| Item type | Where it goes |
|---|---|
| Heavy + frequent (automotive, batteries, water jugs) | Low shelf, knee-to-waist |
| Heavy + infrequent (large equipment, archives) | Locked floor cabinet |
| Light + frequent (hand tools, hose, garden tools) | Wall hooks, slatwall, pegboard |
| Light + infrequent (sealed bins, holiday-adjacent) | High shelf above eye level |
| Seasonal (holiday decor, camping) | Overhead rack above garage door |
| Hazardous (chemicals, flammables, sharps) | Locked low cabinet |
The matrix is simple but it’s surprisingly hard to apply when items already have inertia (“but it lives there”). Stick to the rule, not the inertia.
Small-Garage Layout Ideas
Three quick scenarios, in increasing order of complexity:
- One-car, no workshop. A 24-inch-deep shelf on the back wall holds 27-gallon totes; a 16-pack of hooks on the long wall takes the bike, ladder, hoses, and garden tools; one overhead rack handles seasonal items.
- One-car, cyclist plus occasional projects. Add a 4×4 PVC slatwall, a folding workbench that tucks flat when the car is in, and a wall-mounted bike hanger.
- Two-car with a bike, kayak, and seasonal totes. Two 24-inch-deep shelving units; slatwall spans the side wall between them; overhead racks parallel to the door track carry the kayak; the bike rides a wall hanger above the slatwall.
Wall length, ceiling height, and what you actually own will shift the layout.
FAQ
Should I buy shelves or bins first?
Measure first. Then shelves. Then bins that fit them. Never the reverse — you’ll have bins too big for the shelves you eventually buy.
Is pegboard or slatwall better in a garage?
PVC slatwall in most cases. MDF pegboard swells in unconditioned garages and the holes deform around heavy hooks. PVC stays flat, at a higher cost per square foot than home-center pegboard.
Can I store everything overhead to free up the floor?
No. Overhead racks are for light + seasonal items. Heavy items belong low (lift safety); frequent items belong at eye level (reach safety). Overloading an overhead rack pushes against the manufacturer-listed capacity, which assumes proper joist installation and even weight distribution.
How much should I budget?
A starter setup (one shelf, a tote pack, a hook kit, and a 4×4 slatwall) is the modest end. Full integrated rail systems (FastTrack, Wall Control, Rubbermaid) cost several times more for whole-wall coverage. See how to choose a garage storage system for the buying walkthrough.
Sources Reviewed
This guide synthesizes manufacturer product pages, retailer listings, and recurring patterns in public discussions about small-garage organization. We do not claim hands-on testing.