How to Store Bikes in Your Garage: Wall, Ceiling, or Floor?
Disclosure: This article contains affiliate links. If you buy through these links, we may earn a commission at no extra cost to you. We do not claim hands-on testing unless clearly stated.
Most garage bikes spend their lives leaning against a wall. They tip over, scratch the car door, and slowly take over the parking space. The fix is to get the bike off the floor with a deliberate storage method.
This guide covers the three practical options — wall-mounted racks, ceiling hoists, and freestanding floor stands — and how to choose between them. For a deeper buying-side comparison after you’ve picked a method, see how to choose bike storage for your garage.
Quick Answer
Three methods, each with one dominant trade-off:
- Wall mount — best for most garages with a free wall and 1–4 bikes. Requires drilling into studs.
- Ceiling hoist — best when wall space is taken but the ceiling is 9 ft or taller. Requires drilling into joists.
- Floor stand — best for renters or anyone who can’t drill. No installation, but uses floor footprint.
The decision tree below formalizes this into three quick questions.
The Walls vs Ceiling vs Floor Decision Tree
Three questions in sequence: can you drill into the structure, is one wall free, and how tall is the ceiling.
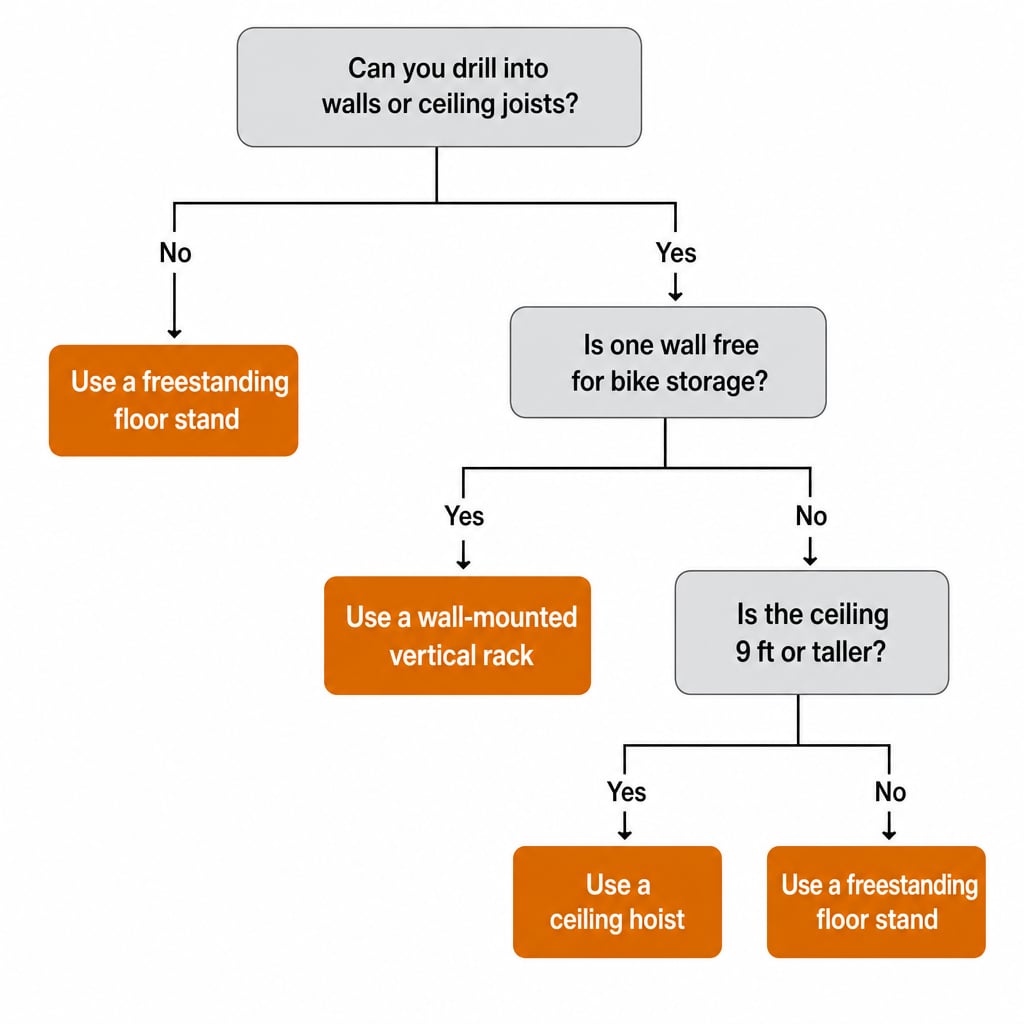
If you can’t drill — renting, masonry walls — the answer is a floor stand. If you can drill and one wall is free, that’s a wall mount. If walls are used but the ceiling is tall, that’s a hoist. Otherwise, back to a floor stand.
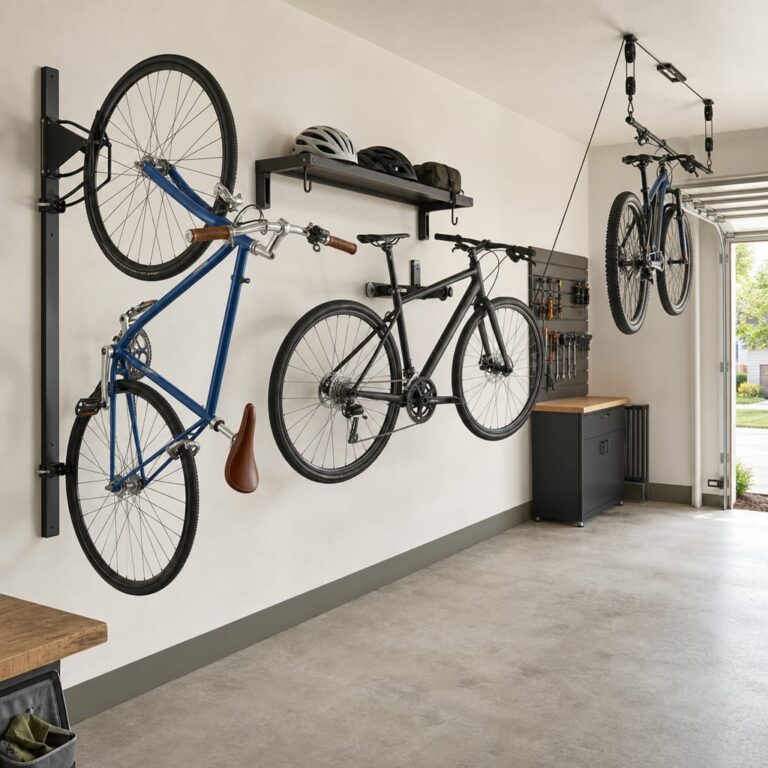
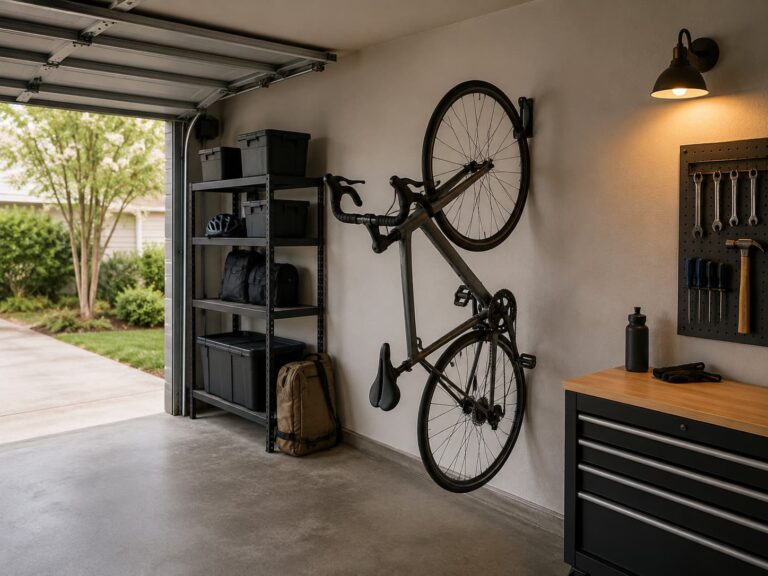
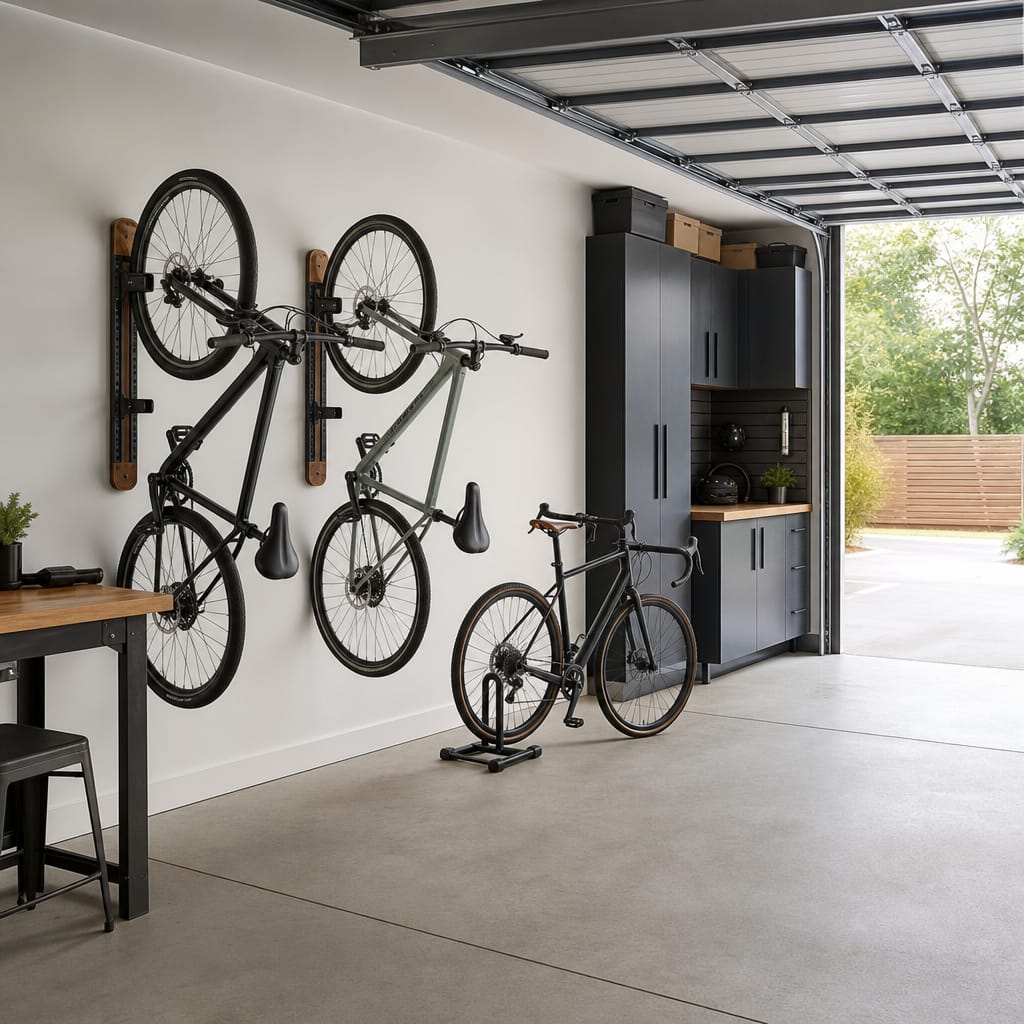
Method 1 — Wall-Mounted Vertical Storage
A wall rack holds the bike vertically by the front wheel. Pivot designs swing 160 degrees so you can pack multiple bikes tight against one wall. This is the default for most attached garages.
When this method is the right pick. You have at least one wall that can lose ~24 inches of clearance per bike, you can drill into studs, and you can lift the front wheel to chest height. Heavy e-bikes or limited lifting ability point to the ceiling or floor routes. For specific picks, see best garage bike racks or best vertical bike racks for small garages.
What to check before buying:
- Wall material. Most racks need wood studs behind drywall. Masonry needs concrete anchors.
- Stud spacing. Standard is 16 inches on center — confirm with a stud finder.
- Hanging clearance. A typical adult bike needs ~70 inches of vertical clearance.
- Tire width. Pivot racks ship in road, MTB, and fat variants. Match your widest tire.
- Manufacturer-listed capacity. Most racks list 35–80 lb per hanger.
For the side-by-side, see wall-mounted bike rack vs freestanding.
Method 2 — Ceiling Hoist (Overhead Pulley)
A ceiling hoist lifts the bike via rope and pulleys and locks it there. The most space-efficient method on paper, with the steepest installation requirements.
Two hooks hang from pulleys mounted to joists. A rope through the pulleys terminates at a wall cleat with an auto-lock. Clip the hooks to the handlebar and seat, then pull to lift.
When this method is the right pick. Wall space is taken, ceiling is at least 9 feet, and structural joists run in a usable direction. Best for infrequently-used bikes (winter storage, kid’s bikes between sizes). Daily-drivers are awkward on hoists because the lift-and-lower process is slow.
What to check before buying:
- Ceiling height. Most hoists are rated for 9–12 ft. Some extend to 16 ft with rope extensions.
- Joist orientation and depth. Hoist hooks must anchor into structural joists, not drywall or sheathing.
- Drop zone. The floor area directly below the lifted bike must be free of cars, shelves, and people.
- Manufacturer-listed capacity. Consumer hoists typically list 75–100 lb. E-bikes often exceed 50 lb assembled.
- Hardware grade. Cheap kits ship with thin lag screws. For heavier bikes, upgrade to longer, beefier lag bolts.
Safety framing — read this before installing.
Hoists fail in three ways: the anchor pulls out, the rope or pulley breaks, or the operator releases without engaging the lock. If you’re not confident drilling into joists, choose the wall mount or floor stand instead.
Method 3 — Freestanding Floor Stand
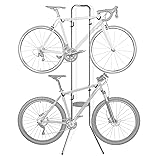
A floor stand holds the bike using gravity and balance, with no mounting. Two common styles: vertical single-bike stands, and 2-bike gravity stands that lean against the wall.
When this method is the right pick. You’re renting and can’t drill, garage walls are masonry or contain wiring, or you want a temporary setup. Also a fit when a household member can’t reliably lift a bike to wall or ceiling height.
What to check before buying:
- Floor footprint. A gravity stand needs ~20 × 24 inches of base plus clearance to lean against the wall.
- Level flooring. Concrete garage floors are often pitched for drainage; a slope makes stands tip more easily.
- Tire width. Most stands fit road and hybrid tires (28–55 mm). Fat tires need a wider cradle.
- Manufacturer-listed capacity. Two-bike gravity stands typically list 80 lb total (40 lb per bike).
- Even loading. Asymmetric load makes a gravity stand pivot toward the heavier side.
For households mixing bikes and scooters, see best garage storage for bikes and scooters.
Side-by-Side Method Comparison
| Dimension | Wall mount | Ceiling hoist | Floor stand |
|---|---|---|---|
| Drilling required | Yes (studs) | Yes (joists) | No |
| Space saved | High | Highest | Lowest |
| Daily access | Easy | Slow | Easiest |
| Typical manufacturer-listed bike weight | 35–80 lb per hanger | 75–100 lb per hoist | 40 lb per arm |
| Install time | 30–45 min | 60–90 min | 10–15 min |
| Suits renters | No | No | Yes |
Tools and Products That Help
One representative product per method — starting points, not “best of” picks.
For wall mount — Steadyrack Classic. The category-defining wall pivot rack. Loads from the wheel tray (no overhead lift), pivots 160 degrees. Match the variant (Classic, Fat, Fender) to your tire width.

For ceiling hoist — Rad Sportz Bike Hoist. A long-tenured pulley system with auto-locking brake and manufacturer-listed 100 lb capacity. Rope supports up to ~12 ft ceilings.

For floor stand — Delta Cycle Michelangelo. A gravity stand for two bikes vertically against the wall. No drilling. Manufacturer-listed 80 lb total (40 lb per bike).
How to Measure Before You Mount Anything
Ten minutes of measurement prevents most installation regrets.
- Wall length of the wall you’re considering
- Stud spacing (16 or 24 in. on center) confirmed with a stud finder
- Ceiling height, floor-to-joist
- Each bike’s overall length and weight
- Parking clearance with the car door fully open
- Drop zone for ceiling hoists — air space below the planned bike location
- Floor levelness at the floor-stand location
If any number rules out a method, switch methods — that’s exactly what the decision tree is for.
Common Mistakes
Mistake 1: Mounting into drywall instead of a stud or joist
What it looks like: Rack screws go into the plastic drywall plugs that came with the kit, not into wood.
Why it’s a problem: Drywall plugs are rated for picture frames, not loaded bicycles. They pull out under the cyclic load of mounting and dismounting, often weeks after install.
What to do instead: Use a stud finder. Anchor every screw into a stud or joist. If hole spacing doesn’t match your studs, mount a strip of plywood across two studs and anchor the rack into the plywood.
Mistake 2: Underestimating the ceiling drop zone
What it looks like: A ceiling hoist installed directly over the parking spot, with a car below the lifted bike.
Why it’s a problem: Hoists do occasionally fail. The floor area directly below the bike must be clear.
What to do instead: Position the hoist over a low-traffic, low-value area. If the only available joist is over the car, reconsider whether a hoist is the right method.
Mistake 3: Loading a gravity stand unevenly
What it looks like: A heavy mountain bike on one arm and a kid’s bike on the other.
Why it’s a problem: Gravity stands rely on balanced weight. Asymmetric loading turns the stand into a slow-motion tip-over.
What to do instead: Load matched weights, or put the heavier bike on the lower arm. If bike weights differ a lot, pick a single-bike vertical stand instead.
Mistake 4: Buying a wall rack that doesn’t fit your tire width
What it looks like: A road-tire wall rack ordered for an MTB with 2.4 in. tires. The wheel tray is too narrow.
Why it’s a problem: The bike won’t seat. You’ll return it or force the tire in, damaging the tray and tire bead.
What to do instead: Measure your widest tire before ordering. Match the rack variant to your width. When in doubt, size up.
If bike storage is part of a bigger garage reset, start organizing a cluttered garage covers the broader sequence.
FAQ
How much weight can a garage wall actually hold for a wall-mounted bike rack?
It depends on the anchor. A rack anchored into a wood stud typically holds the manufacturer-listed per-hanger capacity (35–80 lb on most pivot racks). A rack on drywall plugs cannot reliably hold any bike weight — the plugs pull out. The manufacturer’s number assumes correct stud anchoring.
Can I install a ceiling hoist by myself?
You can install most consumer hoists alone, but two people is faster and safer. You’ll need a stud finder rated for joists, a drill, and a stable ladder. If you’re new to overhead drilling, a second person to hold the ladder is worth it.
Will hanging a bike upside down damage it?
For most bikes, no. Bikes with sealed hydraulic disc brakes occasionally develop air bubbles in the lines after long inverted storage, causing spongy brake feel that needs a bleed. Plan on bleeding once a year for a hydraulic-disc bike stored inverted. Rim or mechanical-disc brakes are unaffected.
How many bikes can I fit on a single garage wall?
A 20-foot wall fits 4–6 pivot racks side by side. Each rack needs roughly 12–14 inches of horizontal space when parked flush. Allow extra clearance if you want to pull bikes without disturbing the others.
Is a floor stand really worse than a wall mount?
Not worse — different. Floor stands trade floor footprint for skipping the install. If you can’t drill, the floor stand is the only option, and a fine one. With drilling and wall space, a wall mount frees the floor for parking or working.
Sources Reviewed
This guide synthesizes manufacturer product pages for the three featured racks (Steadyrack, Rad Sportz, Delta Cycle), Amazon retailer listings for spec confirmation, and recurring patterns in public buyer discussions. We do not claim hands-on testing. Capacity figures are reported as “manufacturer-listed” throughout; real-world performance depends on correct installation, balanced loading, and the structural details of your garage.
Related Guides
- How to Choose Bike Storage for a Garage
- Best Garage Bike Racks for Home Storage
- Best Vertical Bike Racks for Small Garages
- Best Garage Storage for Bikes and Scooters
- Wall-Mounted Bike Rack vs Freestanding Bike Rack