How to Install Overhead Garage Storage (Step-by-Step)
Disclosure: This article contains affiliate links. If you buy through these links, we may earn a commission at no extra cost to you. We do not claim hands-on testing unless clearly stated.
Most overhead storage failures aren’t about the rack. They’re about where it’s bolted, what it’s bolted into, and how much was loaded onto it before anyone checked whether the joists could carry it. This guide walks through a careful, safety-first install of a typical bolt-down overhead garage storage rack — from the pre-install verifications that make the rest of the work safe, through the 10-step sequence, into the post-install checks for the first 30 days.
What this guide does NOT cover: drywall-anchor or “no-drill” install methods (those don’t carry the loads typical residential racks are rated for), motorized lift systems (different product category with electrical considerations), and which rack to buy in the first place. For rack selection, see our roundup of the best overhead garage storage racks and the how to choose overhead garage storage buying guide.
A short note on framing: every load-bearing claim in this article is sourced to the rack manufacturer’s install manual or product page. Numbers vary by kit — pilot-hole diameter, lag-bolt length, bracket spacing, torque guidance — so the article gives the general sequence and explicitly defers to the manual for the specifics. If your install touches anything outside the storage/install domain (cracked drywall ceiling, trussed roof, finished ceiling over living space, structural ambiguity), the answer is a contractor.
What You’ll Need Before You Start
A typical bolt-down install needs a small set of tools, the manufacturer-supplied hardware, and a few pre-conditions in the garage itself.
Tools
- Stud finder with deep-scan and AC detection
- Cordless drill with adequate torque for lag bolts
- Socket wrench (size per manufacturer)
- 4-foot level
- Tape measure and pencil
- Stepladder rated for your ceiling height
- Safety glasses
Hardware
- Manufacturer-supplied lag bolts and brackets from the rack kit (do not substitute lag bolts of different length or diameter without manufacturer guidance — the rack’s listed capacity assumes the kit’s hardware)
- All bracket, beam, and decking components from the kit
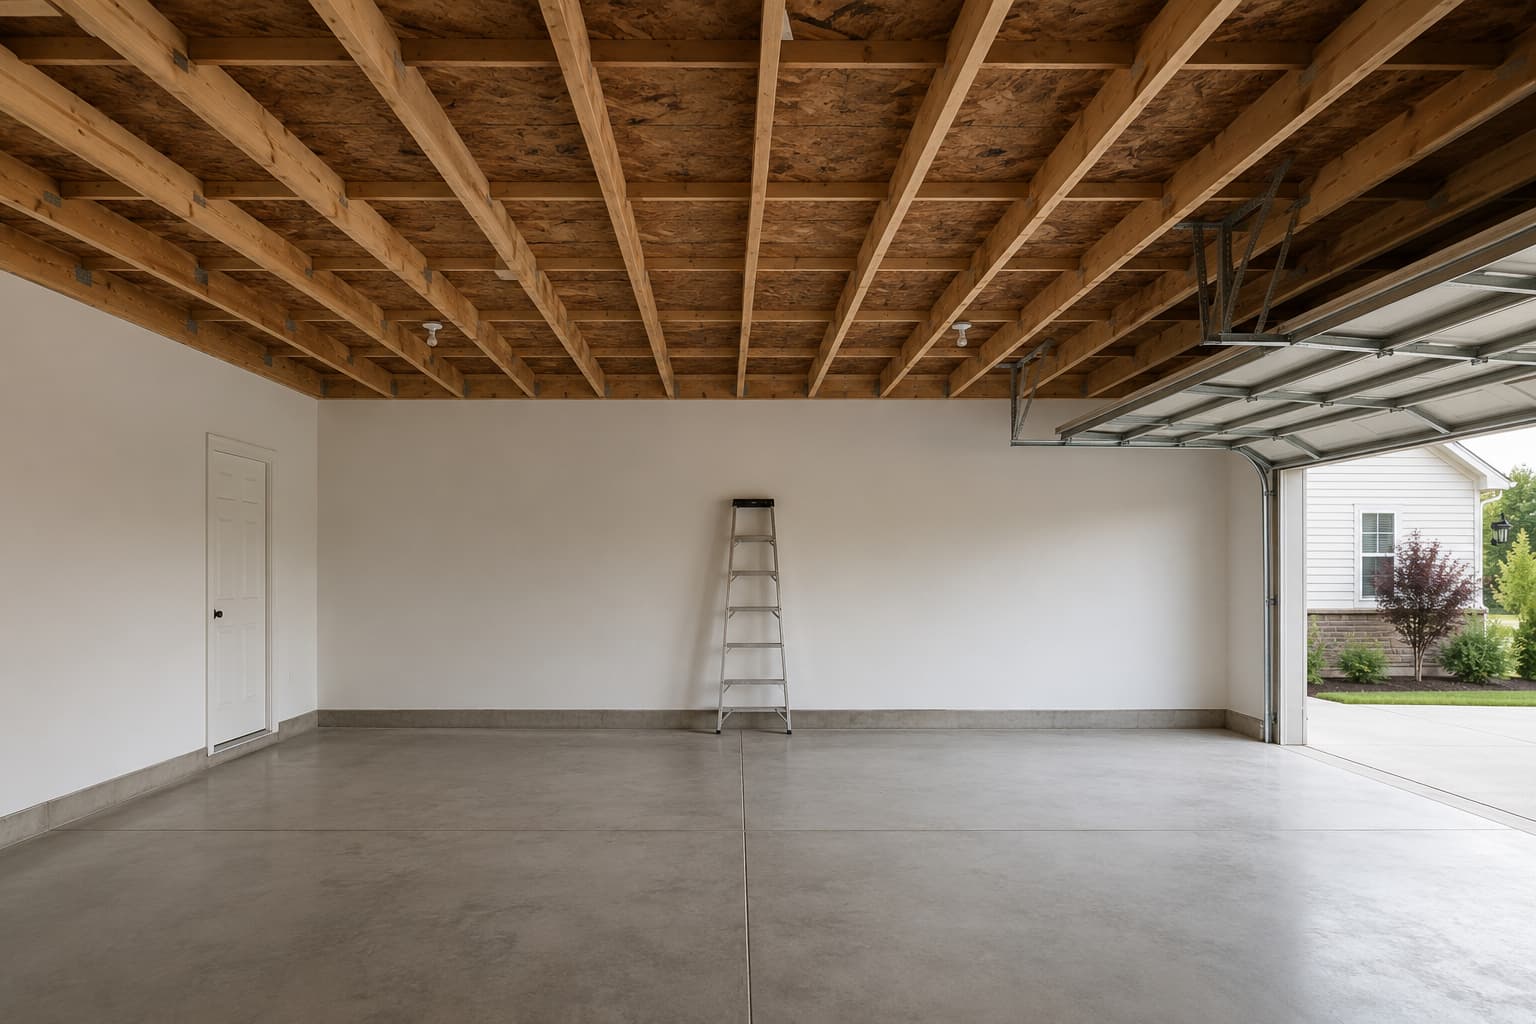
Pre-conditions
- Exposed joists OR a finished drywall ceiling with confirmed joist locations
- Ceiling height adequate for the rack’s drop range (verify against your kit’s spec)
- A clear floor area below the install zone for a ladder
- A second person available for the frame-lift step (single-person install is possible for smaller racks but adds time and risk)
Pre-Install Safety Checks (Do These First)
Most of the avoidable failures in overhead install happen before the drill ever runs. This section is the part most install videos skim and most readers wish they had taken slower.
Locate joists and confirm orientation
Joists run in one direction across the garage ceiling. The rack you’re installing has a long axis (typically 8 feet for a 4×8 rack). The two need to be perpendicular: joists running across the rack’s span means each pair of brackets crosses multiple joists, and the load distributes naturally.
If your joists run parallel to the rack’s long axis, each side of the rack lands on one joist, and the load concentrates in a way the rack wasn’t designed for. The fix is one of three things: reposition the rack 90° relative to the joists, pick a different install location, or call a contractor. Do not proceed if the rack would land parallel to the joists. If you’re not sure your rack orientation matches your ceiling structure, the upstream choice may be wrong — see how to choose overhead garage storage for the rack-vs-ceiling matching guidance.
Verify joist size, spacing, and material
Manufacturers specify a minimum joist size (commonly 2×6 lumber or larger) and a maximum joist spacing (typically 16 or 24 inches on-center). Your install kit’s manual lists the exact spec. Confirm both before drilling. Older homes, additions, or attic conversions sometimes use joist specs that don’t meet modern rack manufacturers’ requirements — and “close enough” isn’t a safe call here.
Check for obstructions in the ceiling cavity
HVAC ducts, electrical runs, plumbing, and sprinkler lines all live in the cavity between drywall and joist. A stud finder with AC detection catches most live wiring near the surface but cannot see deep runs. If your install zone is anywhere near a known electrical panel feed, an HVAC return, or a plumbing chase, that’s a reason to reposition or to ask someone qualified. A stud finder is a starting check, not a substitute for understanding what’s behind the drywall.
Confirm your rack’s manufacturer-listed capacity vs. what you plan to store
Manufacturer-listed total capacity (typically 400-600 lb for residential ceiling racks like the FLEXIMOUNTS GR48[/amazon link] or the SafeRacks 4×8[/amazon link]) is a ceiling value, not a target. It assumes correct install, level joists, balanced load, and manufacturer-supplied hardware. Plan to load at 60-70% of the manufacturer-listed figure to leave headroom — and distribute weight toward the center of the span, not at the edges.
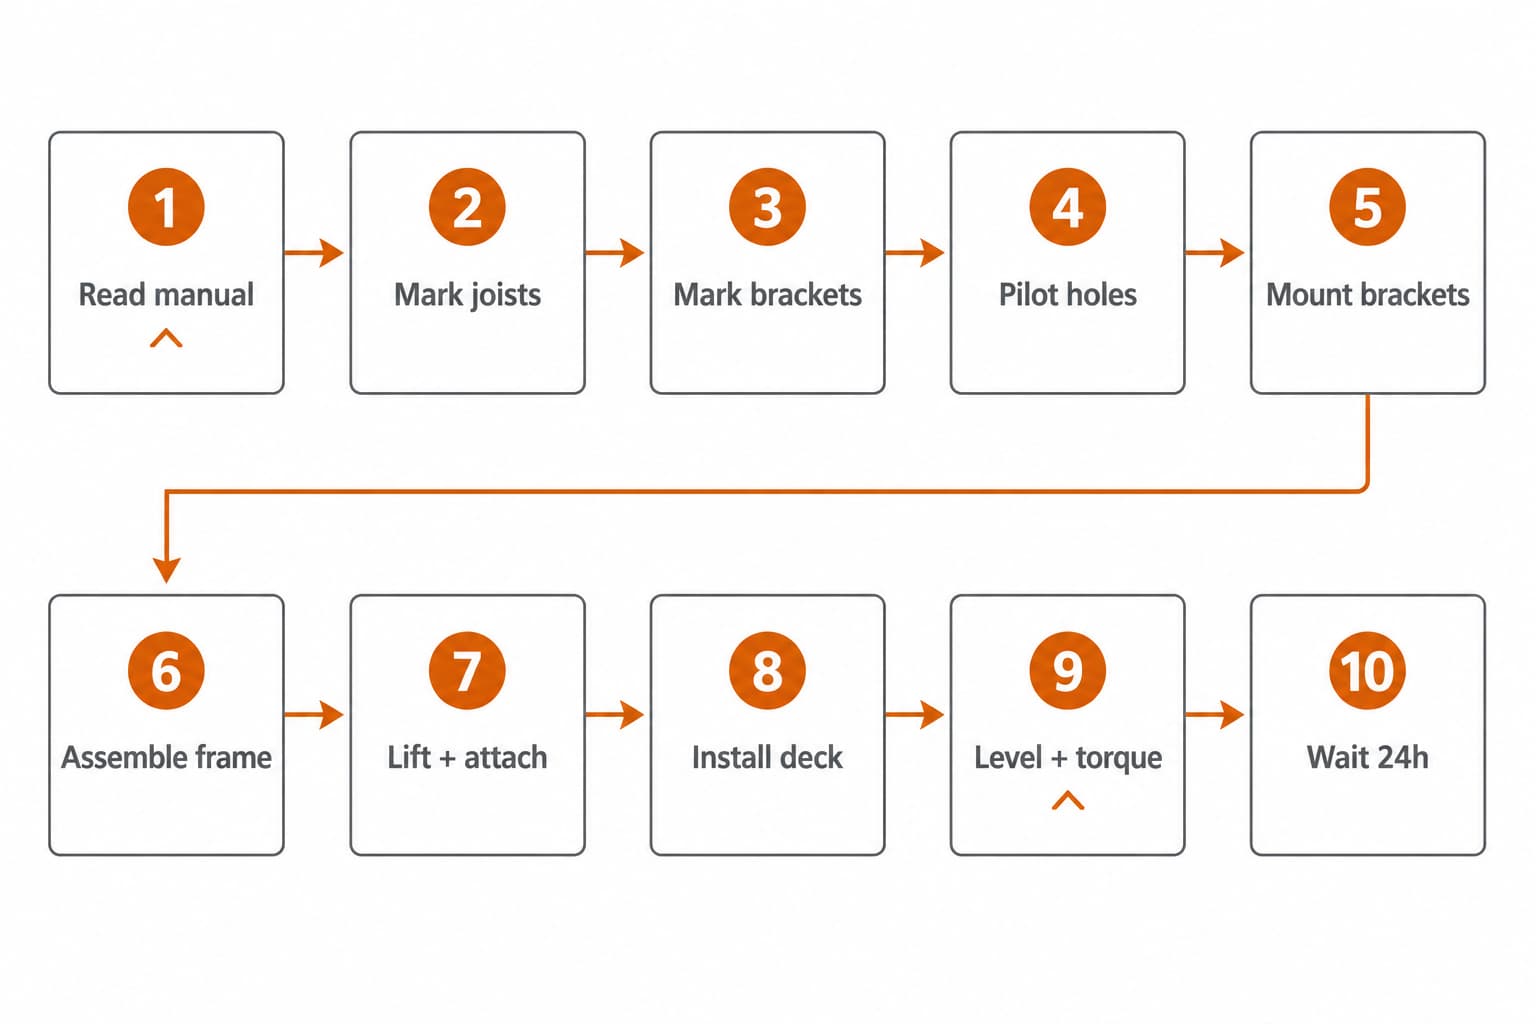
Step-by-Step Install
The sequence below is the general pattern for a typical bolt-down joist-mounted residential rack. Specific numbers — pilot-hole diameter, lag-bolt length, torque, bracket spacing — come from your kit’s manual.
Step 1: Read the manufacturer’s install manual end-to-end
Every rack has a slightly different bracket pattern, lag-bolt size, and torque guidance. The manufacturer’s manual is the only authoritative source on those numbers. Reading the whole thing before you start saves the most painful kind of rework, which is rework after holes are already drilled.
Step 2: Mark joist centers on the ceiling
Use your stud finder to locate each joist crossing the install zone. Confirm one of them with a 1/16-inch pilot hole (any pilot smaller than your final lag bolt is reversible if you’re off-center; large pilots are not). Mark the joist center line with pencil, then mark the joist edges so you know your working width.
Step 3: Mark bracket-mount points along the joist line
Your kit’s manual specifies the exact bracket spacing along the joist. Measure carefully, mark every bracket-mount point, and confirm visually that the resulting pattern crosses at least two joists per bracket pair. Most kits are designed to do this automatically — but verify, especially in older homes with non-standard joist spacing.
Step 4: Pre-drill pilot holes
Pilot-hole diameter comes from the manual (a 5/32-inch pilot for a 5/16-inch lag bolt is common but verify per your kit). Drill at 90° to the ceiling. Angled lag bolts compromise hold. Pull the drill straight back out so the hole stays clean.
Step 5: Mount the ceiling brackets
Hand-thread each lag bolt into its pilot hole first — finger-tight gets you a feel for whether the bolt is finding solid wood or hitting nothing. Then snug with a socket wrench. Stop when the bracket is firmly seated against the ceiling. Over-torquing strips the joist wood and reduces the bracket’s holding power; under-torquing leaves a wobble. The manufacturer’s torque guidance is the only acceptable source for the final figure.
Step 6: Assemble the rack frame
Most rack kits assemble on the garage floor first. Follow the manual’s beam and bracket assembly order — out-of-order assembly often leaves geometry off-square, which compounds when the frame is lifted to the brackets.
Step 7: Lift the frame and attach to brackets
This is the step where a second person makes the install dramatically safer. Insert all connecting bolts between the frame and the ceiling brackets before tightening any of them. That keeps the geometry square as you work around the rack.
Step 8: Install the deck panels
Wire grid or solid decking depending on your rack. The decking is what holds your items, so each panel needs to be fully seated and clipped or bolted per the manual. Loose decking is a silent failure mode — items slip through to the floor.
Step 9: Level check and final torque
Run a level across the rack’s long axis. Minor adjustment is normal — racks are designed with a small amount of leveling tolerance. Final-torque every lag bolt and connecting bolt per manufacturer spec.
Step 10: Wait 24 hours before loading
Lag bolts settle into the joist wood under load. A 24-hour wait between install and first load lets you inspect every bracket the next day and re-torque if anything has loosened. Skipping this step is a common shortcut and a common source of “the rack sagged the first week” complaints.
Tools and Products That Help
For the install itself, useful products include:
- Stud finder with AC detection — for locating joists and avoiding live electrical
- Cordless drill — adequate torque is more important than maximum RPM
- Manufacturer-supplied rack kits — both the FLEXIMOUNTS GR48 4×8[/amazon link] and the SafeRacks 4×8 24-45 inch drop[/amazon link] publish full install PDFs and ship with all required hardware, which makes them well-suited as install-from-scratch examples
For picking the right rack in the first place, see our roundup of the best overhead garage storage racks, or if your ceiling is low (under 9 feet), the best overhead storage for low ceilings guide.
Common Mistakes
Mistake 1: Drilling into joists that run parallel to the rack
What it looks like: The rack lands with its long axis parallel to the ceiling joists, so each side of the rack bolts into only one joist.
Why it’s a problem: The rack’s manufacturer-listed capacity assumes the load distributes across multiple joists. Parallel orientation concentrates the load on two joists carrying everything — a use case the rack wasn’t engineered for.
What to do instead: Always orient the rack’s long axis perpendicular to your joists. If your garage ceiling structure doesn’t allow that, pick a different rack format (a 2×4 or 2×6 may fit a different orientation) or reconsider the location. See how to choose overhead garage storage for rack-vs-ceiling matching.
Mistake 2: Substituting lag bolts of wrong length or diameter
What it looks like: The reader runs out of the kit’s lag bolts, picks up a “similar-looking” bolt from the hardware store, and finishes the install.
Why it’s a problem: The rack’s manufacturer-listed capacity assumes the supplied hardware. Different lag-bolt thread depth or shank diameter changes the holding force materially.
What to do instead: Contact the manufacturer for replacement hardware. Manufacturers typically ship missing pieces for free or low cost. Never improvise on load-bearing fasteners.
Mistake 3: Skipping the 24-hour settle before loading
What it looks like: The install finishes at noon, and by 2 pm the rack is already loaded with seasonal bins.
Why it’s a problem: Lag bolts settle into joist wood under load. Without a settle period, the first 24 hours of weight is the first time anyone can see whether brackets shift, and there’s no second look before serious load is on.
What to do instead: Wait the 24 hours. Re-inspect every bracket. Then load gradually, starting with light items.
Mistake 4: Overloading past 60-70% of manufacturer-listed capacity
What it looks like: The rack carries a 600 lb manufacturer-listed total capacity, and the reader stacks 580 lb on day one to “make use of the space.”
Why it’s a problem: Manufacturer-listed capacity is a ceiling under correct install, perfectly balanced load, and ideal joist conditions. Real-world install rarely meets all three. The 60-70% margin is your headroom against the variables you can’t fully control.
What to do instead: Plan storage volume around 360-420 lb on a 600 lb rack. Concentrate heavy items toward the center of the rack’s span, not at the edges. Use lighter, bulkier items at the perimeter.
When to Call a Contractor
Some install scenarios are outside the range of “follow the manufacturer manual.” For any of these, the right answer is a licensed contractor with structural experience, not a more careful DIY attempt:
- Cracked or sagging drywall in the install zone — the ceiling itself may need repair before any rack mounts to it
- No exposed joists AND no reliable stud finder reading
- A trussed roof structure (engineered trusses behave differently from conventional joists and have specific load limitations that rack kits generally don’t address)
- A garage with a finished ceiling over a living space — load on the joists has consequences for the room below
- Any structural ambiguity that the manufacturer’s manual doesn’t directly cover
This isn’t a failure of DIY skill. It’s a question of scope. Overhead storage install is a storage task. Anything beyond it is structural work, which is a different category with different professional standards.
Post-Install Safety Checks (First 30 Days)
The install isn’t done at the moment you tighten the last bolt. The first month tells you whether the install actually settled correctly.
- Day 1 (after the 24-hour wait): Re-inspect every lag bolt. Snug any that have moved. Begin loading with light items only.
- Day 7: Under partial load, re-inspect lag bolts and bracket-to-frame connections. Look for any visible sag in the rack’s long axis or any deflection in the brackets. If you see either, stop loading and contact manufacturer support.
- Day 30: Full inspection. The lag bolts should be fully settled by now. Re-torque any that have moved. From here, a 6-12 month re-torque inspection is the practical maintenance cycle.
For ongoing safety once the rack is in service — weight distribution patterns, retrieval safety, what to do if you notice movement — see our guide to how to safely use overhead garage storage.
FAQ
Can I install an overhead garage storage rack into drywall without hitting joists?
No. Drywall anchors aren’t rated for the loads residential overhead racks carry — even “heavy-duty” anchors top out at a fraction of a 400-600 lb rack’s manufacturer-listed capacity. Joist-mount is the only supported install method for the racks in this category. If joists aren’t accessible in your install zone, the right answer is a different storage type (wall-mounted shelving against studs, or freestanding shelving on the floor), not different hardware on the ceiling.
How much weight can an overhead garage storage rack hold?
Manufacturer-listed total capacity for typical residential racks is in the 400-600 lb range. Verify the figure for your specific kit on the manufacturer’s product page or install manual. That figure is a ceiling assuming correct install on joists matching the manufacturer’s minimum spec, balanced load, and manufacturer-supplied hardware. Plan to load at 60-70% of the listed capacity for real-world headroom.
Do I need a second person to install?
Strongly recommended for the frame-lift step (step 7 in the sequence above). A single-person install is possible on smaller racks (2×4 or 2×6 formats) but adds time and a meaningful safety margin. For 4×8 racks, a second person is the practical standard.
Can I install over my garage door track?
Sometimes — but check clearance for the door’s fully-open position first. Sectional overhead doors swing up into the ceiling cavity, and the swing path varies by door type. Some racks are designed specifically for above-door spans with a low drop range; the best ceiling storage racks for garage roundup covers above-door-suitable options. Always verify your specific door’s swing clearance before drilling.
What if my garage has a finished ceiling and I can’t see the joists?
A stud finder with AC detection is the starting check. Confirm joist locations by drilling a small (1/16-inch) pilot hole — any size smaller than your final lag bolt is reversible if you’re off-center. If the stud finder reading is unreliable (older homes with metal lath, plaster ceilings, or unusual framing materials), or if you can’t get a consistent reading across the install zone, open a small inspection hole or call a contractor. Don’t guess — guessing on this step is the single most common cause of installs that fail under load.
How long should an installed overhead rack last?
With correct install, manufacturer-supplied hardware, and load within manufacturer-listed capacity, the rack itself can last decades. The practical failure mode isn’t the steel — it’s the install, specifically lag bolts loosening slightly over time in a garage environment with temperature swings and occasional vibration. A 6-12 month re-torque inspection is the routine that catches this before it becomes a problem.
Sources Reviewed
Editorial synthesis from rack manufacturers’ published install manuals (FLEXIMOUNTS GR48 install guide on fleximounts.com; SafeRacks install guide on saferacks.com), retailer product pages, and publicly-discussed install patterns. We do not claim hands-on testing. Every load-bearing number in this article is framed as “manufacturer-listed” and refers the reader to their own kit’s manual for the figures that apply to their specific install.
Related Guides
- Best overhead garage storage racks — the roundup of joist-mount racks suitable for the install methodology in this guide
- Best ceiling storage racks for garage — alternative roundup with above-door and low-drop options
- Best overhead garage storage for low ceilings — for installs where ceiling height is under 9 feet
- How to choose overhead garage storage — the upstream buying guide if you haven’t picked a rack yet
- How to safely use overhead garage storage — the companion guide for ongoing safe use after install