How to Organize a Garage With No Walls Available
Disclosure: This article contains affiliate links. If you buy through these links, we may earn a commission at no extra cost to you. We do not claim hands-on testing unless clearly stated.
Almost every garage-organization guide starts with the same instruction: “Put hooks on the wall.” That advice assumes you have walls you’re allowed to anchor into. A surprising number of garages don’t. If your walls are finished drywall you don’t want to damage, poured concrete you can’t easily drill, a rental where modifications aren’t allowed, or simply already occupied by windows, doors, breakers, and the water heater, the standard playbook breaks down.
This guide is for that garage. It walks through a three-tier plan that organizes around your floor and ceiling instead of your walls, and lists the measurements to take before you buy anything. It does not cover pegboards, slatwall, French cleats, wall hooks, or any anchoring into the wall itself.
Why “No Walls Available” Is More Common Than You Think
The “no walls” reader usually falls into one of four scenarios. The first is the finished-drywall garage: the wall surface is paint-ready and the owner doesn’t want to patch holes later. The second is a concrete or CMU exterior wall — physically anchorable with the right hardware, but the drilling effort and dust isn’t worth it for most homeowners. The third is a rental: the lease says no modifications. The fourth is the layout problem: the walls exist, but doors, windows, electrical panels, water heaters, and the garage door tracks already occupy every linear foot worth using. For an honest look at the rental side specifically, our guide to garage storage built for renter constraints goes deeper on the lease and damage-deposit angles.
One honest scope note before we go further. “No walls available” doesn’t always mean “no drilling at all.” Overhead ceiling racks still need to anchor into your ceiling joists. That’s acceptable for the finished-drywall reader who just doesn’t want holes in the visible wall plane. It is NOT acceptable for a true zero-drill rental — those readers should skip Tier 2 and combine Tiers 1 and 3 only.
The Three-Tier No-Wall Plan
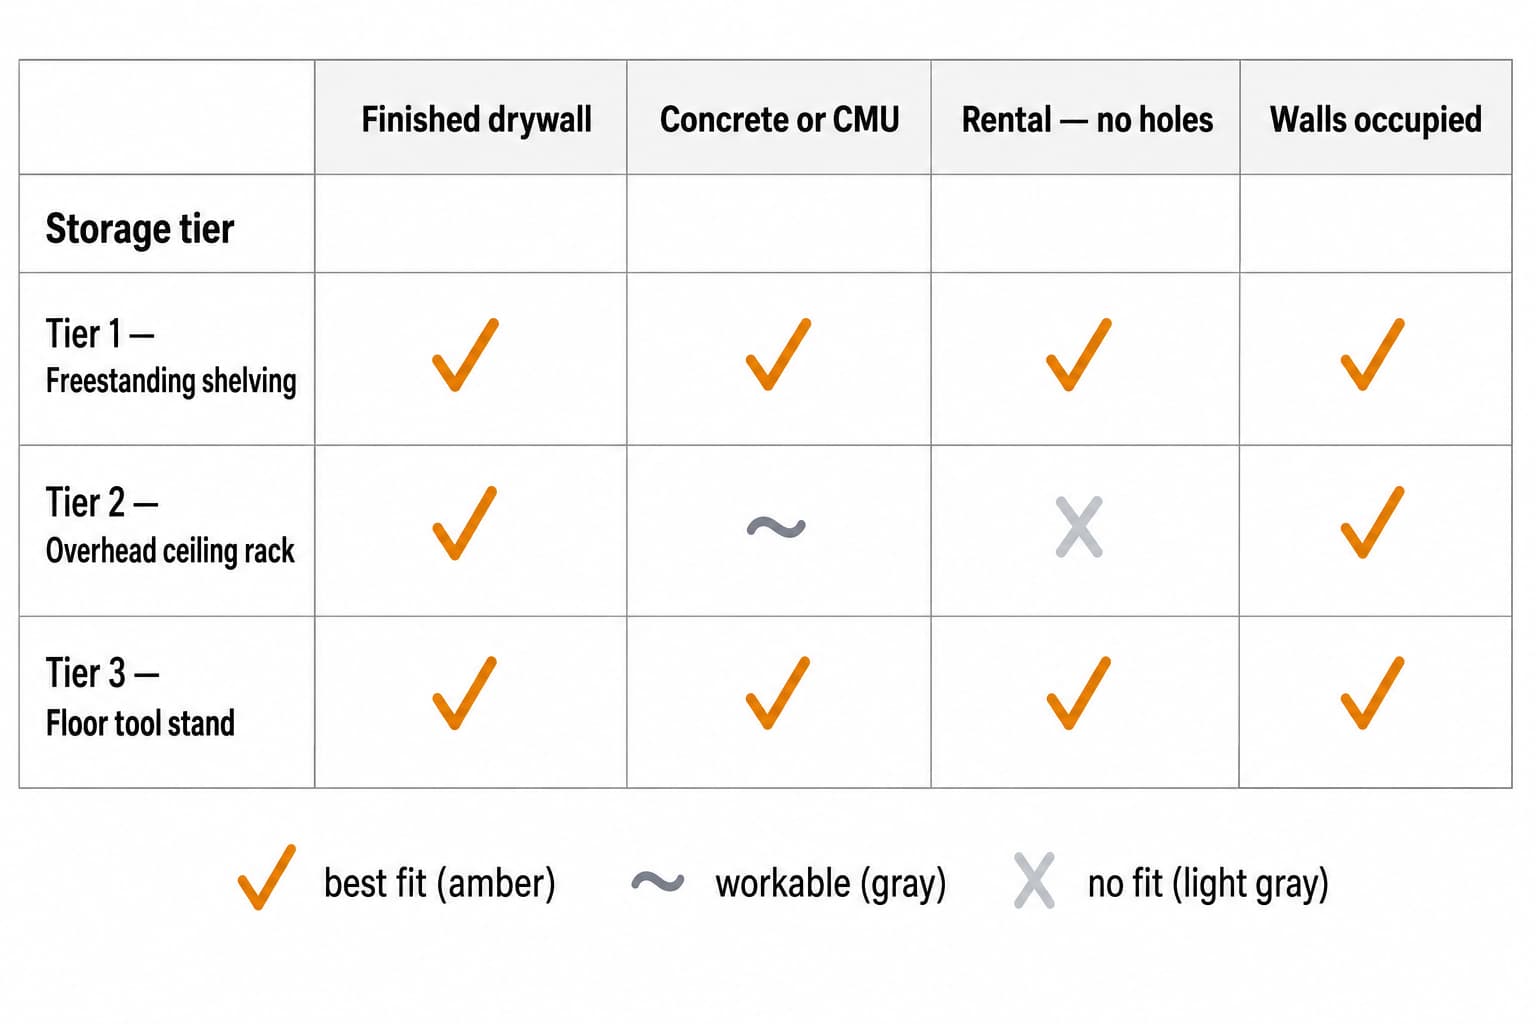
The plan has three tiers, applied in order. Most readers use two of the three; a few use all three. The decision matrix below shows which tier fits each no-wall scenario.
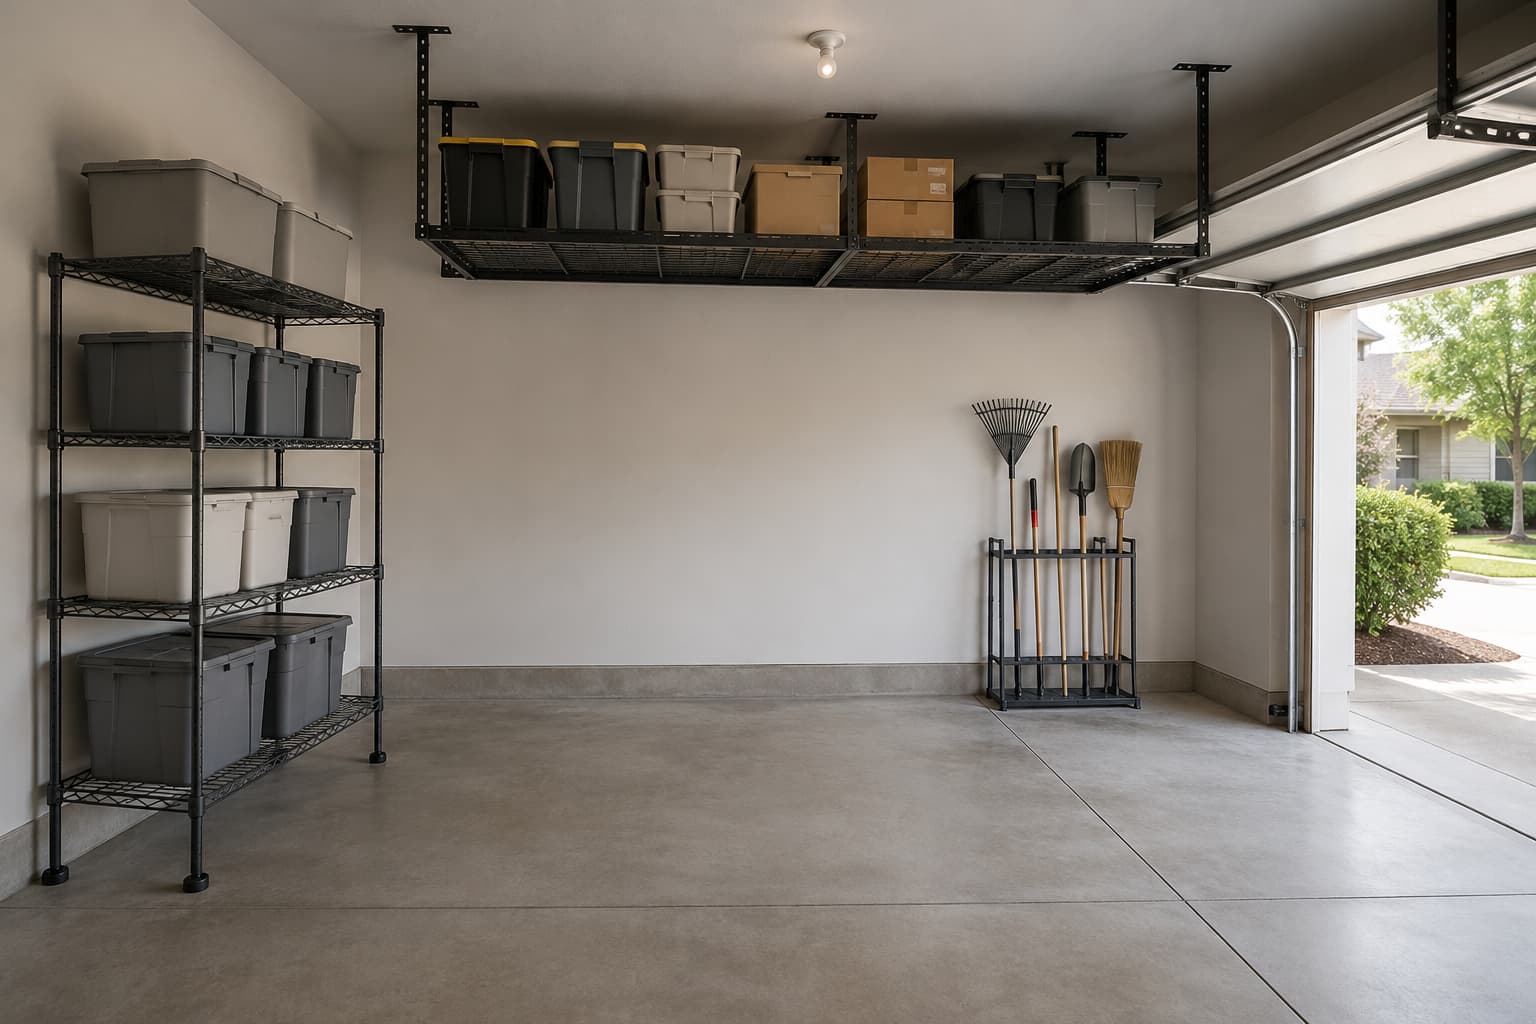
Tier 1 — Freestanding shelving (the workhorse)
Freestanding wire or steel shelving is the default. It stands on leveling feet, takes its load through its own frame, and doesn’t touch the wall except optionally to brace against tipping (and even that isn’t required for properly loaded units). The standard pick is a Seville Classics NSF-certified 5-tier 60″×18″ unit (View on Amazon[/amazon link]). NSF-certified frame, manufacturer-listed leveling feet, multiple variants available — pin down the 60″×18″ UltraDurable model specifically. For the wider context of how shelving fits into a tight floor plan, see the broader small-garage layout walkthrough.
A common reader question is whether freestanding shelving can support real load without wall anchoring. The manufacturer-listed capacities assume leveling feet on a level floor with proper weight distribution. Keep heavy items low, light items high, and the unit stays stable.
Tier 2 — Overhead ceiling racks (when joists are accessible)
Tier 2 is the ceiling. Overhead racks like the FLEXIMOUNTS 4×8 (View on Amazon[/amazon link]) mount into ceiling joists, leaving the wall plane completely untouched. The trade-off: you need joist access. If your ceiling is exposed framing (common in unfinished garages), joists are easy to find. If the ceiling is finished drywall, you’ll need a stud finder and a willingness to drill into the drywall to reach the joists. If the ceiling is metal-framed or a rented condo garage with a shared ceiling above, Tier 2 is off the table.
The FLEXIMOUNTS Classic Series 4×8 is compatible with joist spacing up to 24″ on center per the manufacturer, which covers the vast majority of US residential framing (16″ OC is standard). The manufacturer-listed capacity is 750 lb total — but this assumes correct joist mounting, level installation, and even weight distribution.
Tier 3 — Freestanding floor organizers (true no-drill option)
Tier 3 is for the reader who cannot drill anything — not the wall, not the ceiling. A floor-standing tool organizer like the StoreYourBoard Freestanding Tool Storage Rack (View on Amazon[/amazon link]) is purpose-built for long-handled tools (rakes, brooms, shovels, snow tools) and stands on its own footprint. It is NOT a shelving substitute — the manufacturer-listed capacity targets handle-mounted tools, not totes or boxes. Pair Tier 3 with Tier 1 (shelving for the bins, floor stand for the handles), don’t try to use Tier 3 alone for everything.
What to Measure Before You Buy
The single biggest reason readers regret a no-wall storage purchase is buying something that doesn’t fit the floor or ceiling space they actually have. Measure these before ordering.
Floor footprint
Walk the perimeter of the garage with a tape measure. For every linear foot of wall, note whether the floor in front of it is clear or blocked by a door swing, a vehicle wheel arc, or a stationary object (water heater, breaker panel, freezer). The freestanding shelving plan uses the floor footprint along clear perimeter only. Most readers also need at least 30 inches of clearance between a parked car door and any shelving — measure with the car parked in its normal spot. For a focused buying-side perspective, see the buying guide for small-space storage.
Ceiling clearance
Measure the ceiling height from floor to the lowest ceiling element (which may be the garage door track, not the actual joist). Overhead racks drop the storage zone below the joist — typical drops run 22 to 40 inches depending on the model. Subtract the rack drop from your ceiling height, then subtract another ~12 inches for the typical garage door header to confirm the rack does NOT cross the garage door track plane when the door is open. This is the most-missed measurement in the no-wall plan.
Joist access
If you’re considering Tier 2, get a stud finder and locate your joists. Note three things: are joists exposed or behind drywall, what’s the spacing (16″ OC is typical; ≤24″ OC is the FLEXIMOUNTS compatibility window), and what direction do they run (perpendicular to the garage door is most common). If you can’t confidently find joists yourself, hire a handyman for roughly the cost of one shelving unit; cheaper than dealing with a rack that pulls free of drywall.
Tools and Products That Help
For most no-wall garages, the three-tier plan above is enough. If you want more depth on specific reader constraints, two related guides go deeper:
- For renters — the renter-focused buying guide covers lease language, damage deposits, and which storage formats remove cleanly.
- For small spaces — the small-spaces buying guide covers compact layouts where the floor footprint itself is the bottleneck.
Pick whatever fits your specific layout. Measure first.
Common Mistakes
Mistake 1: Buying shelving deeper than your totes need
Standard wire shelving comes in 14″, 18″, and 24″ depths. The 18″ model is the most popular default but is shallow for 27-gallon storage totes (which run roughly 20″ wide on the short side — the tote overhangs the shelf by ~2 inches at the front). Measuring your bins before buying is non-negotiable for the no-wall plan because there’s no wall to push the overhang against — the front of the tote lives in your walkway.
Mistake 2: Putting the overhead rack over the garage door track plane
If the rack crosses the geometry of the garage door rails when the door is up, the door hits the rack. Always sketch the garage door’s up-position track on paper before deciding where the rack mounts.
Mistake 3: Treating a freestanding tool organizer as primary shelving
Tier 3 organizers are designed for long-handled tools, not bins. They have low total capacity and no flat shelf surface. If you try to stack totes on a floor tool stand, you’ll either tip it or break the manufacturer-listed weight rating. Pair with shelving — don’t substitute.
Mistake 4: Forgetting the man-door and vehicle door-swing arcs
Most readers measure the wall length and put shelving against it, then discover the man-door swings into that exact space. Recheck arcs before placing freestanding units. Same for the parked vehicle’s door — open it fully and measure the swept area.
FAQ
Can I really organize a garage without drilling into anything?
Yes — skip Tier 2 (overhead rack) and combine Tier 1 (freestanding shelving) and Tier 3 (floor tool stand). Tier 1 handles bins and boxes, Tier 3 handles long-handled tools. The trade-off is reduced ceiling utilization, but the gain is zero modifications to any surface. For a curated renter-friendly product roundup, see our guide.
Are overhead racks safe to install myself?
Manufacturer-listed capacities assume correct joist mounting, level installation, and even weight distribution. If you can confidently find joists with a stud finder and follow the manufacturer’s installation instructions step by step, DIY is reasonable. If you’re not sure, hire a handyman — the cost is small relative to the downside of a rack pulling free.
What if my ceiling joists run the wrong direction?
Most ceiling racks include mounting plates that work in both perpendicular and parallel joist orientations. Check the spec on the product page before buying. The FLEXIMOUNTS Classic Series, for example, lists joist-spacing compatibility — verify your spacing falls inside that window.
How much weight can a freestanding shelf hold without wall anchoring?
The manufacturer-listed per-shelf capacity assumes leveling feet on a level floor and proper weight distribution. Heavy items go on the lowest shelves; light items go up top. This keeps the center of gravity low and the unit stable without wall anchoring.
Can I move freestanding shelving once it’s loaded?
Not safely. Wire frames flex and leveling feet aren’t designed for rolling load. If you expect to move the unit, buy a variant with locking casters from the start.
Is a rolling tool cart better than a fixed floor stand?
It depends on whether you actively move tools to a workbench (rolling wins) or store them seasonally in place (fixed wins). For active workshop use, rolling. For seasonal yard tools, fixed is fine and usually cheaper.
Sources Reviewed
To put this guide together we reviewed manufacturer product pages and Amazon listings for the three picks referenced inline (Seville Classics UltraDurable 60″×18″ 5-Tier NSF wire shelving, FLEXIMOUNTS 4×8 Classic Series overhead rack, StoreYourBoard Freestanding Tool Storage Rack), cross-checking dimensions, joist-spacing compatibility, and manufacturer-listed capacity figures. We do not claim hands-on testing unless clearly stated; the guidance here synthesizes manufacturer documentation, retailer product pages, and recurring buyer-discussion patterns rather than independent measurement.
Related Guides
- How to organize a small garage step by step
- Best garage storage for renters
- How to choose garage storage for renters
- How to choose garage storage for small spaces