How to Organize Christmas Decorations in Your Garage
Disclosure: This article contains affiliate links. If you buy through these links, we may earn a commission at no extra cost to you. We do not claim hands-on testing unless clearly stated.
The garage is the only room with enough space for Christmas decor, and the worst room for storing it. Items come out for one month and disappear chaotically for eleven — anything not sorted, labeled, and located intentionally gets crushed, lost, or thrown out by accident.
This guide is a four-step method (sort, compartmentalize, color-code, locate) plus three containers that match the three real failure modes — broken ornaments, mid-season retrieval confusion, and the tree itself. It does not cover overhead-rack installation (see our overhead seasonal storage how-to), gasketed bin selection for damp garages (see weather-sealed bins for seasonal decor), or year-round seasonal flow (see rotating seasonal items across the year).
The Four-Step Method at a Glance
Every system that holds up across multiple years follows the same four moves, in this order. Skip a step and the system collapses by year three.
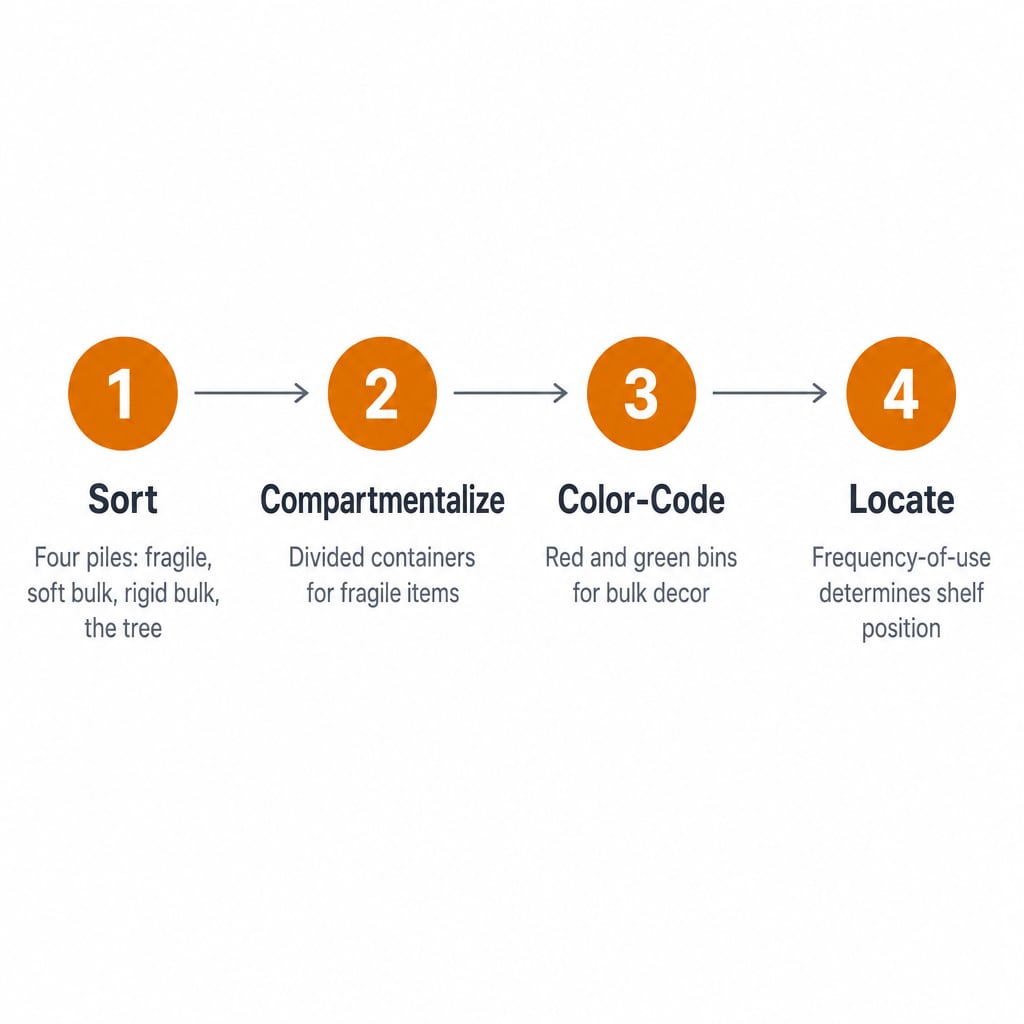
- Sort — split everything into four piles by fragility and frequency-of-use. Not by holiday section.
- Compartmentalize — fragile items get a divided container before they get a bin.
- Color-Code — bulk decor goes into red or green bins. Color is readable across a dim garage; ink isn’t.
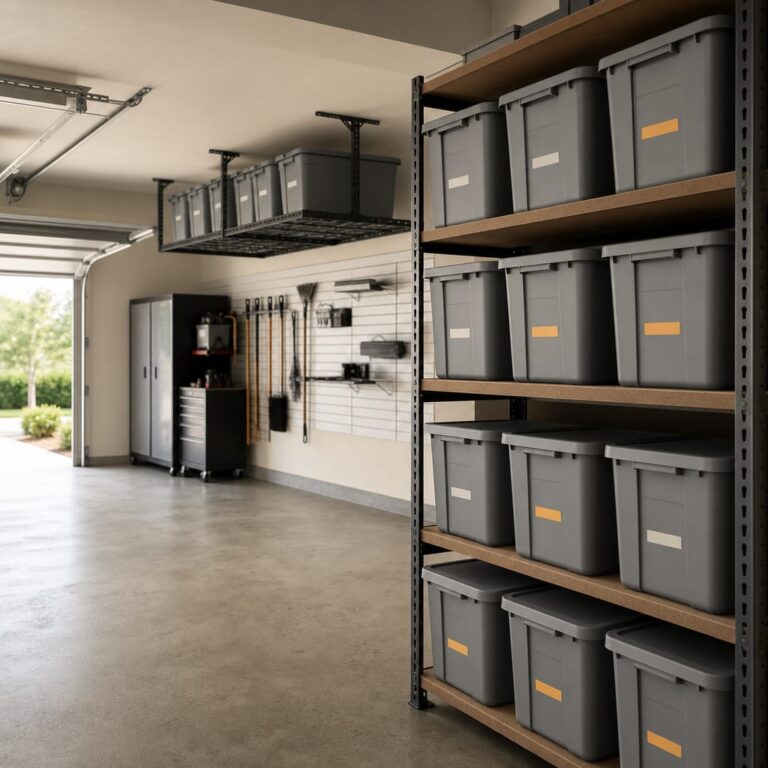
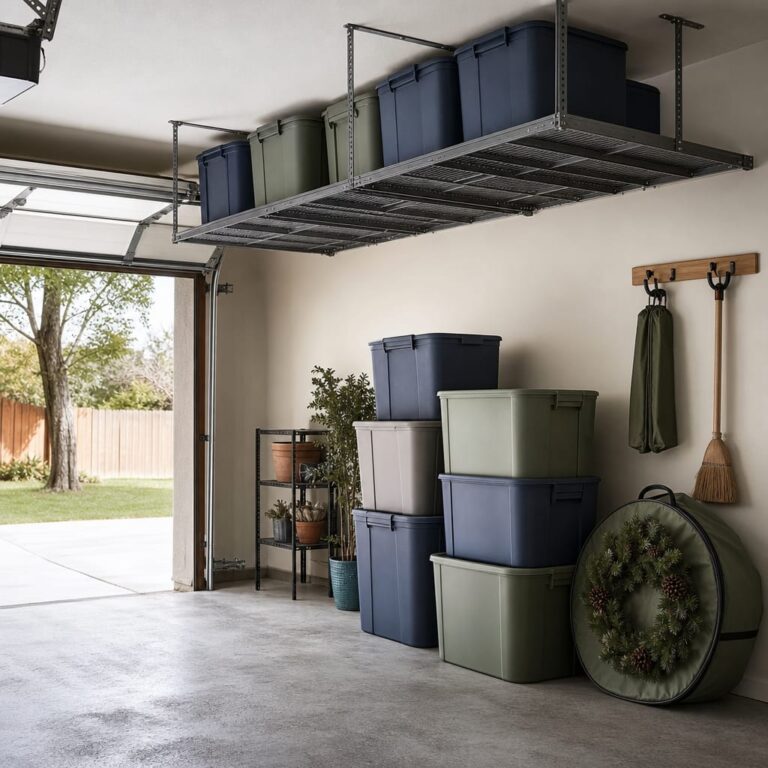
- Locate — bins live on the shelf or rack by frequency of use. Tree on top, ornaments second, bulk decor third.
Each step below maps to one of these moves and recommends the specific container that solves it.
Step 1 — Sort Before You Buy a Single Bin
Most people buy bins first and try to fit decor into whatever they bought. Reverse the order: empty the pile onto the floor and make four piles.
- Fragile — glass ornaments, ceramic figurines, hand-painted decor, nativity sets.
- Bulk soft — tree skirts, stockings, fabric garlands, table runners.
- Bulk rigid — light reels, animatronic decor, large plastic figurines, oversized wreath frames.
- The tree — the artificial tree in its disassembled sections.
Then donate or recycle three things now: lights that don’t work (you will not fix them in eleven months), decorations no one remembers buying, and duplicates. This step alone removes 20–40% of the volume you’d otherwise store.
Step 2 — Compartmentalize the Fragile Items
The most common Christmas-storage failure is ornaments rattling in a tote. Round shapes leave gaps, gaps allow movement during stacking, and movement chips paint and breaks hooks. A flat-bottomed bin doesn’t help — the problem is the gaps, not the bin. The fix is a divided container with one compartment per ornament.
Best for Fragile Ornament Protection: HOLDN’ STORAGE Christmas Ornament Storage Box
Best for: Households with a mix of glass, ceramic, and painted ornaments going to overhead storage twice a year.
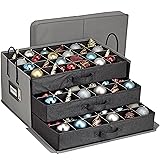
Short verdict: Three removable trays with adjustable dividers — each ornament gets its own pocket, which is the format that genuinely prevents chipping during the round trip to overhead storage and back.
Why it stands out
Most ornament containers have either fixed compartments (so only one ornament size fits) or none at all (which makes them just a bin with the same gap problem). The HOLDN’ format uses sliding dividers in three stacked trays, so you can configure each tray for the ornament size it holds. For deeper alternatives — wreath containers, tree-figurine boxes, specialty hard-shell storage — see our seasonal-storage solutions guide.
Key specs and buyer warning
The manufacturer lists capacity as 72 ornaments at approximately 3-inch round per pocket. Three removable trays, adjustable dividers, internal metal frame for stacking under moderate loads. The 72-ornament figure assumes 3-inch round ornaments distributed evenly — oversized hand-blown pieces, large ceramic figurines, or asymmetric shapes eat into the count quickly. Measure your tallest and widest ornament before assuming the box fits your collection.
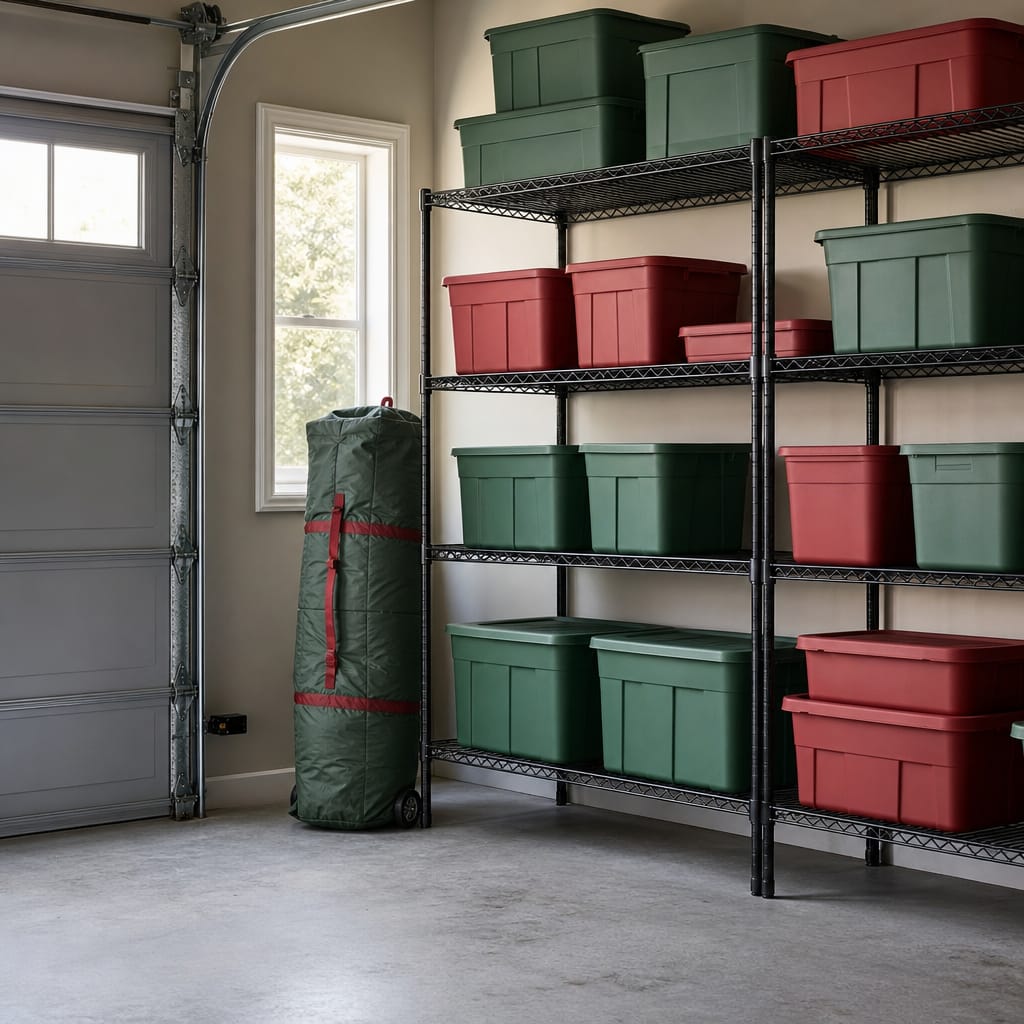
Step 3 — Color-Code the Holiday Bins
Labels fail in garages. Tape peels in summer humidity, Sharpie fades, and adhesive labels lose their stick after one freeze-thaw cycle. By year three, every bin says “MISC” or has a peeled-off rectangle where a label used to live.
Color-coding solves the problem at a different layer. You see a Christmas-colored bin and know what’s inside without reading anything — lighting doesn’t matter, ink doesn’t matter, a fallen label doesn’t matter. A red-and-green Christmas-themed four-pack beats six clear bins with handwritten labels every time.
Best for Color-Coded Holiday Binning: HOMZ 4-Pack Holiday Storage Containers, 18 Gallon
Best for: Households with moderate general Christmas decor (skirts, garlands, larger decor, light reels) you want to find without opening every lid.

Short verdict: Four green-base / red-lid bins make Christmas decor visually obvious in a dim garage — no labels needed.
Why it stands out
18 gallons is the practical sweet spot. Smaller bins fill too fast and leave you with eight half-decor bins; larger bins get too heavy to overhead-lift safely.
Key specs and buyer warning
The manufacturer lists 18 gal per bin, four bins per pack with green base and red lid (Christmas colorway), snap-on (not gasketed) lids, stackable when full. Snap-on lids are the right trade-off for cost and ease of use, but they are not a moisture barrier. If garage humidity climbs above 70% in summer, or you store on a concrete floor that wicks moisture, the inside of the bin will track the outside humidity within days. For paper decor, textile garlands, or anything mildew-sensitive, pair these with a gasketed tote — see our weather-sealed bins for seasonal decor guide. Confirm the green-and-red colorway on the listing before ordering.
Step 4 — Bag the Tree and Locate Everything Together
The artificial tree doesn’t fit any standard bin. Setting it down in pieces on the garage floor for eleven months guarantees a missing branch tip, dust in the foliage, and a tangle of stand parts. A wheeled bag that closes solves both the carrying and the storage.
Best for Artificial Tree Storage: ZOBER 600D Oxford Rolling Christmas Tree Storage Bag, 9 Ft
Best for: Households with an artificial tree that disassembles into 2–3 sections totaling 8–9 ft in length.

Short verdict: 600D Oxford fabric, dual handles, and wheels solve the carrying problem; the zip closure solves the storage problem.
Why it stands out
600D Oxford is the tear-resistance benchmark for tree bags. Wheels plus dual handles let one person move the loaded bag across the garage floor without dead-lifting.
Key specs and buyer warning
The listing states the bag fits a 9-ft artificial tree, with 600D Oxford polyester, dual side handles plus wheels, and heavy-duty two-way zippers. Confirm your disassembled tree’s longest section is under approximately 60 inches before buying — pre-lit trees with rigid mid-sections can exceed the bag’s interior length even when sold as “9 ft”. Measure with a tape, not by eyeballing the box.
After the tree is bagged and the rest binned, bins live on the shelf or rack by frequency of use. Tree on top (last out, first back in). Ornament container second. Color-coded bins third. For the overhead-rack installation itself — joist verification, capacity math, safety — see our overhead seasonal storage how-to.
What to Measure Before Buying Any of These
Most failures happen because the bin doesn’t fit the space. Five measurements, three minutes total:
- Longest disassembled tree section — decides tree bag size.
- Tallest ornament including stem or hook — decides ornament-box compartment depth (the hook adds 1–2 inches most people forget).
- Available shelf depth — decides bin width. A bin hanging 2 inches off the front edge will get knocked off.
- Vertical space between shelves — decides bin height. Most snap-lid bins are 12–14 inches tall.
- Path from garage door to shelf — decides whether you can carry, or need wheels.
Common Mistakes to Avoid
Stacking ornament boxes UNDER tree bags
The tree bag is the heaviest item in the system. Putting the ornament container under it compresses the dividers and breaks ornaments anyway. Reverse the order: tree on top, ornaments below or beside on the same shelf.
Taping labels to bin lids
Tape fails in garage temperatures. Within one summer cycle, the label is on the floor or stuck to a different bin. Trust the color-coding and only label the bin that needs a content callout.
Vacuum-bagging strung lights
Vacuum bags work for soft compressible items like fabric tree skirts — see the soft-goods section in our overhead seasonal storage how-to. Strung lights are the wrong item type entirely: vacuum pressure damages bulbs, bends wire frames, and tangles the strings. Lights belong on reels.
FAQ
Can I store Christmas decorations in an unheated garage?
For plastic decor, artificial trees, and metal items, generally yes. For paper decor, candles, anything chocolate-fragranced, and electronics with internal batteries, no — those belong indoors. Real-world performance depends more on humidity than temperature.
How do I keep mice out of Christmas storage bins?
Two layers: gasketed totes (snap-on lids and soft bags are not pest-proof — see our gasketed totes guide) plus elevation off the floor. Every foot off the ground reduces nesting probability.
Should I keep the original ornament boxes or transfer everything?
Transfer to a divided container. Cardboard degrades in garage humidity within 2–3 years and doesn’t stack reliably.
How many bins do I actually need?
For a typical 2-bedroom household: 2 color-coded bins (one red, one green), 1 ornament container, 1 tree bag, 1 wreath box. Five containers total. Anything more is over-buying.
When should I organize — December or January?
January. You’ve just seen what worked, broken ornaments are obvious, and the items are out and visible. Doing it in December means organizing what’s already on display, which is impossible.
Sources Reviewed
We reviewed manufacturer product pages and Amazon listings for the three featured products and synthesized recurring patterns in publicly-visible buyer feedback. We do not claim hands-on testing. Capacity figures are framed as manufacturer-listed; real-world performance depends on how containers are loaded and the garage’s climate.
Related Guides
- Storing all seasonal items in a garage
- Choosing seasonal storage solutions
- Weather-sealed bins for seasonal decor
- Rotating seasonal items across the year