How to Plan Garage Organization Zones
Last updated:
Disclosure: This article contains affiliate links. If you buy through these links, we may earn a commission at no extra cost to you. We do not claim hands-on testing unless clearly stated.
The most expensive garage organization mistake is buying the storage products first and then trying to fit them into the space. Most readers do exactly this — they grab a shelving unit on sale, take it home, and discover it doesn’t fit the wall they planned for, or it blocks the car door, or it leaves a useless gap on either side. The right sequence is zones-first, products-second. This guide walks through the six universal garage zones, the measurements you need to take before buying any storage product, and how to avoid the layout mistakes that lock people into a garage that never feels organized.
What this guide does not cover: specific product recommendations for each zone (covered in the broader utility-storage buying guide and the cluster-specific BGs linked in Related Guides), or major garage renovation work.
Quick Recommendation by Garage Type
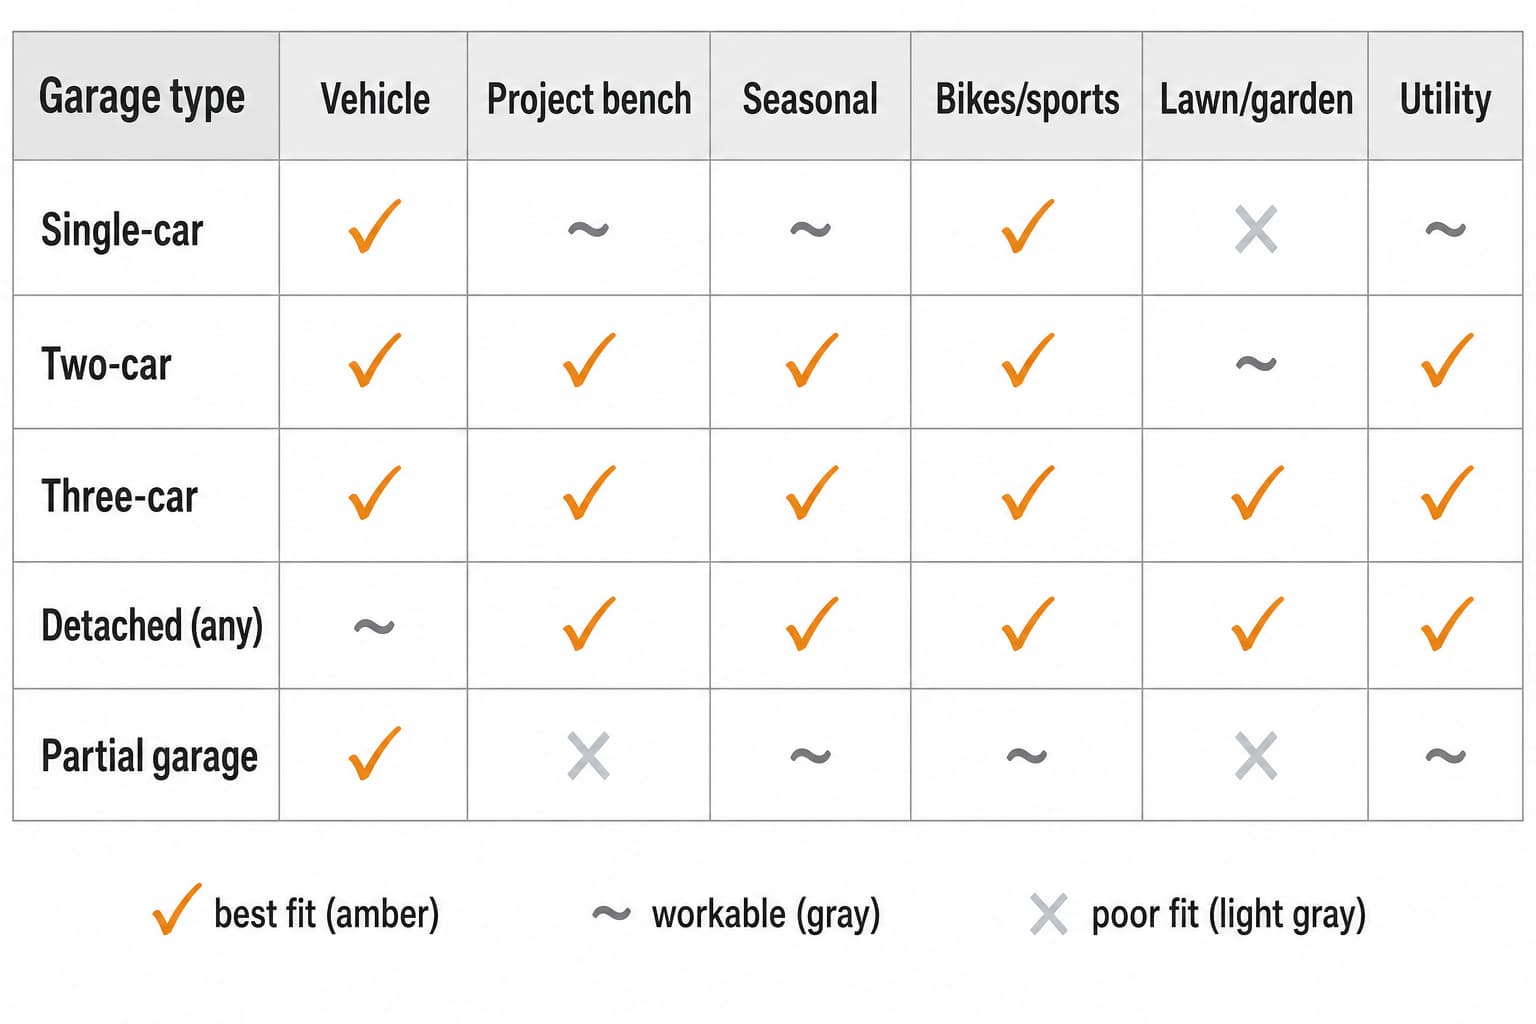
| Garage type | Zones to plan | First action |
|---|---|---|
| Single-car | 4 zones (vehicle, active project, seasonal, bikes/sports) | Measure wall around the parked car first — usually less than you think |
| Two-car | 6 zones (all) | Decide which side wall gets the project zone; the other gets seasonal/bikes |
| Three-car | 6 zones with a workshop bay | The third bay typically becomes a dedicated workshop zone — don’t dilute |
| Detached garage | 6 zones, climate-adjusted | Cold-sensitive items go inside; the detached garage gets durable storage only |
| Partial garage / carport | 2-3 zones, weather-protected only | Choose 2 zones that work — don’t try to force 6 into a half-space |
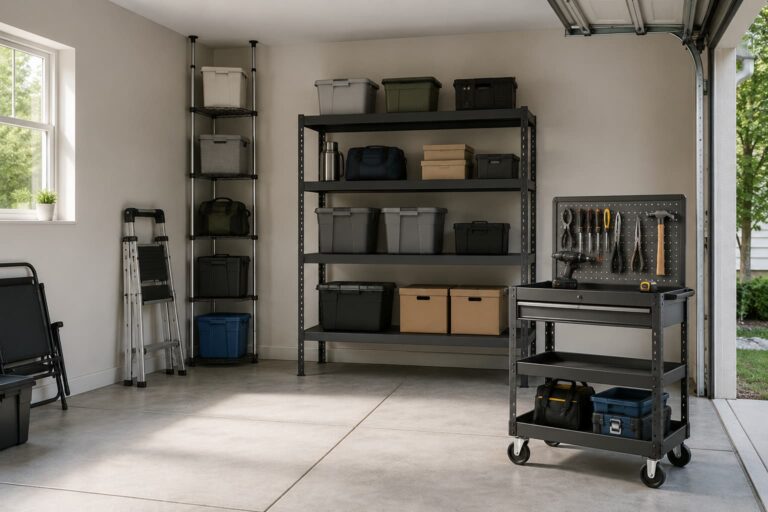
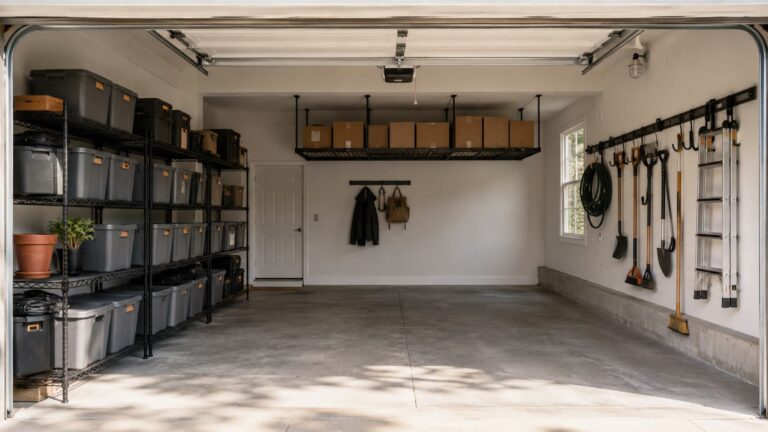
The Six Universal Zones
Every garage organization plan reduces to six zones, regardless of garage size or layout. The art of zone planning is matching each zone to the wall, corner, or overhead space where it physically belongs — not where you’d like it to be.
Zone 1: Vehicle parking
The largest single zone in most garages. Defined by the parked vehicle plus the door swing arc on both sides plus walking clearance to enter/exit. This is the zone you DON’T put storage in — it’s the zone everything else has to work around. For small garages where vehicle parking dominates, see how to organize a small garage.
Single-line rule: measure the parked car with both doors open. The footprint plus the swing arcs is the no-storage zone.
Zone 2: Active project / workshop
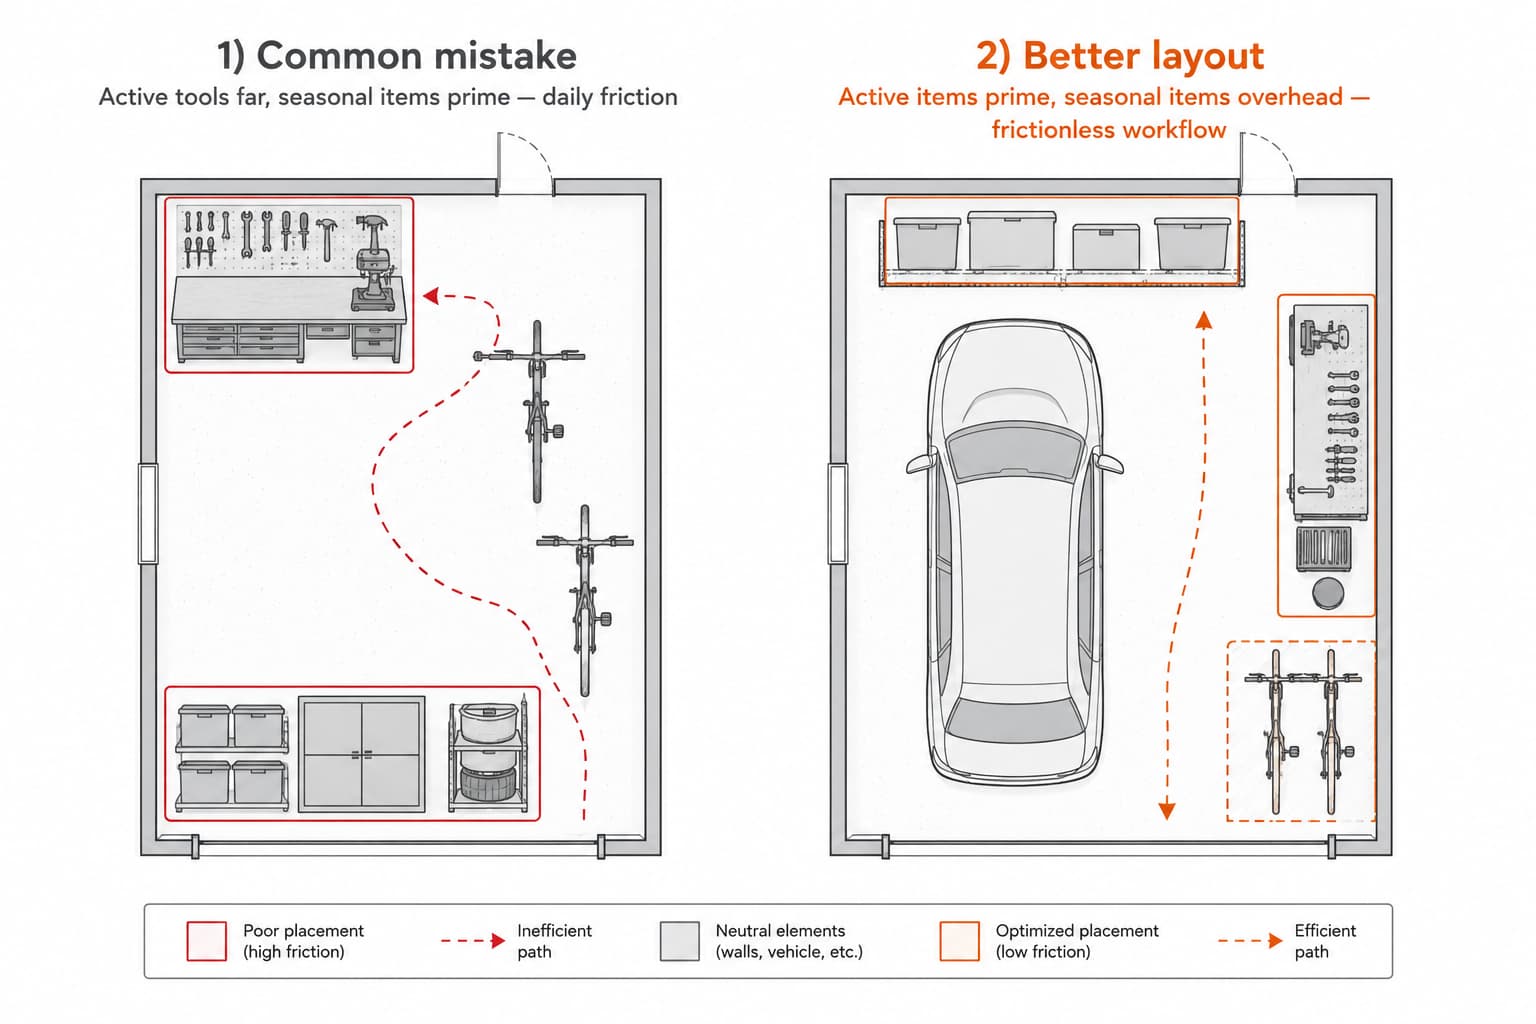
Where you actually use tools — bench, vise, miter saw, frequently-used hand tools. This zone needs prime wall area (not the back corner), eye-level reachability, and good lighting. For the system architecture decision (pegboard vs. slatwall vs. magnetic), see how to choose a garage tool organization system.
Single-line rule: put this zone within 6 feet of where you stand while working — anything farther turns into “I’ll go get it later”.
Zone 3: Seasonal storage (long-term)
Christmas decorations, summer beach gear, snow shovels in July, the camping tent. These items move once or twice a year — the zone they live in can be hard-to-reach (overhead racks, top shelves, back corners) without affecting workflow. For overhead installation specifically, see how to install overhead garage storage.
Single-line rule: if you touch it less than 4 times a year, it belongs overhead or in the back corner.
Zone 4: Bikes and sports gear
Bikes, helmets, balls, hockey sticks, ski equipment. Frequency varies wildly (kids’ bikes daily; adult ski equipment annually) — split the zone if needed: active bikes near the door, seasonal gear in deeper storage.
Single-line rule: active bikes near the garage door; seasonal sports near (or in) Zone 3.
Zone 5: Lawn and garden
Mower, weed trimmer, garden hose, fertilizer, hand garden tools. Often best near the door that opens to the yard. Some items (fuel, chemicals) need lockable storage and belong partially in Zone 6 instead.
Single-line rule: lawn equipment lives where it exits — closest to the door it’ll be wheeled through.
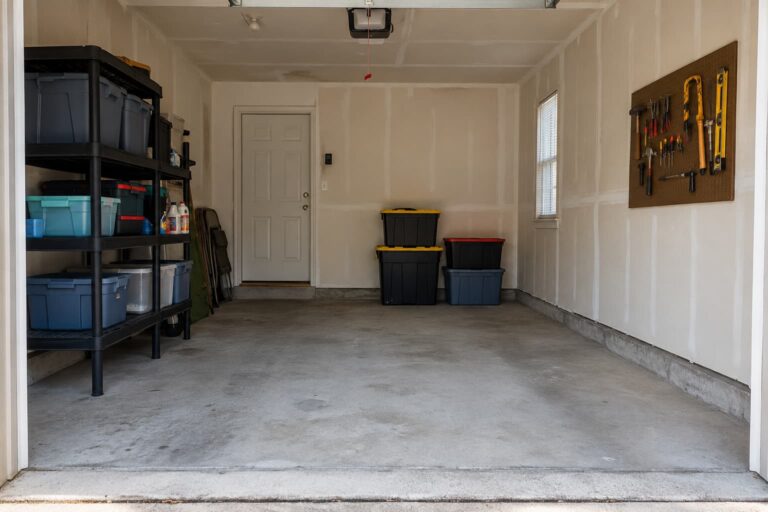
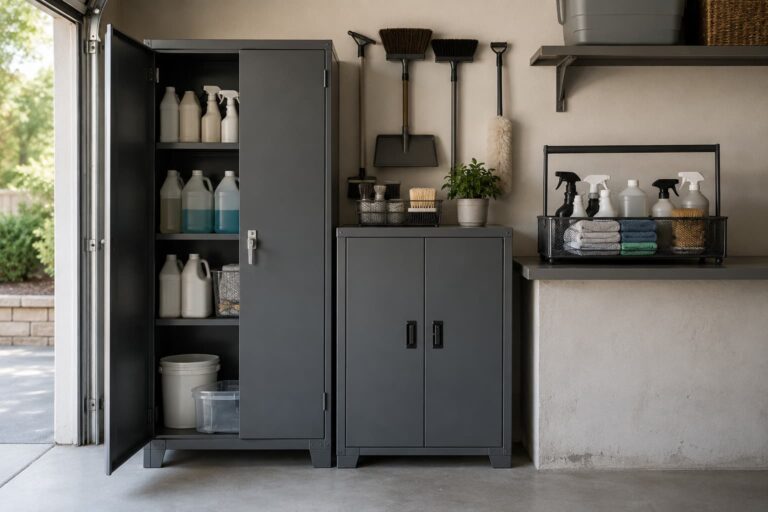
Zone 6: Utility (supplies and consumables)
Cleaning supplies, automotive fluids, paints, lubricants, light bulbs, batteries. The format question (open shelf vs. cabinet vs. lockable) is answered in the broader utility-storage buying guide. For zone-planning purposes, treat utility as wanting closed/lockable storage in a low-traffic spot.
Single-line rule: utility goes in the lowest-traffic, child-inaccessible spot in the garage.
Key Factors When Mapping Your Zones
Six factors decide whether your zone plan will actually work.
Garage type (1/2/3 car, attached/detached)
A single-car garage rarely fits all six zones — be honest about which 4 you need. A three-car garage almost always has room for a dedicated workshop bay. A detached garage has a different climate profile (more humidity, more temperature swing) and shouldn’t hold heat- or cold-sensitive items. For small-garage specifics, see the small-garage buying guide.
Climate (insulated vs. uninsulated)
Uninsulated garages routinely hit 100°F-plus in summer and 20°F in winter (US climate ranges). Paint, automotive fluids, electronics, anything battery-powered — all degrade fast in those swings. Cold-sensitive items belong inside the house, or in a partially insulated section of the garage if you have one.
Vehicle door swing — the silent wall-area thief
Sit in the driver’s seat with the door fully open and measure the arc traced by the outer door edge. That arc is the no-storage zone on the wall closest to the vehicle. In a typical two-car garage, vehicle door swing eliminates 20-30% of the usable wall area — most plans forget to subtract this and end up with storage that the car door slams into.
Workflow priority
Which zone gets the prime wall (longest, best-lit, easiest reach)? The answer depends on how you actually use the garage. A hobbyist’s prime wall is Zone 2 (project bench). A family’s prime wall might be Zone 4 (bikes — daily use). A gardener’s might be Zone 5. There’s no universal answer — pick based on actual frequency of use.
Future-proofing
Will your zone needs change in 2-3 years? Kids’ bikes get bigger. Hobbies change. Cars change (an electric vehicle changes the workshop chemical inventory dramatically). Build modularity into the zone plan: prefer adjustable shelving over fixed shelving, modular hooks over screwed-in racks, reconfigurable cabinets over single-purpose units.
Reachability
The eye-level rule: daily items at eye level (4.5 to 6 feet up), weekly items below eye level, monthly items above eye level, seasonal items overhead. Reaching for what you use stops being a problem when the layout matches the frequency.
Measurement Checklist Before You Start
Five measurements before you commit to any zone plan or buy any storage product.
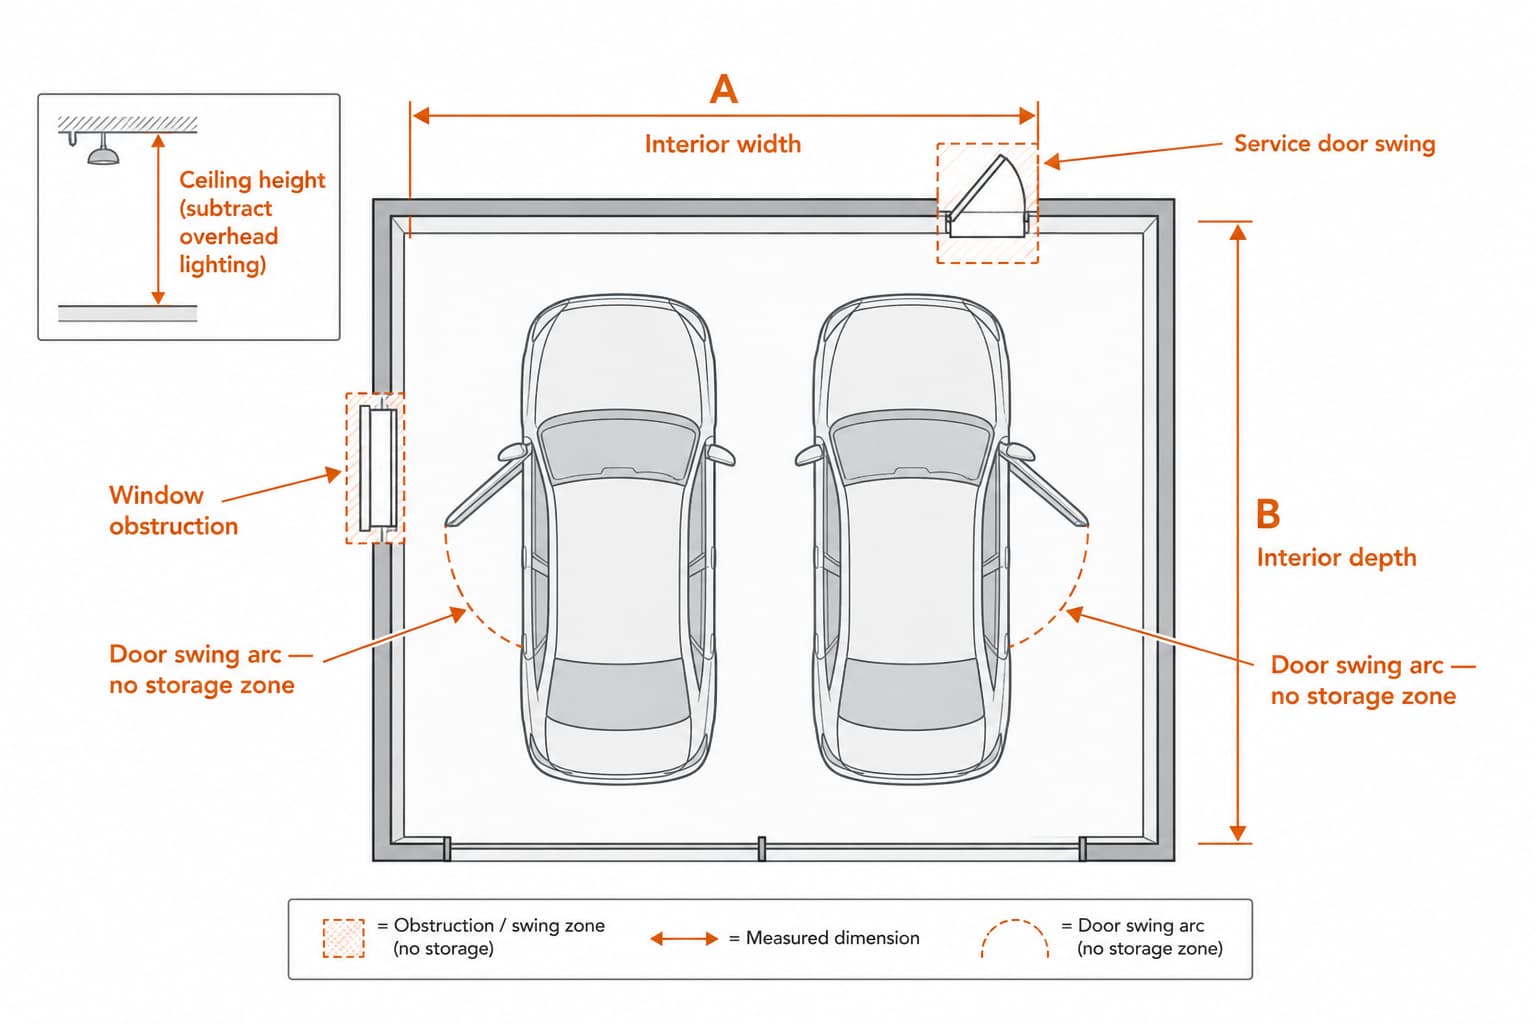
- Interior width and depth — the garage’s actual rectangular footprint. Measure from wall to wall, not from drywall edge (assume drywall is ~1/2 inch thick on each wall — that’s the lost area).
- Ceiling height, minus overhead obstructions — floor to ceiling, then subtract the lowest hanging obstruction (light fixtures, garage door track, joist drops).
- Each vehicle’s parked footprint and door swing — park, open both doors fully, measure both the vehicle’s outline and the door arc.
- Window and service-door obstructions — windows, service doors, electrical panels, water heaters. None of these can be obstructed by storage.
- Stud spacing — find studs (16 inches on center in standard US residential construction; 24 inches possible in older homes). This determines what can mount to which wall later.
A laser distance measure is the practical tool for this work — measuring a 20-foot garage wall with a tape measure alone is a two-person job. The featured pick below covers this.
Common Mistakes to Avoid
Five mistakes show up over and over.
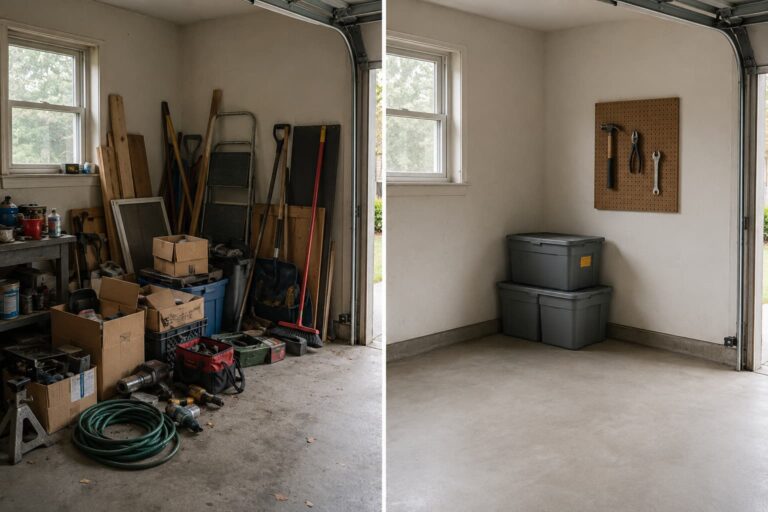
- Buying storage products before mapping zones. The single most common — and most expensive — mistake. The cabinet looked great at the store; in your garage, it blocks the car door. Map zones first.
- Putting active tools in the back corner. Active tools belong in Zone 2 with eye-level prime-wall placement. The back corner is for Zone 3 (seasonal). Reversing these is the layout choice that turns a “10-minute project” into “30 minutes because I had to go around the car to get the screwdriver”.
- Forgetting the vehicle door arc. A storage unit that fits the wall perfectly when the garage is empty will get hit by the car door every time the driver exits. Always measure the arc.
- Using overhead racks for daily items. Overhead is Zone 3 only — seasonal, long-term, low-frequency. Daily items overhead means a ladder every time you need them. For correct overhead use, see how to install overhead garage storage.
- Treating storage capacity as the only metric. A 3000-lb-capacity shelving unit that’s in the wrong zone is worse than a 300-lb unit in the right zone. Zone placement matters more than capacity for most residential garage use.
Safety and Installation Notes
When you start mounting storage products into zones, the standard wall-mounting rules apply: find studs, use the right anchors for your wall type, do not exceed manufacturer-listed capacity. Overhead racks have additional considerations covered in their dedicated installation guide.
For tall shelving in Zones 2-6, anchor the top of any unit taller than 60 inches to a wall stud. Free-standing tall units can tip when reaching for top-shelf items.
Featured Picks
This is a methodology guide, so featured picks are minimal — only the two tools most directly tied to the zone-planning workflow.
For zone measurement: Bosch GLM 50C Bluetooth Laser Distance Measure
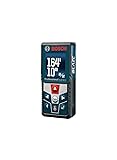
Branded laser distance measure with 165-foot range and manufacturer-listed accuracy of plus or minus 1/16 inch. Bluetooth transfers measurements to the Bosch MeasureOn app for layout planning, which is a meaningful workflow advantage when you’re mapping multiple zones on paper or in a sketch app. Pocket-size, runs on 2 AAA batteries. Not the cheapest laser measure on Amazon, but Bosch’s brand stability and the Bluetooth integration are the editorial differentiators. A tape measure works for a single-zone install; once you’re planning 4-plus zones, a laser pays back in time saved.
For modular zone-spanning storage: MonsterRax Modular Garage Shelving 5-Tier 18-by-36-by-72 inch

The defining feature is configurability — assembles as one 72-inch 5-tier unit, OR splits into two 36-inch units that can live in two different zones. This is the editorial point for a zone-planning guide: one purchase that supports zone layouts that change as your needs evolve. Powder-coated steel, 300 lb per level manufacturer-listed, 1.5-inch shelf increments. MonsterRax is a recognized brand in the garage storage category. For more shelving alternatives beyond this single pick, see the dedicated shelving roundup.
FAQ
How many zones does a typical 2-car garage need?
Most two-car garages benefit from planning all six zones, with vehicle parking dominating the central floor area and the remaining five zones spread across walls and corners. If you’re starting from a fully cluttered garage, plan all six but execute them one at a time — picking the zone that solves the biggest daily friction first.
What’s the first zone I should plan?
Zone 1 (vehicle parking), because everything else has to work around it. Measure the parked vehicles with doors fully open; the outline plus door arcs is the no-storage zone. Once you know what’s left, you can place the other five zones in the remaining space.
Can I have a workshop zone if I park two cars?
Yes, but you’ll lose 18-24 inches of one side wall to the bench depth, and you need to verify the bench doesn’t intrude into the vehicle door swing arc. A wall-mounted folding bench is the typical solution for tight two-car garages — folded against the wall when not in use, deployed for projects.
How do I plan zones if my garage is detached and uninsulated?
Detached garages have wider temperature swings, more humidity, and (often) more pest activity. Zone 3 (seasonal) and Zone 6 (utility, especially chemicals) work fine. Zone 2 (active project) works if you don’t mind seasonal discomfort. Electronics, paints, and battery-powered tools belong inside the house, not in a detached unheated garage.
Do I need to measure before buying any storage?
Yes. Returns are expensive in time and effort even when Amazon takes the product back, and a storage unit that physically fits but blocks the vehicle door is functionally useless. Measurement is the cheapest insurance against buying mistakes.
How often should I re-evaluate my zone layout?
Annually, or when a major life change happens (new kid, new hobby, new vehicle, move). The six-zone framework stays stable, but which zone occupies which wall often needs to shift as your usage patterns change.
Sources Reviewed
For this buying guide, we reviewed manufacturer documentation, retailer product pages, residential garage layout references, and recurring patterns in public discussions about garage organization workflow.