How to Set Up a Garage Workshop Area
Last updated:
Disclosure: This article contains affiliate links. If you buy through these links, we may earn a commission at no extra cost to you. We do not claim hands-on testing unless clearly stated.
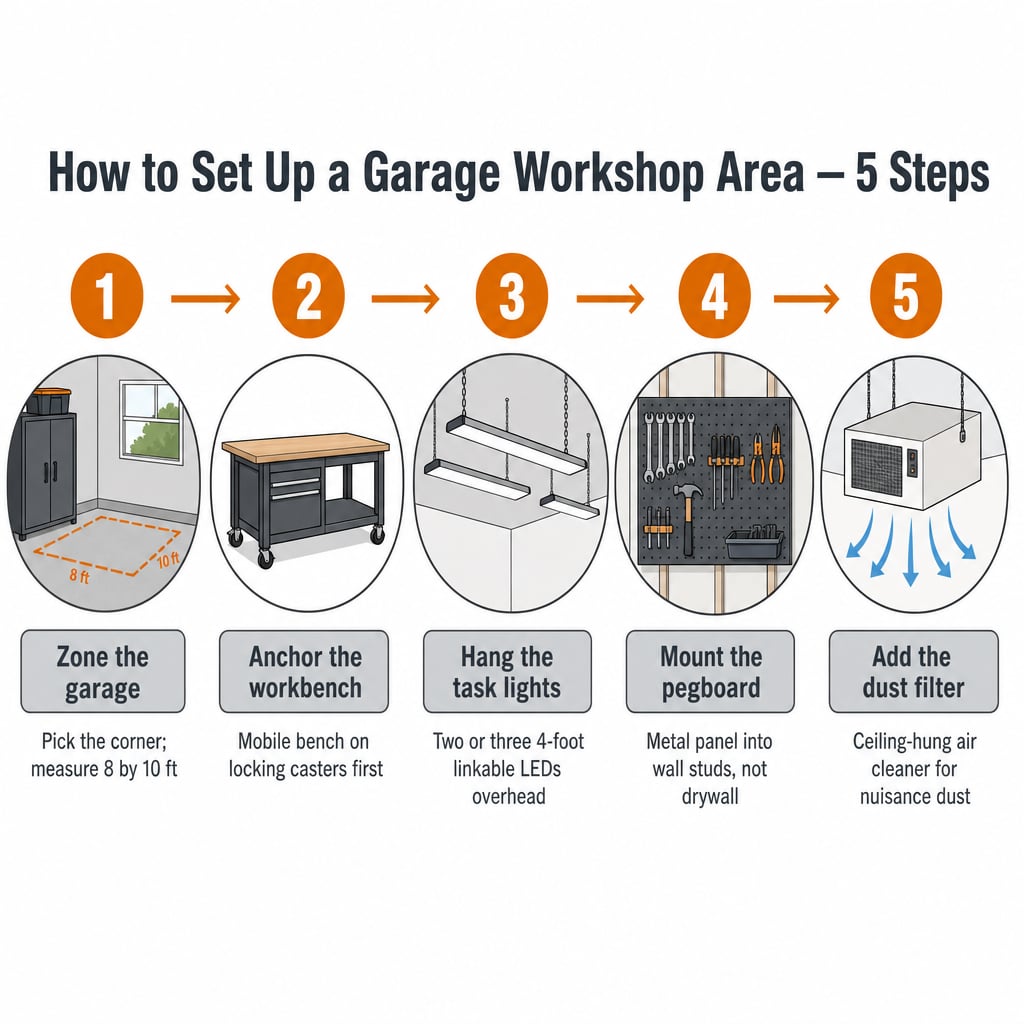
Most readers shopping for a workshop setup start with the workbench and treat the garage as a variable. Reverse the order. A workshop AREA — not a full workshop — lives inside an existing multi-use garage, sharing floor with cars, bins, and seasonal clutter. The question is how to carve out about a quarter of the garage and equip it without losing your parking spot. This guide walks through the five components the area needs, the install order, and the measurements to take first. We do not cover power-tool selection or full-shop conversions — for that, see our companion guide to setting up a complete garage workshop.
Quick Recommendation by Use Case
| Use case | Best workshop-area approach | Why |
|---|---|---|
| Renter, no drilling allowed | Mobile workbench plus plug-in LED lights only | No wall anchoring; everything is freestanding or hangs from existing fixtures |
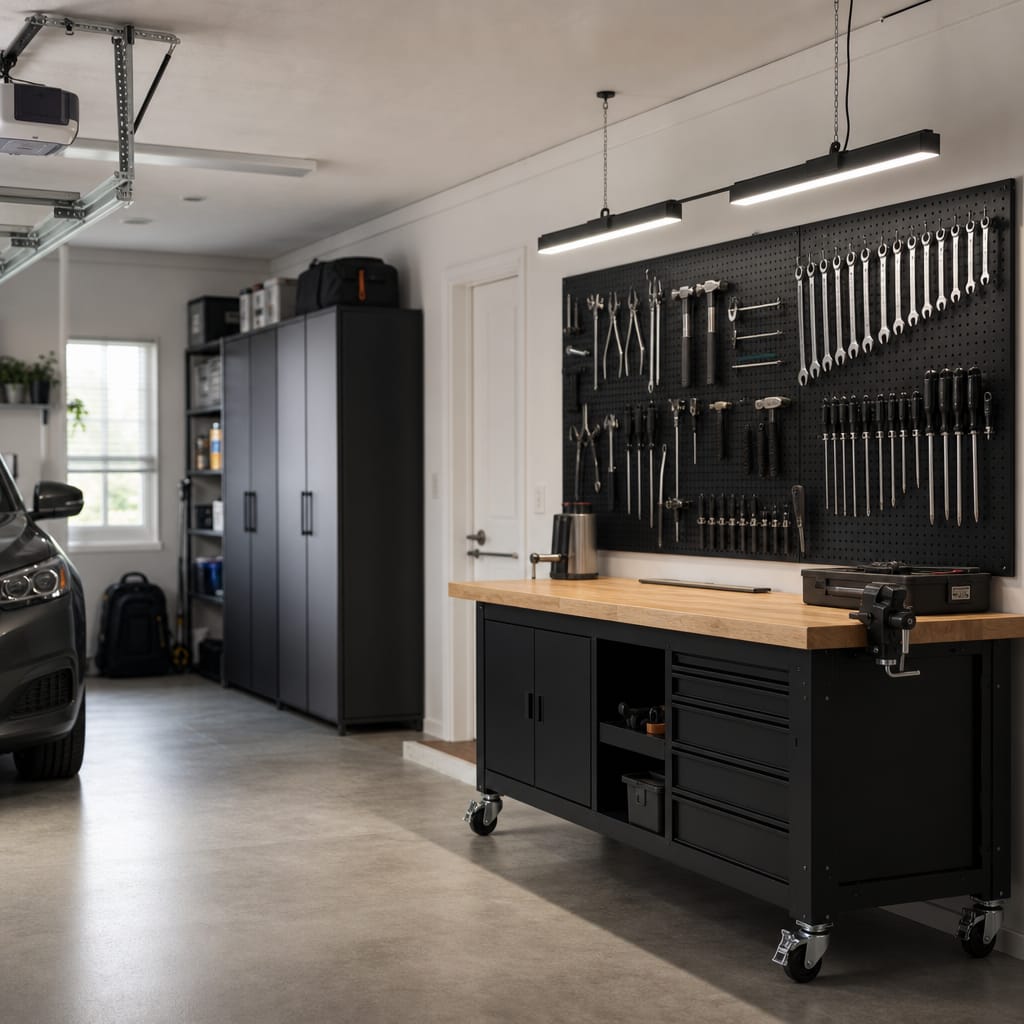
| 1/4-garage zone in a 2-car garage | Mobile workbench, pegboard wall, magnetic strip, overhead LEDs | The standard buildout; covers the four work surfaces every reader needs |
| Ceiling under 8 ft | Skip the ceiling-hung dust filter, prioritise wall-mounted task lights | Hanging clearance is the constraint; air filter sits on a shelf instead |
| Shared with two cars plus storage | Compact mobile bench plus magnetic strip plus task lights | Wall real estate is scarce; magnetic strip eats less wall than full pegboard |
| Hobby woodworker, occasional sanding | All five components plus filter higher CFM | Dust drift into the rest of the garage is the priority constraint |
If you only read one section, read the measurement checklist below. The most common buyer mistake is shopping for a workbench before measuring the zone — and discovering at install time that the bench plus walking aisle plus car door don’t all fit. For deeper workbench picks, see our roundup of garage workbenches with storage.
Key Factors to Consider
Zone size and placement
A workshop AREA in a 2-car garage typically claims about 1/4 of the floor — roughly 8 ft by 10 ft. That fits a 41-inch mobile bench, a 4-ft pegboard above it, and a 4-ft walking aisle between the bench and the parked car. Smaller than 6 ft by 6 ft, the zone feels cramped for any project beyond hand-tool assembly.
Floor surface and slope
Most garage floors slope toward the door, typically 1 to 2 inches over 20 ft. A mobile bench on locking casters compensates because each caster can be levelled; a fixed-leg bench wobbles. Set a 4-ft level on the planned spot — if slope exceeds 1/2 inch across the bench footprint, plan shims or a mobile bench.
Wall and ceiling anchors (studs, joists)
Wall storage — pegboard, slatwall, magnetic strips — needs anchoring into studs, not drywall alone. Most US garages use 16-inch on-center stud spacing. Stud finder, painter’s tape mark, pilot drill before lag screws. Block or concrete walls need masonry anchors. If you cannot drill, the zone is workbench plus magnetic-base storage only.
Lighting
The default garage fixture is fine for parking and useless for fine work. The area needs daylight-temperature task light over the bench — usually two or three 4-foot linkable LED shop lights. Plug-in linkable fixtures avoid hardwiring. Aim for at least 4,000 lumens per linear foot of bench.
Power and outlets
The area needs at least one accessible outlet within 6 ft of the bench. Anything beyond outlet POSITION — adding circuits, sizing breakers, GFCI protection, running wiring — needs a licensed electrician. Do not extend amperage with daisy-chained power strips. If the zone has no outlet within reach, the next step is calling an electrician.
Dust management
Even hand-tool work produces fine dust that drifts. In a multi-use garage it ends up on the car and bins. A ceiling-hung air filter rated for the zone’s square footage cuts drift substantially. This is dust nuisance, not respiratory protection — hazardous particulates (lead paint, treated lumber, MDF in volume) need a respirator and a project plan beyond this article.
Workshop-Area Components Explained
The mobile workbench
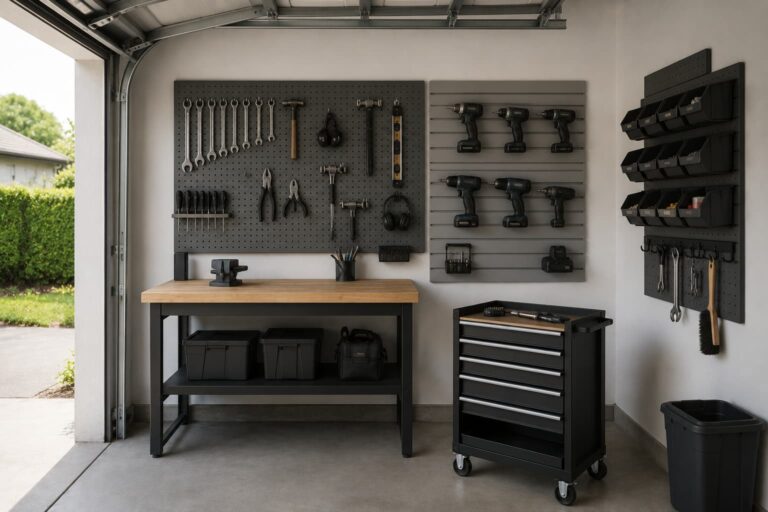
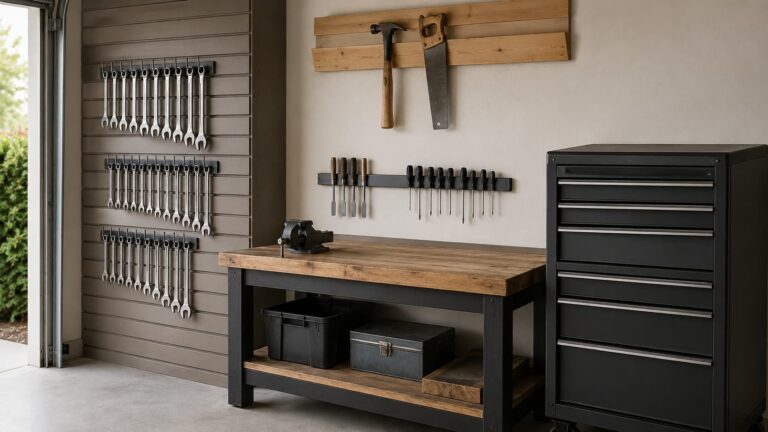
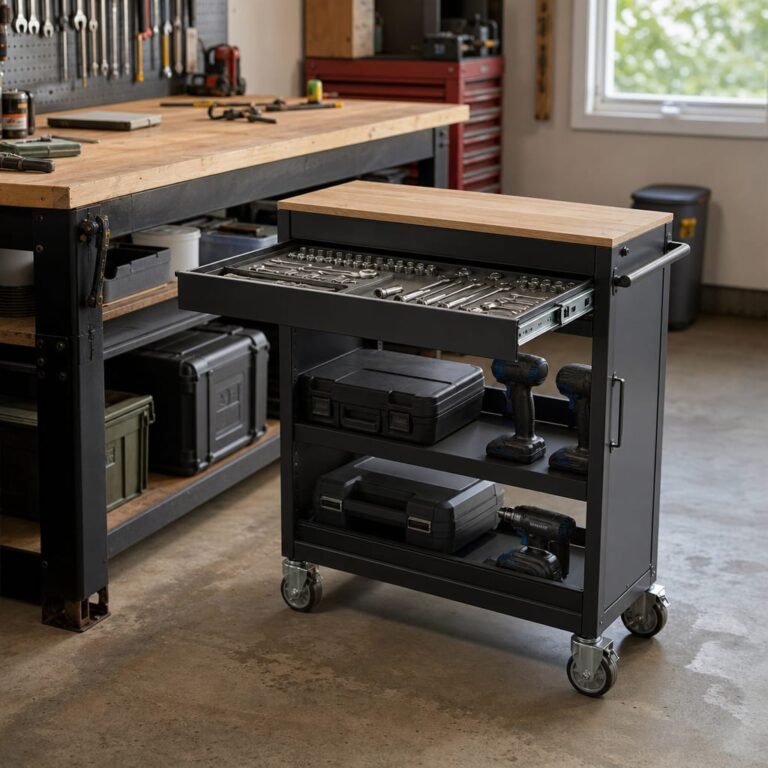
A workbench on locking casters is the anchor of the area. Mobile beats fixed for the workshop ZONE because it rolls out for messy work and rolls back when you need the parking spot. Best for: 1/4-garage zones in 1- or 2-car garages. Limitations: mobile benches max out around 60 inches wide; for serious cabinet work you’d want a fixed bench, which pushes you toward the full-workshop frame in our complete workshop setup guide. What to look for: locking casters (not just brakes), manufacturer-listed drawer capacity at least 75 lb, and a sealed top.
The task light setup
Linkable 4-foot LED shop lights are the practical default. They plug into a standard outlet, link end-to-end so multiple fixtures share one cord, and produce daylight-temperature light. Best for: any area where the existing ceiling fixture is a single bulb. Limitations: low ceilings under 8 ft bring the fixture into head-bump range — switch to wall-mounted swing-arm task lights. What to look for: at least 4,000 lumens per 4-ft fixture, 5000K color temperature, plug-and-play linking.
Wall tool storage (pegboard or slatwall)
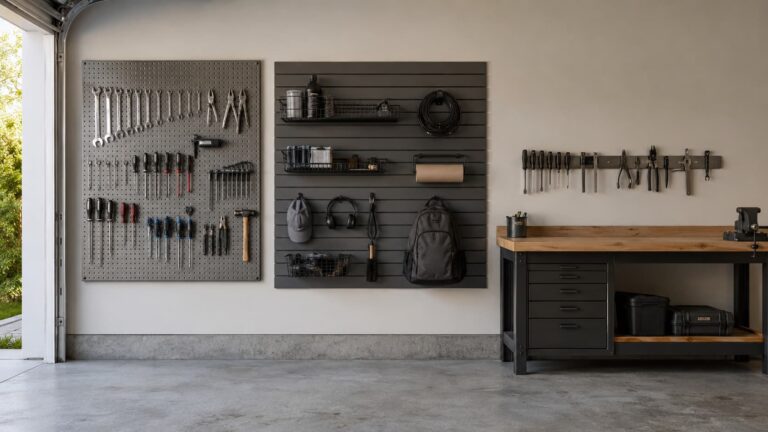
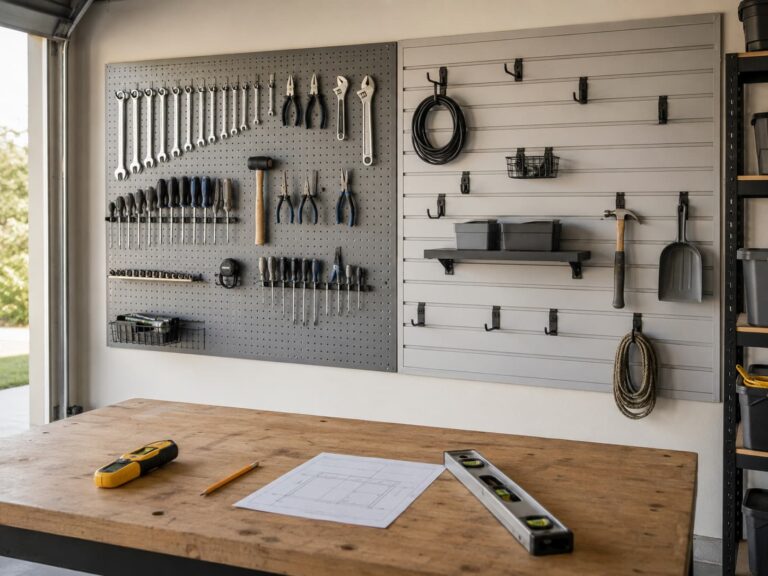
A pegboard above the bench verticalises tools so the floor stays clear. Metal pegboard outperforms hardboard because it carries more weight per square foot and hooks do not pull through. Best for: any garage with 3 to 4 ft of free wall above the bench. Limitations: must mount into studs; if you cannot drill, skip and use a freestanding tool tower. What to look for: powder-coated steel panels, flush-mount flange for stud-mounted installation, hook compatibility with both proprietary and generic 1/4-inch pegs.
Magnetic strips and small-tool quick-access
A 24-inch magnetic strip mounted above the bench captures the wrenches and drivers you reach for ten times an hour. It eats far less wall than a pegboard section and is faster to grab and replace. Best for: the wall area directly above the bench backsplash. Limitations: only holds ferrous tools — aluminum tapes and plastic-handled screwdrivers will not stick. What to look for: length matching your bench width, screw-mount brackets (not adhesive), pull-force adequate for medium-weight wrenches.
Dust filtration
A ceiling-hung air filter pulls airborne fines out before they drift into the rest of the garage. Sized to the zone, a unit at 300 to 400 CFM is appropriate for 1/4-garage. Best for: garages shared with cars, especially light-color cars where dust film is visible. Limitations: needs ceiling joist anchoring; not a respirator substitute. What to look for: CFM rated for shops under 400 sq ft, dual-stage filtration (5-micron outer plus 1-micron inner), remote-controlled speed.
When to Choose Each Component Type
The decision boils down to garage conditions plus your constraints. The matrix below maps the four most common scenarios to the five components.
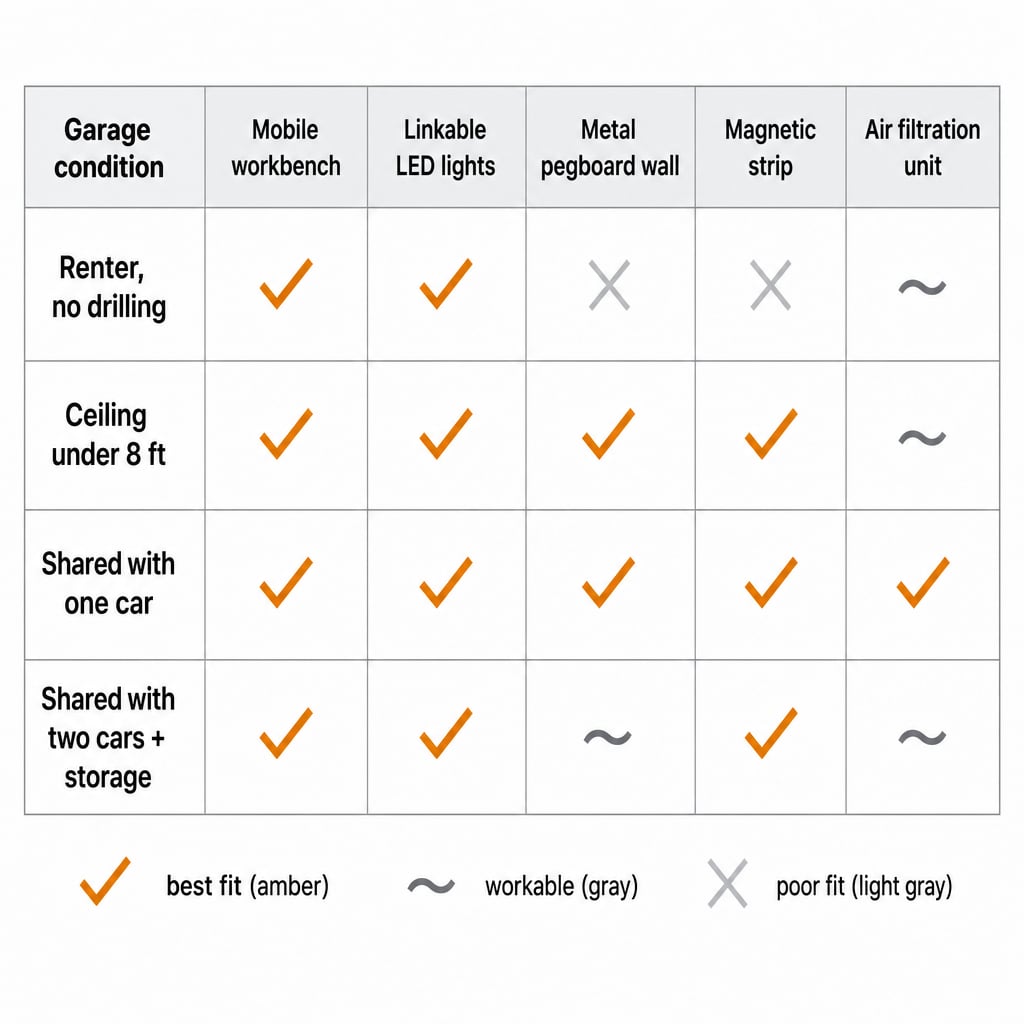
- Renter, no drilling → mobile workbench plus plug-in LED lights only. Wall storage and ceiling-hung filtration both need anchors.
- Ceiling under 8 ft → all five work, but shelf-mount the air filter to avoid head-bump clearance.
- Shared with one car → all five work in standard configurations. This is the typical 1/4-garage workshop area.
- Shared with two cars plus storage → tighten the zone. Skip a full pegboard; favor magnetic strips and a compact bench. The filter is lower priority because the rest of the garage absorbs drift.
For the decision between cabinet-style closed storage and open wall storage, see our buying guide to choosing garage cabinets.
Measurement Checklist
Before ordering any of the picks, measure the garage. Start at the floor and walls, end at the bench.
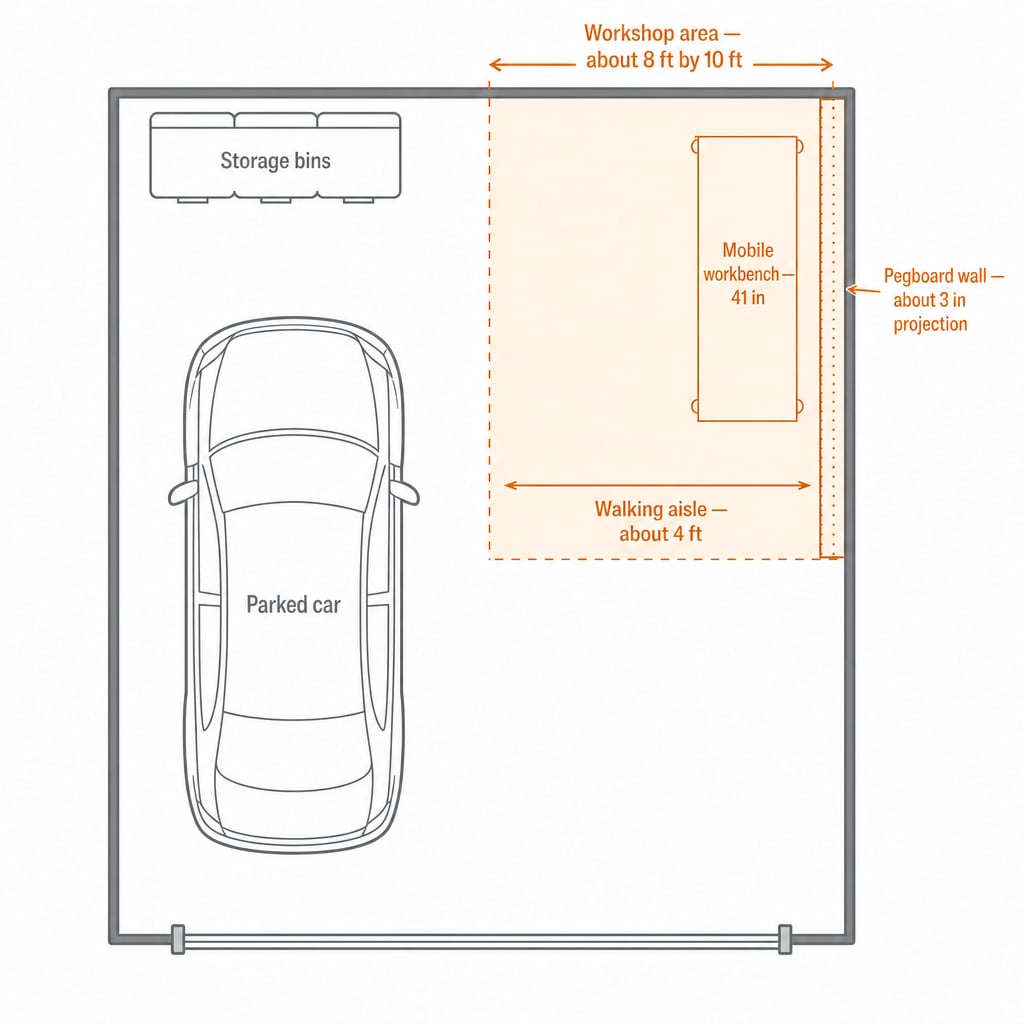
- Zone footprint. Mark the 8 ft by 10 ft corner with painter’s tape on the floor; walk through it; verify it does not collide with the car door swing.
- Bench length. A 41-inch bench needs 41 inches of clear wall plus about 6 inches each side for drawer swing.
- Wall projection of pegboard plus deepest hook. Metal panels sit about 3/4 inch off the wall; deepest standard hook adds 2 to 3 inches. Total typically 3 to 4 inches.
- Ceiling clearance. Linkable LEDs hang about 2 inches below the ceiling. Under 7-ft ceilings, switch to wall-mounted task lights.
- Walking aisle. At least 4 ft between bench and parked car so the car door can swing without hitting bench or person.
- Outlet location. Within 6 ft of the bench. If it isn’t, that’s a call to an electrician — not an extension-cord solution.
- Stud locations along the pegboard mounting line. Stud finder, painter’s tape, pilot drill before lag screws.
Mistakes to Avoid
Most workshop-area mistakes trace back to one of four patterns.
Mistake 1: Buying the workbench before zoning the garage. A 60-inch bench looks small online and dominant in a 1-car garage. Tape the zone footprint on the floor first, walk through it, and verify the bench leaves room for the walking aisle and car door swing.
Mistake 2: Anchoring heavy storage to drywall alone. Wall Control’s own pegboard is manufacturer-listed at 200 lb per panel into studs versus 100 lb per panel on drywall anchors alone — a sourced split for that one product, not a number to assume for every wall system. Hit wood studs; use masonry anchors for block or concrete.
Mistake 3: Daisy-chaining power strips to extend amperage. A corded tool plus a vacuum plus three task lights on one circuit can exceed 15 amps. The strip won’t tell you — the breaker will. The fix is not a longer cord; it’s an electrician adding a dedicated circuit. Treat amperage as a licensed-pro question, full stop.
Mistake 4: Skipping dust management because the area looks small. Even a 1/4-garage zone produces enough fine dust to film the car parked 6 ft away. A 300 CFM filter rated for shops under 400 sq ft handles the zone with margin.
Safety and Electrical Notes
Three rules apply across the workshop-area components:
- Hit a stud or a joist, never just drywall. Wood frame anchoring is the minimum; masonry anchors for block or concrete.
- For anything electrical beyond plugging a fixture into an existing outlet, consult a licensed electrician. That includes adding circuits, GFCI protection, sizing breakers, running wiring, or hardwiring fixtures. This guide covers outlet POSITION; it does not cover any electrical install scope. Local code applies.
- Test mounted hardware with a low-stakes load first. Hang a backpack with half the planned load on a new pegboard before loading tools. A small failure under a backpack is recoverable; under a full tool set, not.
For tool-organization picks beyond pegboard, see our buying guide to choosing a garage tool organization system.
Featured Picks
Below are five starting points — one per workshop-area component. For deeper picks within a category, follow the link to the matching roundup.
The mobile workbench: Craftsman 41-Inch 6-Drawer Mobile Workbench

A 41-inch mobile workbench on locking casters with six soft-close drawers and a butcher-block top. Manufacturer-listed drawer slides are rated at 100 lb each. The 41-inch footprint fits a 1- or 2-car garage workshop area without dominating the floor. For deeper picks, see our roundup of garage workbenches with storage.
The task light setup: Barrina LED Shop Light 4FT 6-Pack

A 6-pack of 4-foot linkable LED shop lights, manufacturer-listed at 40W per fixture, 5500 lumens, 5000K daylight. Two fixtures over a 41-inch bench give shadow-free task light; the remaining four cover the rest of the garage. Plug-in only, no hardwiring.
The pegboard wall: Wall Control Pegboard Standard Tool Storage Kit

A 4-foot metal pegboard kit with black panels and hook accessories. The manufacturer describes Wall Control as significantly stronger than hardboard, with a flush-mount flange for stud-mounted installation. Accepts both proprietary and generic 1/4-inch hooks.
The magnetic strip: 24-Inch Heavy-Duty Magnetic Tool Holder

A 24-inch magnetic strip with screw-mount brackets. Sits flat above the bench backsplash; holds ferrous wrenches, drivers, and adjustable tools at arm’s reach. For broader tool-organization options, see our buying guide to choosing a garage tool organization system.
The dust filter: WEN 3410 3-Speed Remote-Controlled Air Filtration System
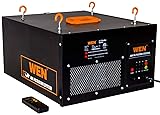
A ceiling-hung air filter, manufacturer-listed at 300 / 350 / 400 CFM across three speeds, rated for shops under 400 sq ft. Dual-stage filtration (5-micron outer plus 1-micron inner). Manufacturer-listed at 31 lb. Two-year warranty.
What garage wall systems actually hold, compared fairly
Pegboard is rated per panel, rails per linear foot, slatwall per square foot. Three different units means the published numbers cannot be compared as they stand — so nobody compares them, and a 200 lb figure on one product looks like a 200 lb figure on another. This table quotes each manufacturer’s rating and converts them all to pounds per linear foot of a 4 ft high wall run, with the arithmetic shown. Normalised values are comparison figures, not safe point-load limits. A system rated for 1,200 lb distributed across a wall section does not support a 1,200 lb hook.
| System | Type | Rating as published | Rating type | Same rating, per linear foot of a 4 ft wall | Working | Stud requirement | Specification source | Source checked |
|---|---|---|---|---|---|---|---|---|
| Wall Control metal pegboard (16 × 32 in panel) | pegboard | 200 lb per panel into studs (100 lb on drywall anchors) | panel recommendation | 225 lb per linear foot | 200 lb ÷ (16 in × 32 in panel = 3.56 sq ft) = 56.25 lb per sq ft; 56.25 × 4 ft high = 225 lb per linear foot (equivalently: a 4 ft × 4 ft section fits 3 panels across × 1.5 high = 4.5 panels × 200 lb = 900 lb ÷ 4 ft) | mounting holes on 16 in stud centres | Wall Control 16 × 32 in Metal Pegboard | 2026-09-14 |
| Gladiator GearTrack channel (rail) | rail | 75 lb per linear foot of channel | rail/channel rating | 150 lb per linear foot | 75 lb/ft per channel (published) × 2 channels (assumed common install) | mounts to bare wood studs or drywall over wood studs | Gladiator 4′ GearTrack Channels | 2026-09-14 |
| Craftsman VersaTrack 4 ft rail (CMST82602VT) | rail | 75 lb per linear foot (300 lb total per 4 ft rail) | rail/channel rating | 150 lb per linear foot | 75 lb/ft per channel (published) × 2 channels (assumed common install) | installs to drywall, wall studs, or masonry | Craftsman VersaTrack 4-Foot Storage Rail | 2026-09-14 |
How these numbers were produced: Each published rating is quoted from the manufacturer’s own page on the date shown. Conversion to pounds per linear foot assumes a 4 ft high run of wall: a per-square-foot rating is multiplied by 4. A per-panel rating is first converted to an equivalent per-square-foot rate, using the panel’s own published width and height, then multiplied by 4 the same way — scaling a per-panel rating sideways only, at the panel’s own height, would normalise it to a taller or shorter slice of wall than the 4 ft reference every per-square-foot row uses, so the two steps (per-panel → per-sq-ft → per-4-ft-run) keep every row on the same footing. A per-foot-of-rail rating is different in kind: the manufacturer publishes a rate per channel, and this table doubles it to show a common two-channel install — that doubling is our own installation assumption, not a manufacturer-stated rate; the sourced figure is the single-channel rate. Where a manufacturer publishes a single fixed capacity for a whole pre-sized unit rather than a rate per foot or per square foot, that figure is quoted as published and left out of the per-linear-foot column rather than converted with an invented rate.
- These are manufacturer maximums for a correctly installed system, not a promise. Every one of them depends on hitting studs, using the specified fasteners, and spreading the load rather than hanging it all off one hook.
- The comparison assumes a 4 ft high run. A rail system does not gain capacity from wall height the way a panel does — it gains it from adding channels, which is why its normalised figure moves when you change the channel count, not the height.
- Stud spacing is a hard constraint, not a suggestion. Proslat’s PROCORE is the only system here with a published compatibility range — engineered for 24 in centres, rated compatible down to 16 in. Check whether your own system publishes a similar range before assuming it.
- Drywall anchors are not studs: Wall Control publishes 100 lb per panel on anchors against 200 lb into studs — a real number for that one product, not a ratio to assume for other systems here that don’t publish their own stud-vs-anchor split.
- Capacity drops the further a load sits from the wall: storeWALL publishes 250 lb per sq ft as a distributed rating at the panel surface, but only 115 lb as a point measurement 4 in out. That lever-arm principle is a reasonable general caution for hooks and brackets on any system, but storeWALL is the only brand here that publishes a number for it.
- A blank cell means the manufacturer does not publish that figure — we do not fill gaps with numbers we could not source.
- This list favors brands whose own specification pages state a capacity figure in a form we could verify directly. Some well-known brands are not yet in this table because their published pages did not state a load rating we could confirm on this pass — that is a sourcing gap, not a signal that the product is weaker.
These are the entries that matter for this guide. The full table, with every row and its source, is in our What garage wall systems actually hold, compared fairly.
FAQ
How much garage space do I really need for a workshop area?
Plan for about 1/4 of a 2-car garage — roughly 8 ft by 10 ft. That fits a 41-inch mobile bench, a 4-ft pegboard behind it, two or three overhead lights, and a 4-ft walking aisle. Below 6 ft by 6 ft, the area feels cramped for anything beyond hand-tool assembly.
Can I set up a workshop area in a 1-car garage?
Yes, but the trade-off is harder. Walking aisle plus bench claim about 40% of a 1-car garage floor. The usual solution is a compact mobile bench (under 36 inches) that rolls out and parks against a wall. Skip the full pegboard; favor magnetic strips.
Do I need to insulate or heat the workshop area?
For occasional weekend work, no. Insulation matters if you work for hours in winter or store temperature-sensitive items (wood glue, finishes, batteries) in the area. Insulation and heating are out of scope — they’re a whole-garage project.
Should I anchor the workbench to the floor?
For a mobile bench on locking casters, no. Locking casters provide enough stability for hand-tool work, assembly, and light power-tool use. If you’re doing heavy planing or hand-sawing of dimension lumber, you’ve outgrown the workshop-AREA frame and need the fixed bench setup in our complete workshop setup guide.
Do I need a dedicated electrical circuit for the workshop area?
Maybe — that’s an electrician’s question. A typical 15-amp circuit handles task lights plus one corded tool plus a vacuum, but the math depends on the specific tools. Do not extend amperage with daisy-chained strips. If the breaker trips, the next step is a licensed electrician adding a dedicated workshop circuit.
Can I store a dust filter on a shelf instead of hanging it from the ceiling?
Yes. The WEN 3410 weighs about 31 lb per the manufacturer, light enough for a sturdy shelf. The trade-off is air-flow geometry — a ceiling-hung filter pulls air across the room more effectively. For a 1/4-garage area with a normal ceiling, either works. For ceilings under 8 ft where clearance is tight, shelf-mounting is the safer default.
Sources Reviewed
For this buying guide, we reviewed manufacturer documentation for Craftsman, Barrina, Wall Control, and WEN, the corresponding Amazon product pages, and recurring patterns in public buyer discussions about garage workshop area setup. Product picks were cross-referenced against their Amazon listings during fact-check. We do not claim hands-on testing.