How to Start Organizing a Cluttered Garage
Last updated:
Disclosure: This article contains affiliate links. If you buy through these links, we may earn a commission at no extra cost to you. We do not claim hands-on testing unless clearly stated.
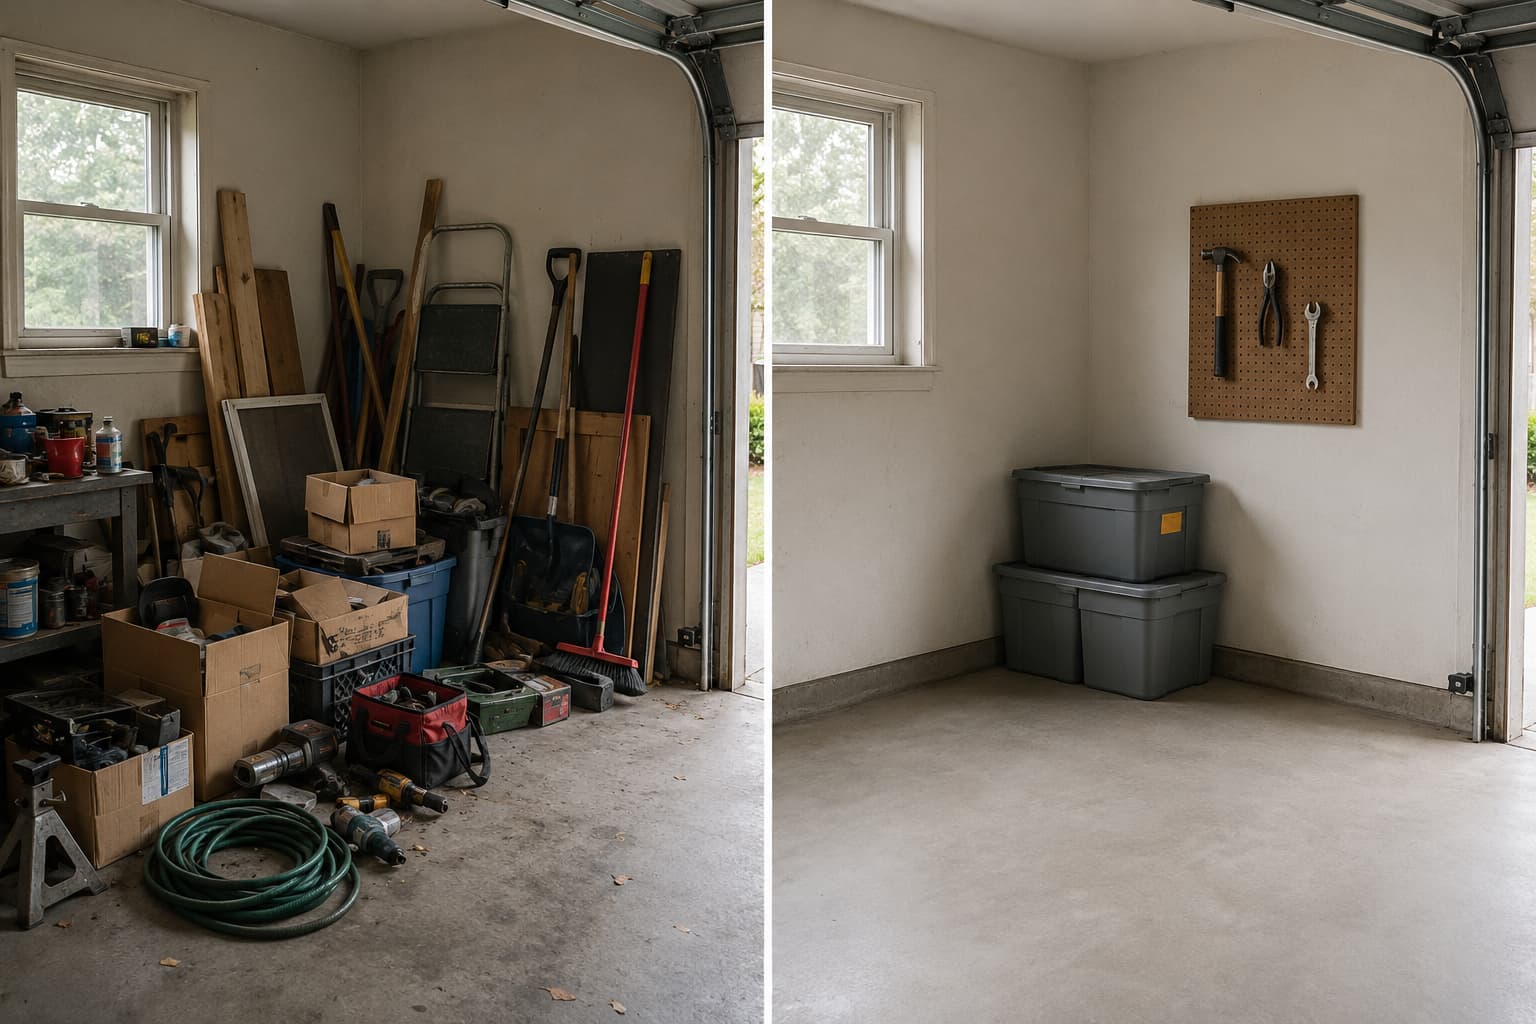
The cluttered garage is not a one-weekend project. Pretending it is, is why most garage organization attempts fail by Sunday afternoon. You start with the best intentions, you buy a stack of bins because everyone says to buy bins, and three hours in you discover that half your stuff doesn’t fit, the other half doesn’t have a home, and somewhere along the way the workbench got buried again.
This guide walks through a four-stage method spread across four weeks, not four hours. The goal is momentum, not perfection. By the end of stage one (this weekend), one corner is sorted. By the end of stage three (three weekends later), the whole garage has a system. Stage four (the next month) is refinement. It does not cover specific bin recommendations or wall-system installs — those live in the linked guides at each stage. It also does not cover renovation work, garage sales, or selling things on Craigslist; this article is about the organization decisions, not the disposal logistics.
Why Most Cluttered-Garage Projects Stall
Three real reasons, all worth naming because they catch nearly everyone:
- Wrong scope. “Organize the whole garage” is a multi-day project framed as a single Saturday. It doesn’t fit. You run out of time, energy, and decisions before you finish, and the half-organized garage looks worse than the original chaos for a week.
- Premature shopping. Buying bins before sorting means you buy the wrong size or wrong quantity. Both result in returns, frustration, and stalled momentum. The right time to buy bins is after stage two, not before stage one.
- All-or-nothing thinking. A partially-organized garage feels worse than an unorganized one for about a week — until you push through to “mostly organized.” Most people quit during that worse week.
The reframe is simple: this is a four-week project, not a one-weekend project. Treat it that way and the success rate climbs dramatically.
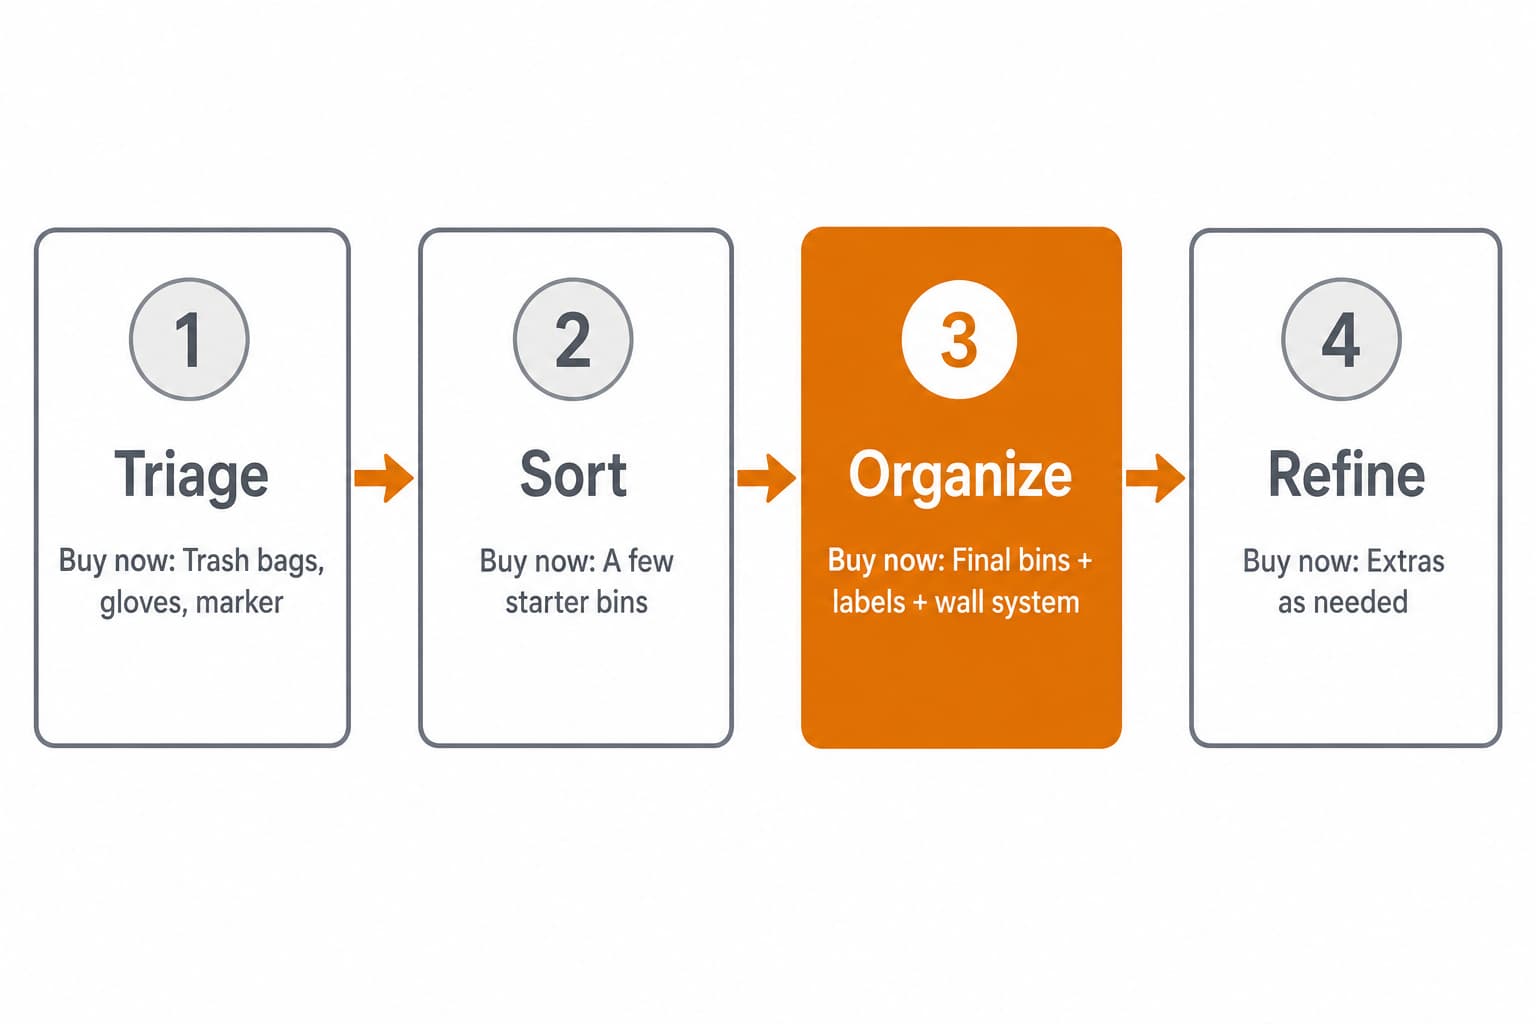
The Four-Stage Method
Stage 1 — Triage (this weekend, 2–3 hours)
The goal of triage is NOT to organize. It’s to identify three categories of stuff: KEEP, DONATE/DISCARD, and DECIDE LATER. Three boxes, no more.
What you do today:
- Pick ONE zone in the garage — a single wall, a single corner, or a single workbench surface. Not the whole garage.
- Sort everything in that zone into the three categories. KEEP goes back where it was for now. DONATE/DISCARD goes straight out — trash bag for trash, marked bag for donation. DECIDE LATER goes in a single box pushed to a clear spot.
- Photograph the zone before and after. The before-and-after is what gets you to come back next weekend.
- Stop. Don’t shop. Don’t organize. Don’t expand to a second zone today. The whole point of stage 1 is to confirm that the system works on one zone before scaling it.
Stage 2 — Sort (next weekend, 4 hours)
Now that roughly 20% of the stuff is gone — donated and discarded from stage 1 — you can see what you actually own. Repeat the triage on a second zone, then do an initial sort of all the KEEP items into categories: power tools, lawn & garden, sports and recreation, holiday decor, off-season clothing, miscellaneous.
Count how many bins each category will fill. This is the answer to “how many bins should I buy?” that you couldn’t answer at the hardware store. For most households, the number lands between 8 and 20 — useful information you didn’t have last weekend.
For the bin-buying decision itself, see our storage bins for shelves guide. It covers what survives a hot garage, what fits standard wire shelving, and what stays sealed against pests.
Stage 3 — Organize (the weekend after sort, 4–6 hours plus shopping)
This is when you actually buy bins, label them, install any wall storage, and assign zones to categories. By now you know exactly how many bins of what size you need, which has eliminated most of the over-buying problem from premature shopping.
The labeling step is where a label maker pays off. See our bin labeling guide for the placement rules and the labeling-method decision (machine vs preprinted vs handwritten).
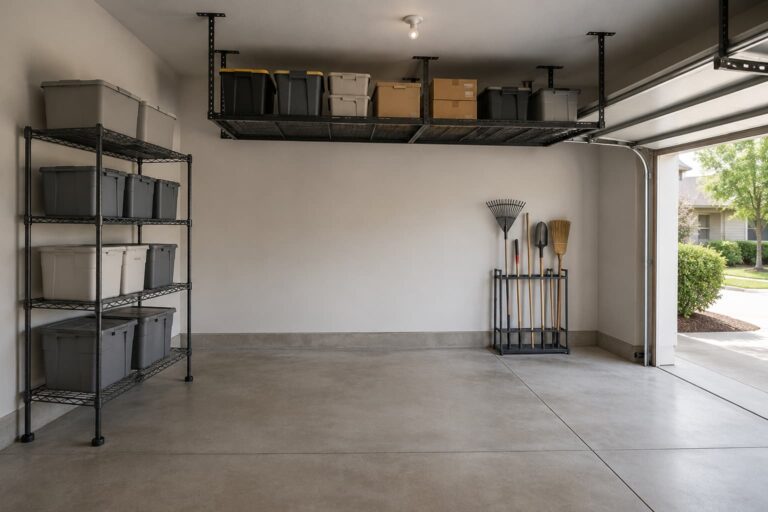
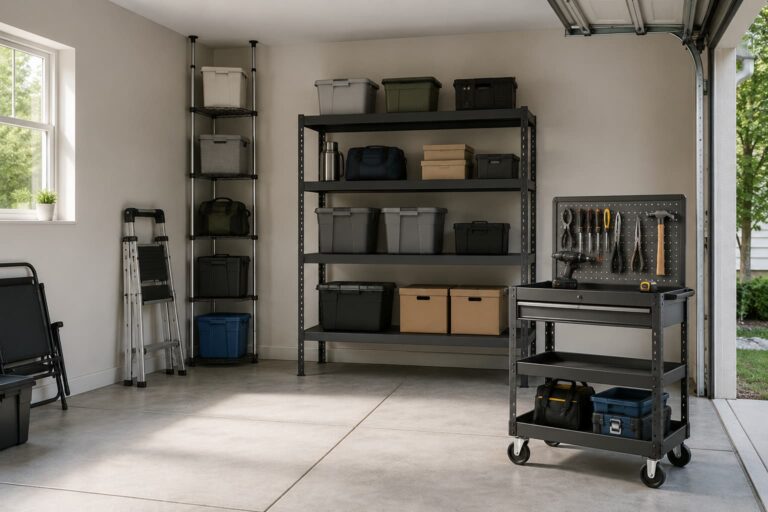
For wall storage decisions — slatwall, pegboard, hooks, or shelving — see our wall storage systems guide. If you’ve decided on pegboard specifically, our pegboard installation guide walks through the install. For overhead ceiling storage of seasonal items, see our overhead racks guide.
For small garages where parking the car is non-negotiable, see our one-car garage maximization guide for layout-by-garage-size advice.
Stage 4 — Refine (the next month)
Daily life reveals what’s wrong with your stage-3 plan. The bin that’s hardest to reach is in the wrong place. The hook that hangs the wrong item gets moved. The category that turned out to be too narrow gets merged with another.
The refining is normal. It is not a sign of failure. Build the labeling system from the start so refining is easy — the bin’s contents matter, not its specific shelf position. When you move a bin, the label moves with it; no relabeling needed.
What to Buy at Each Stage (and What NOT to Buy)
The single biggest mistake in cluttered-garage projects is buying the wrong things at the wrong stage. Here’s the timing.
| Stage | Buy now | Don’t buy yet |
|---|---|---|
| 1 — Triage | Heavy-duty trash bags, gloves, a marker | Bins, shelving, hooks, label makers |
| 2 — Sort | A few cheap generic bins for the DECIDE LATER pile | The full bin set, the label maker, wall systems |
| 3 — Organize | Final bins (sized to your sort count), label maker or preprinted labels, shelving, wall system if applicable | Anything you didn’t decide you needed in stage 2 |
| 4 — Refine | Extra labels, one or two missing hooks, maybe one more bin | A second wall system “to expand”, a workbench you didn’t plan for |
Stage 3 is where the bulk of the spending happens, and it’s the one stage where over-buying is least likely because you know your numbers.
Tools and Products That Help
Most of what you need is covered by the cluster guides linked above. The exception is the label maker — it’s worth calling out separately because beginners often skip it and then regret it during stage 3.
Label maker (used in stage 3) — The Brother P-Touch PTH110 is the canonical entry-level handheld label maker for first-time bin labeling. TZe laminated tapes are rated water- and fade-resistant per the manufacturer, which is what you need for an unconditioned garage. A label maker is overkill for fewer than about twelve bins; below that, preprinted labels or a permanent marker on blank labels works fine. See our bin labeling guide for the labeling-method decision.

Everything else — bins, shelving, wall systems, ceiling racks — belongs in stage 3 only, and the right pick depends on your sort-count and garage layout. Follow the linked guides at each stage rather than buying anything in this article.
Common Mistakes
Mistake 1: Buying bins before sorting
You don’t know how many bins or what size you need until after stage 2. Buying earlier means returning bins, which kills momentum more than almost anything else in this project.
Mistake 2: Trying to do it in one weekend
See “Why Most Cluttered-Garage Projects Stall” above. The four-stage method exists because the one-weekend approach has a known failure rate. Plan four weeks; expect three.
Mistake 3: Organizing without labeling
Within four weeks of stage 3, you will forget which bin holds what. The labeling step is non-optional, even if the labels are just permanent marker on masking tape during stage 3 and you upgrade to printed labels in stage 4.
Mistake 4: Skipping the donate/discard step
Organizing junk is still organizing junk. The 12-month rule applies: if you haven’t touched it in twelve months and you’re not the kind of person who genuinely uses it seasonally (which means yearly), it leaves. Be honest with yourself before you start labeling bins of stuff you don’t use.
FAQ
How long does each stage actually take?
Stage 1 is about 2–3 hours. Stage 2 is 4 hours. Stage 3 is 4–6 hours plus a shopping trip. Stage 4 is ongoing for about a month. Total active time runs roughly 14 hours spread over four weeks.
What if I don’t have a donate option nearby?
A curbside pickup service or a thrift store with weekend hours works. Don’t let lack of immediate donation stop the triage step — bag it and store the donate pile in the garage for a week if you have to. The pile being temporarily visible is fine; not triaging at all is not.
Should I rent a dumpster?
For most residential cluttered-garage projects, no. Curbside trash plus one or two donation runs handles it. A dumpster is for renovation debris or a major downsize, not for organization alone.
How do I decide what to keep versus discard?
The 12-month rule. If you haven’t touched it in twelve months and you don’t have a clear seasonal reason to keep it, it leaves. The exception is genuinely seasonal items (Christmas decor, summer beach gear), which by definition wait a year between uses — those stay if you actually use them annually.
Where do I start if I have no clue?
The most visible zone — the wall facing you when you walk in, or the corner you trip over every time. Visible wins build the confidence to keep going. Avoid starting deep in a corner where the result isn’t visible from the door; you won’t feel the progress, and you’ll quit.
Sources Reviewed
This article synthesizes manufacturer product pages (Brother P-Touch PT-H110), public garage organization discussions, and GSG editorial. We do not claim hands-on testing unless clearly stated. The four-stage method described here is a synthesis of common organization frameworks adapted for the residential garage context.
Related Guides
- How to Organize a Small Garage Step by Step — broader small-garage context
- How to Maximize Storage in a One-Car Garage — layout strategy for small spaces
- Best Garage Storage Bins for Shelves — bin selection (stage 2/3)
- Best Garage Shelves for Storage Bins — shelving comparison
- How to Label Garage Storage Bins — labeling system (stage 3)
- Garage Organization Checklist for Renters — renter-specific approach